动机
希望将闲置的 2018 款 MBP 利用起来,整成一台 Linux 服务器就好了,因为 macOS 上的 Docker 非常难用,再加上我比较爱折腾,于是有了这个想法。
主要参考这个 wiki:https://wiki.t2linux.org
Tip
后来,我发现,macOS 15 把屏幕啊文件啊共享都做到了极致,比起折腾 ArchLinux 成本低多了,而且 macOS 更适配硬件,于是我几乎不需要所谓服务器了…… 再说,Orbstack 还是 macOS 上运行容器的好手。 于是我删除了 ArchLinux at 2025-04-13.
diskutil list
sudo diskutil eraseVolume free none /dev/diskXsY
sudo diskutil apfs resizeContainer disk0s2 0
最后 关机后 Option + Command + P + R 长按 20 秒来重建 NVERAM。
思路
装 双系统 or 纯 Linux ?
答:双系统
理由:1. WiFi 的驱动是直接用的 macOS 上的 2. 出问题了有原生 macOS 兜底 3. macOS 更新使得一些固件得以更新,这对 Linux 来说同样有好处
装什么 Linux ?
答:ArchLinux
理由:1. 我比较熟悉 ubuntu/Debian 系,也用过 centOS,这次就要用不一样的 2. ArchLinux 现在比较流行,原因是““The Arch Way” + By far the biggest and most up-to-date software collection with the official repos + AUR.”,内核都能直接更新
安装前准备
在 macOS 上为 Linux 分区
- Open Disk Utility
- Choose the volume you want to partition for Linux
- Press in the top-right “Partition”
- Under the blue pie chart press “+” button
- When prompted be sure to select “Add Partition” and NOT “Volume”, you want a partition.
- Name: choose a name for the partition, e.g. Linux
- Format: choose whatever format there is - APFS or another - it doesn’t really matter (during the Linux installation you must erase your created 1. partition anyway)
- Size: pick the desired amount of space for Linux, because you will not be able to change it.
我是 512 GB 的 MBP,留了大概 200GB 给 macOS,300 GB 给了 Linux。
制作 Linux 安装启动盘
| Linux | DistributionDownload ISO with T2 support |
|---|---|
| Arch Linux | https://github.com/t2linux/archiso-t2/releases/latest |
直接用 macOS 上的 dd 命令执行就行,不用下载第三方软件的:
- Insert your USB drive.
- Open macOS Terminal.
- Run
diskutil listto list all the drives. - Look up for your USB thumb which appears as an external, physical drive labelled
/dev/diskXwhereXis a single number (e.g. /dev/disk2). - Run
sudo diskutil unmountDisk /dev/diskXto unmount the disk. - Run
sudo dd if=path/to/linux.iso of=/dev/rdiskX bs=1mto start writing. To fetch the iso path easily you can just drag and drop the .iso into the Terminal. - Now you may press
control-Tto make it show how many KBs it has written so far.
备份 WiFi 和 蓝牙 固件
需要先下载脚本并运行: Click here to download the script.
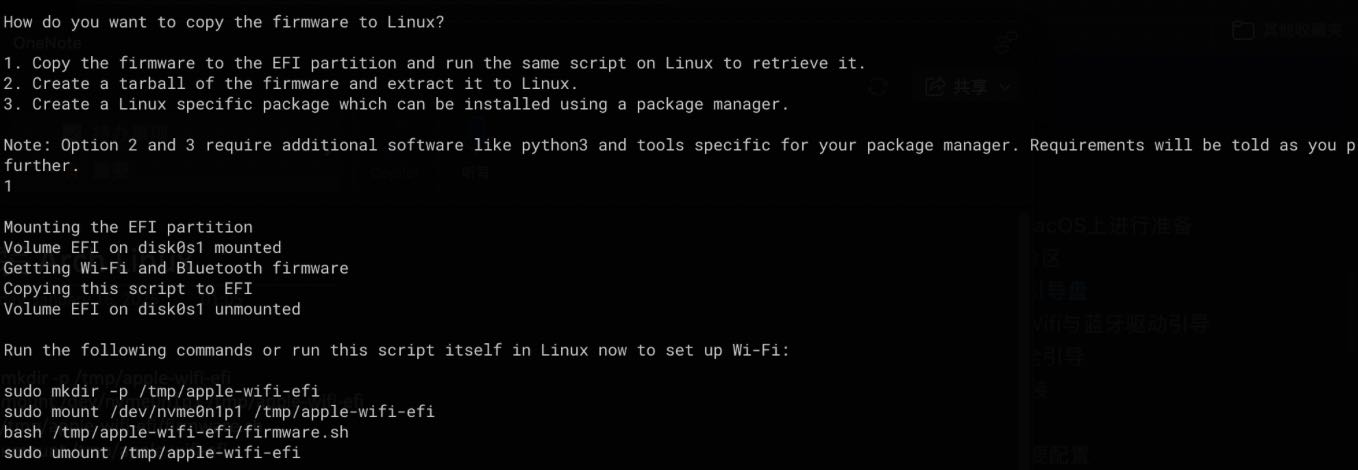
然后等安装好 Linux 后,在 Linux 上执行一下命令来安装固件,这一节放在后面讲。
关闭 MBP 的安全模式
- Turn off your Mac
- Turn it on and press and hold
Command-Runtil the black screen flashes - Your Mac will boot in the macOS Recovery
- Select your user and enter your password
- Now, from the menu bar choose Utilities > Startup Security Utility
- Enter again the password
- Once in Startup Security Utility:
- set Secure Boot to No Security
- set Allow Boot Media to Allow booting from external or removable media
执行
启动盘安装 Linux
- Ensure the Linux Installation USB you created is plugged into your Mac.
- Reboot while holding down the option (⌥) key, this will put you in macOS Startup Manager.
- Select the orange EFI option with arrow keys and press return/enter on it. If there are two, try the one to the very right first (the last one).
- The installation may start right away or you may be put into a Bootloader Menu where it may select a default option e.g. “Try or Install Ubuntu”, but you can use arrow keys to select a different option. If you are unsure, check if there is any additional advice on your distro’s installation page on this wiki.
一句话就是:关闭电脑 -> 长按 Option -> 键盘➡️ -> 回车 (这个要熟记,默认启动的是 macOS ,如果要进入 Linux 系统,这个步骤是你每次都要重复执行的动作)
根据系统的引导,自己选择需要安装的组件,然后安装即可,可以看这个:Installing Arch Linux on a Mac with the T2 Chip 。
连接上 Wi-Fi
先要把 Wi-Fi 固件安装上,之前我们已经执行过一次备份 macOS 上固件的脚本,现在我们在 Linux 上再执行一下:
sudo mkdir -p /tmp/apple-wifi-efi
sudo mount /dev/nvme0n1p1 /tmp/apple-wifi-efi
bash /tmp/apple-wifi-efi/firmware.sh
sudo umount /tmp/apple-wifi-efi测试固件是否正常:sudo journalctl -k --grep=brcmfmac
类似如下输出:
Dec 24 22:34:19 hostname kernel: usbcore: registered new interface driver brcmfmac
Dec 24 22:34:19 hostname kernel: brcmfmac 0000:01:00.0: enabling device (0000 -> 0002)
Dec 24 22:34:20 hostname kernel: brcmfmac: brcmf_fw_alloc_request: using brcm/brcmfmac4377b3-pcie for chip BCM4377/4
Dec 24 22:34:20 hostname kernel: brcmfmac 0000:01:00.0: Direct firmware load for brcm/brcmfmac4377b3-pcie.apple,tahiti-SPPR-m-3.1-X0.bin failed with error -2
Dec 24 22:34:20 hostname kernel: brcmfmac 0000:01:00.0: Direct firmware load for brcm/brcmfmac4377b3-pcie.apple,tahiti-SPPR-m-3.1.bin failed with error -2
Dec 24 22:34:20 hostname kernel: brcmfmac 0000:01:00.0: Direct firmware load for brcm/brcmfmac4377b3-pcie.apple,tahiti-SPPR-m.bin failed with error -2
Dec 24 22:34:20 hostname kernel: brcmfmac 0000:01:00.0: Direct firmware load for brcm/brcmfmac4377b3-pcie.apple,tahiti-SPPR.bin failed with error -2
Dec 24 22:34:20 hostname kernel: brcmfmac 0000:01:00.0: Direct firmware load for brcm/brcmfmac4377b3-pcie.apple,tahiti-X0.bin failed with error -2
Dec 24 22:34:20 hostname kernel: brcmfmac: brcmf_c_process_txcap_blob: TxCap blob found, loading
Dec 24 22:34:20 hostname kernel: brcmfmac: brcmf_c_preinit_dcmds: Firmware: BCM4377/4 wl0: Jul 16 2021 18:25:13 version 16.20.328.0.3.6.105 FWID 01-30be2b3a
Dec 24 22:34:20 hostname kernel: brcmfmac 0000:01:00.0 wlp1s0f0: renamed from wlan0
使用 iwd 连接 WiFi:
iwctl
device list
station wlan0 get-networks
station wlan0 connect <无线网名称>
station wlan0 show
格式化分区
由于我们之前已经在 macOS 上给 Linux 划分了空间,此时只需要格式化文件系统,不需要再重新分区。
fdisk -l /dev/nvme0n1
# 一下磁盘名以上面命令出来的实际为准
mkfs.fat -F 32 /dev/nvme0n1p3
mkfs.ext4 /dev/nvme0n1p4
然后挂载分区:
mount /dev/nvme0n1p4 /mnt
mkdir /mnt/boot
mount /dev/nvme0n1p3 /mnt/boot
执行安装程序
使用 archinstall 命令安装,可参考这篇文章:https://www.cnblogs.com/chen2ha/p/18469127 (若该文章无法访问,可联系我给你备份)。
如果下载时它说空间不足,没法下载更多,那就安装一个比较纯净的命令行系统,后面再搜一搜教程来安装桌面吧,桌面我选择的 KDE。
安装完成后启动 Linux
还是这个动作:关闭电脑 -> 长按 Option -> 键盘➡️ -> 回车
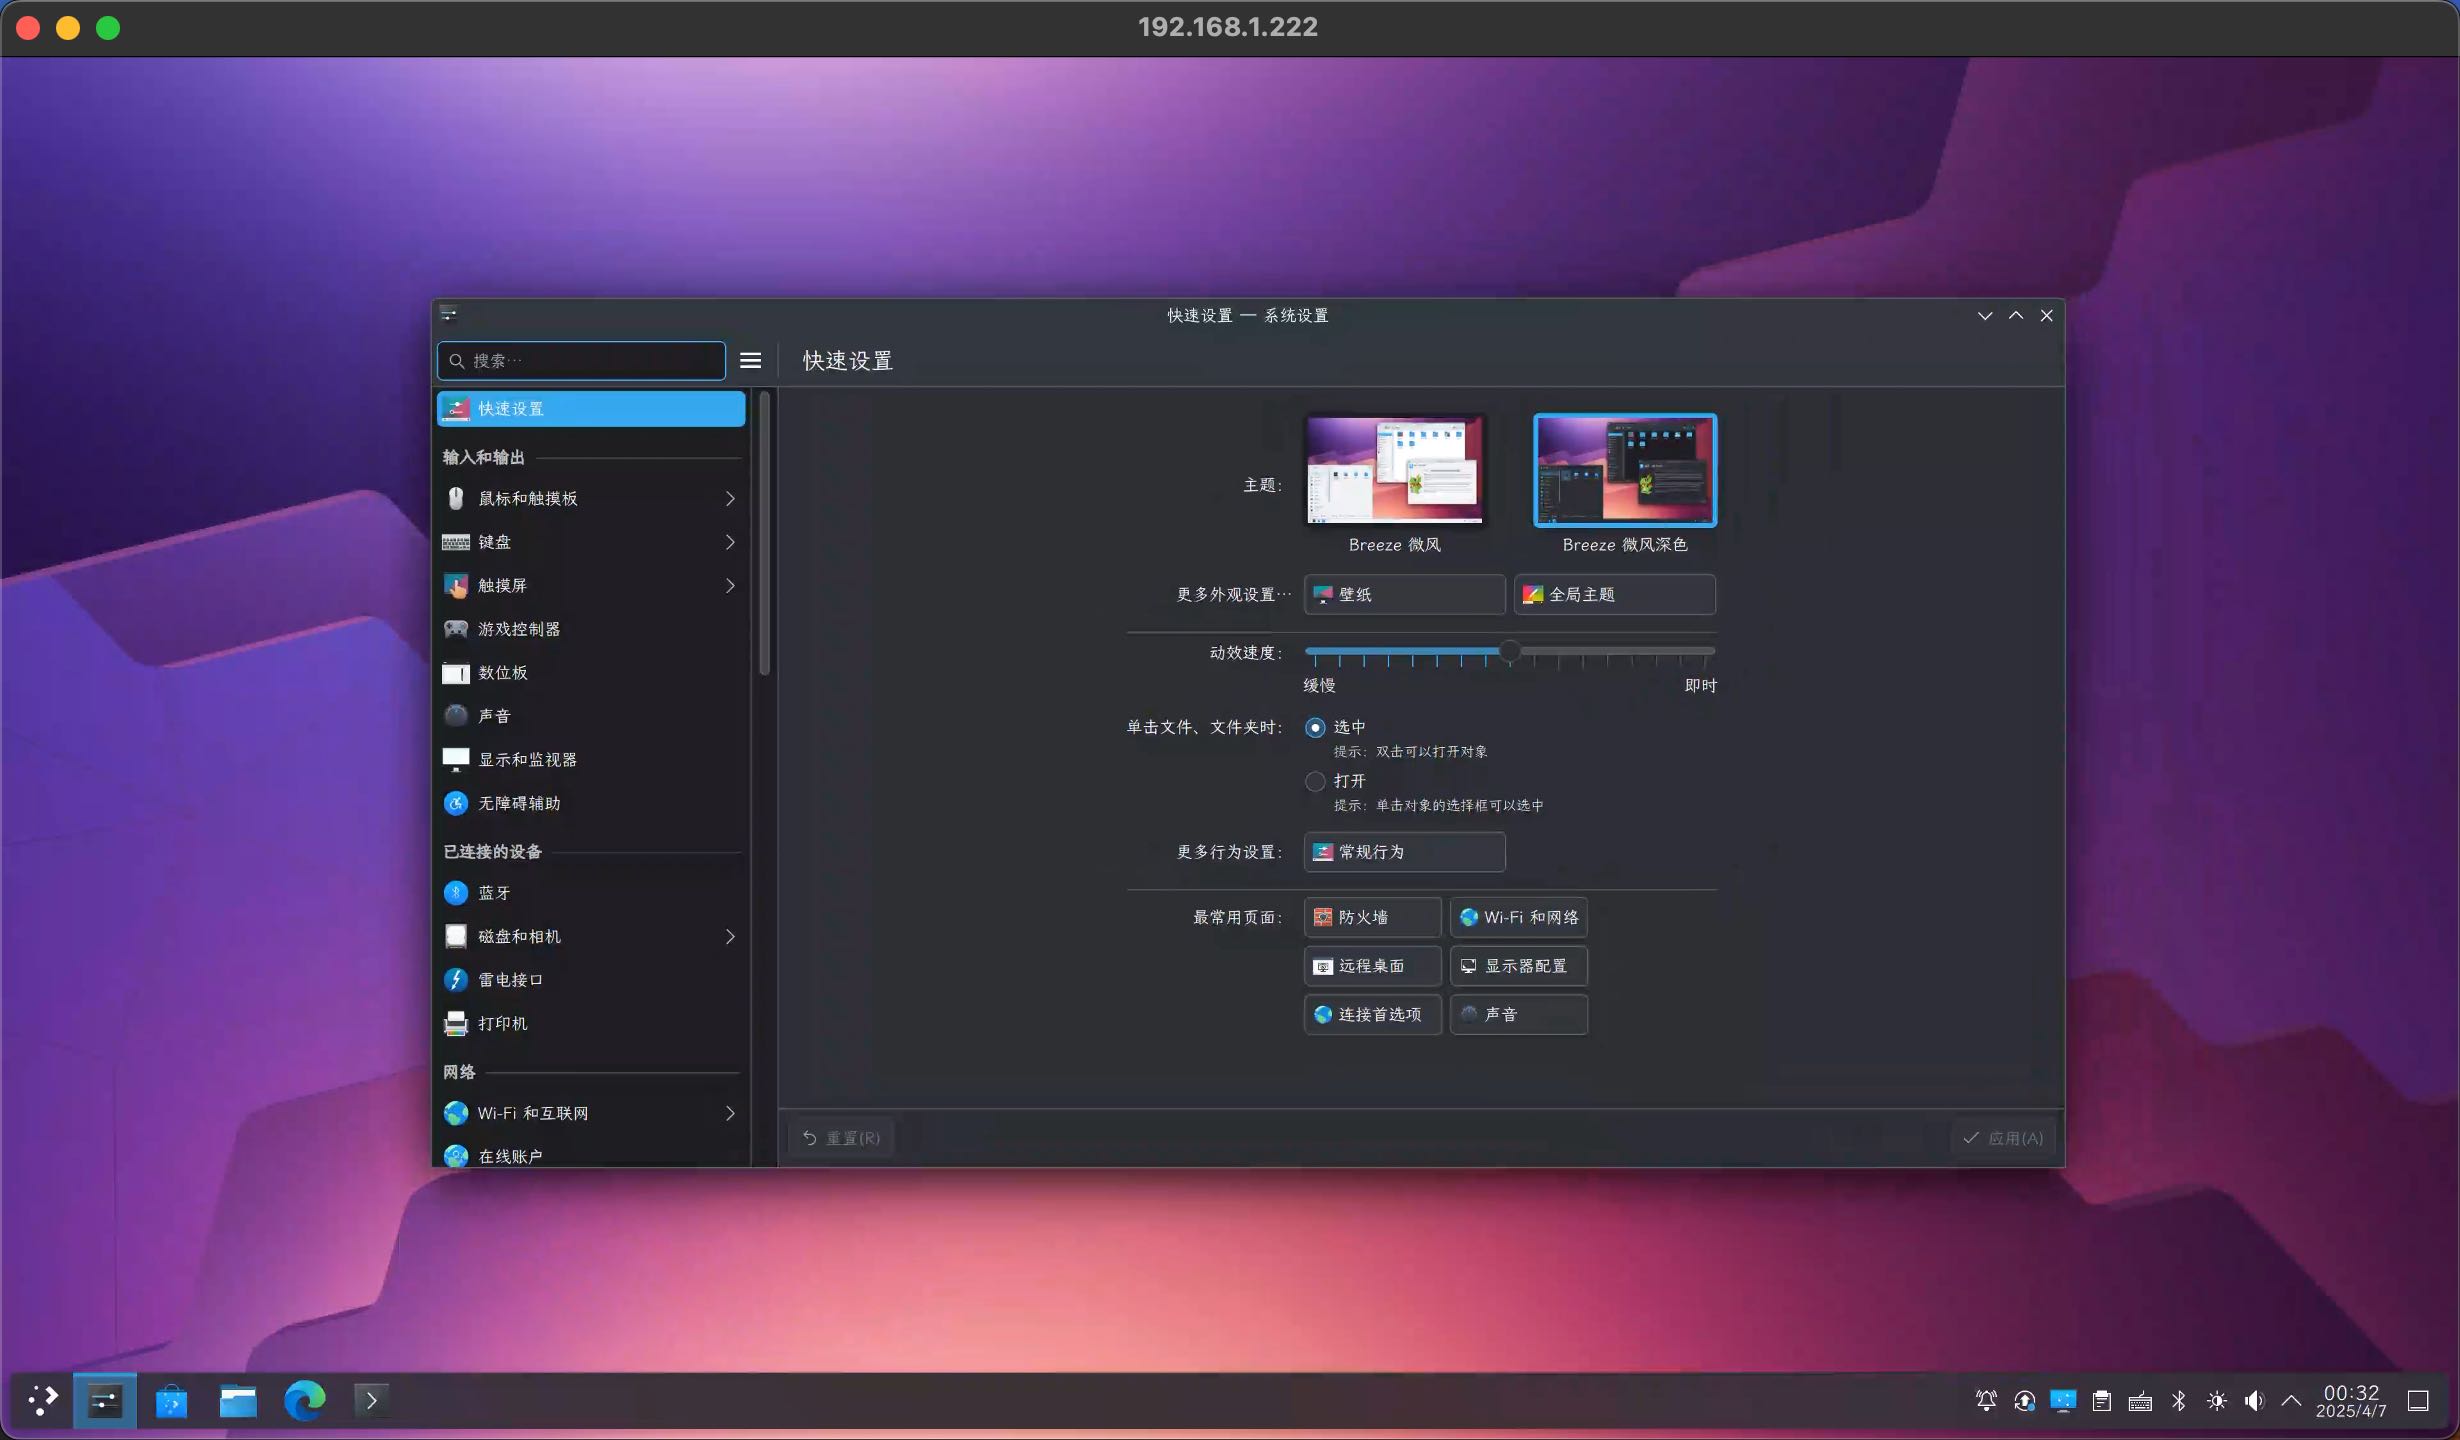
Tip
上面这张截图是我用另一台 Mac ,使用 Windows App(之前叫 Remote Desktop)通过 RDP 远程连接到这台 Linux 后截图的,这个也比较简单,打开 ArchLinux 的远程桌面并配置用户名和密码即可:
安装完成后 Linux 的一些配置
风扇、声音等驱动
还是参考 wiki,完成风扇、声音等固件的配置,这里不赘述。
- Getting Wi-Fi and Bluetooth to work
- Install drivers for the fan (if not working automatically or want to force a certain speed)
- Configure audio
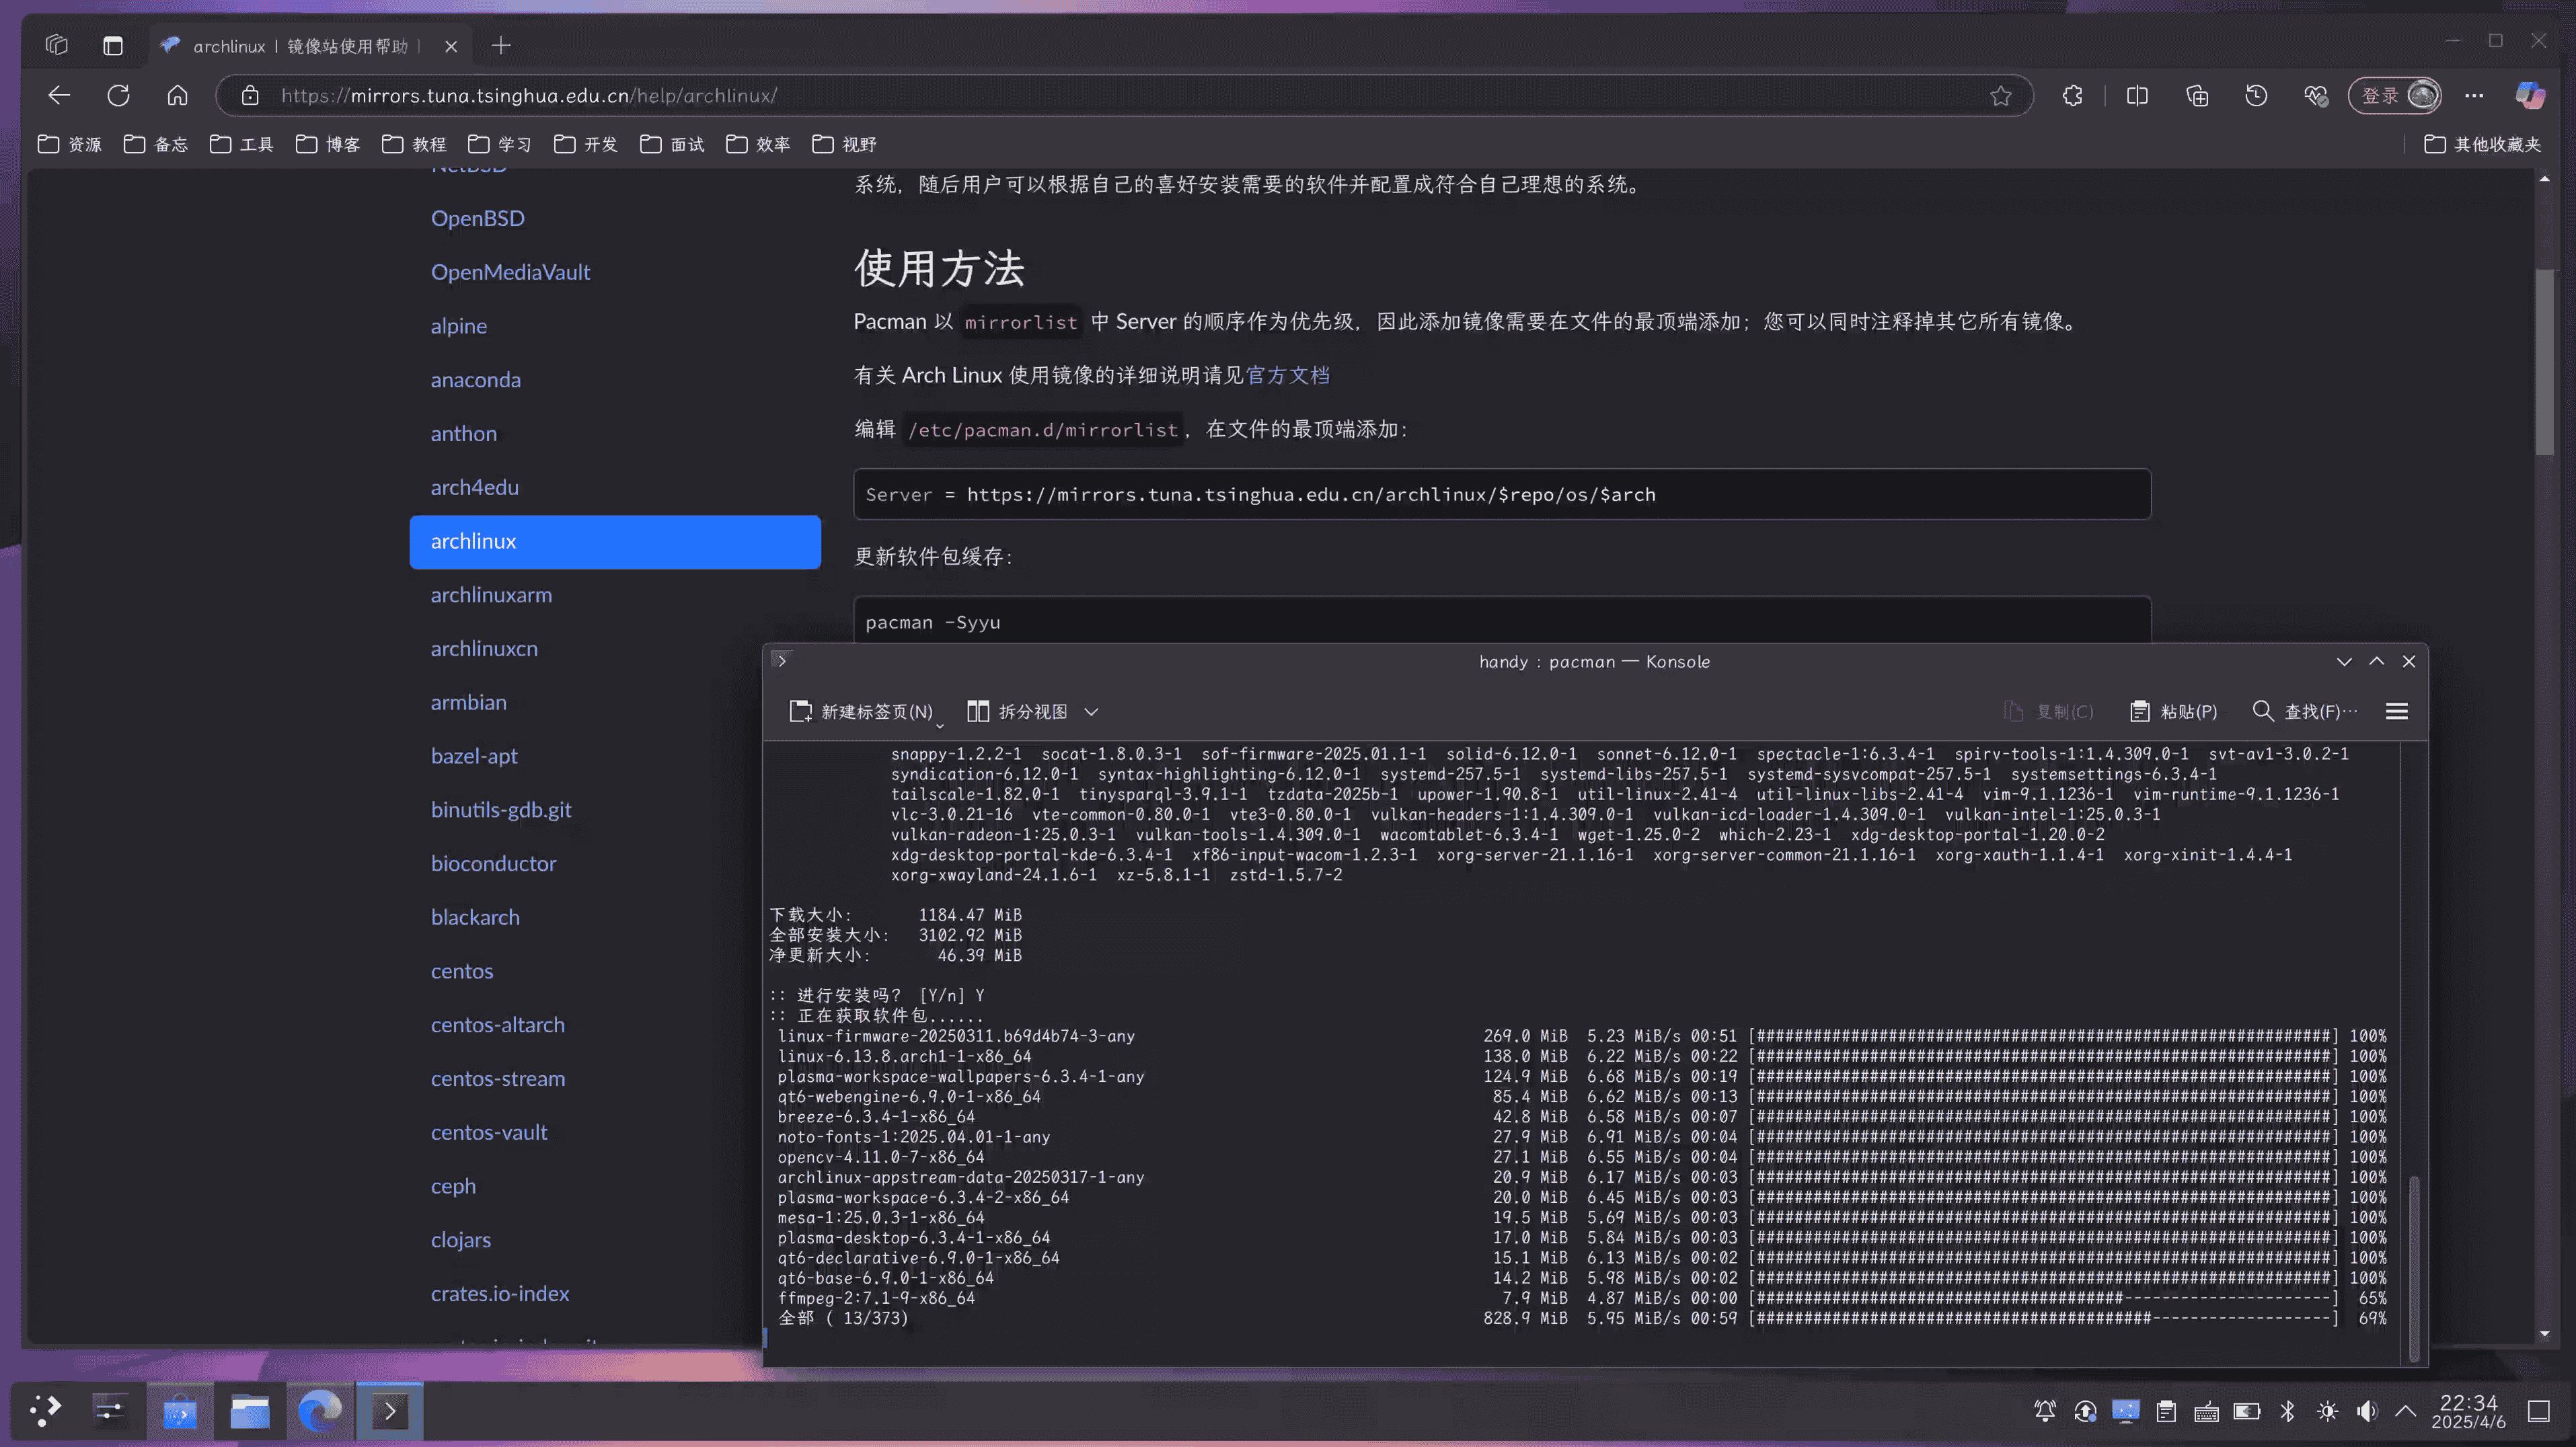
更新软件源
直接搜 tuna 的教程。
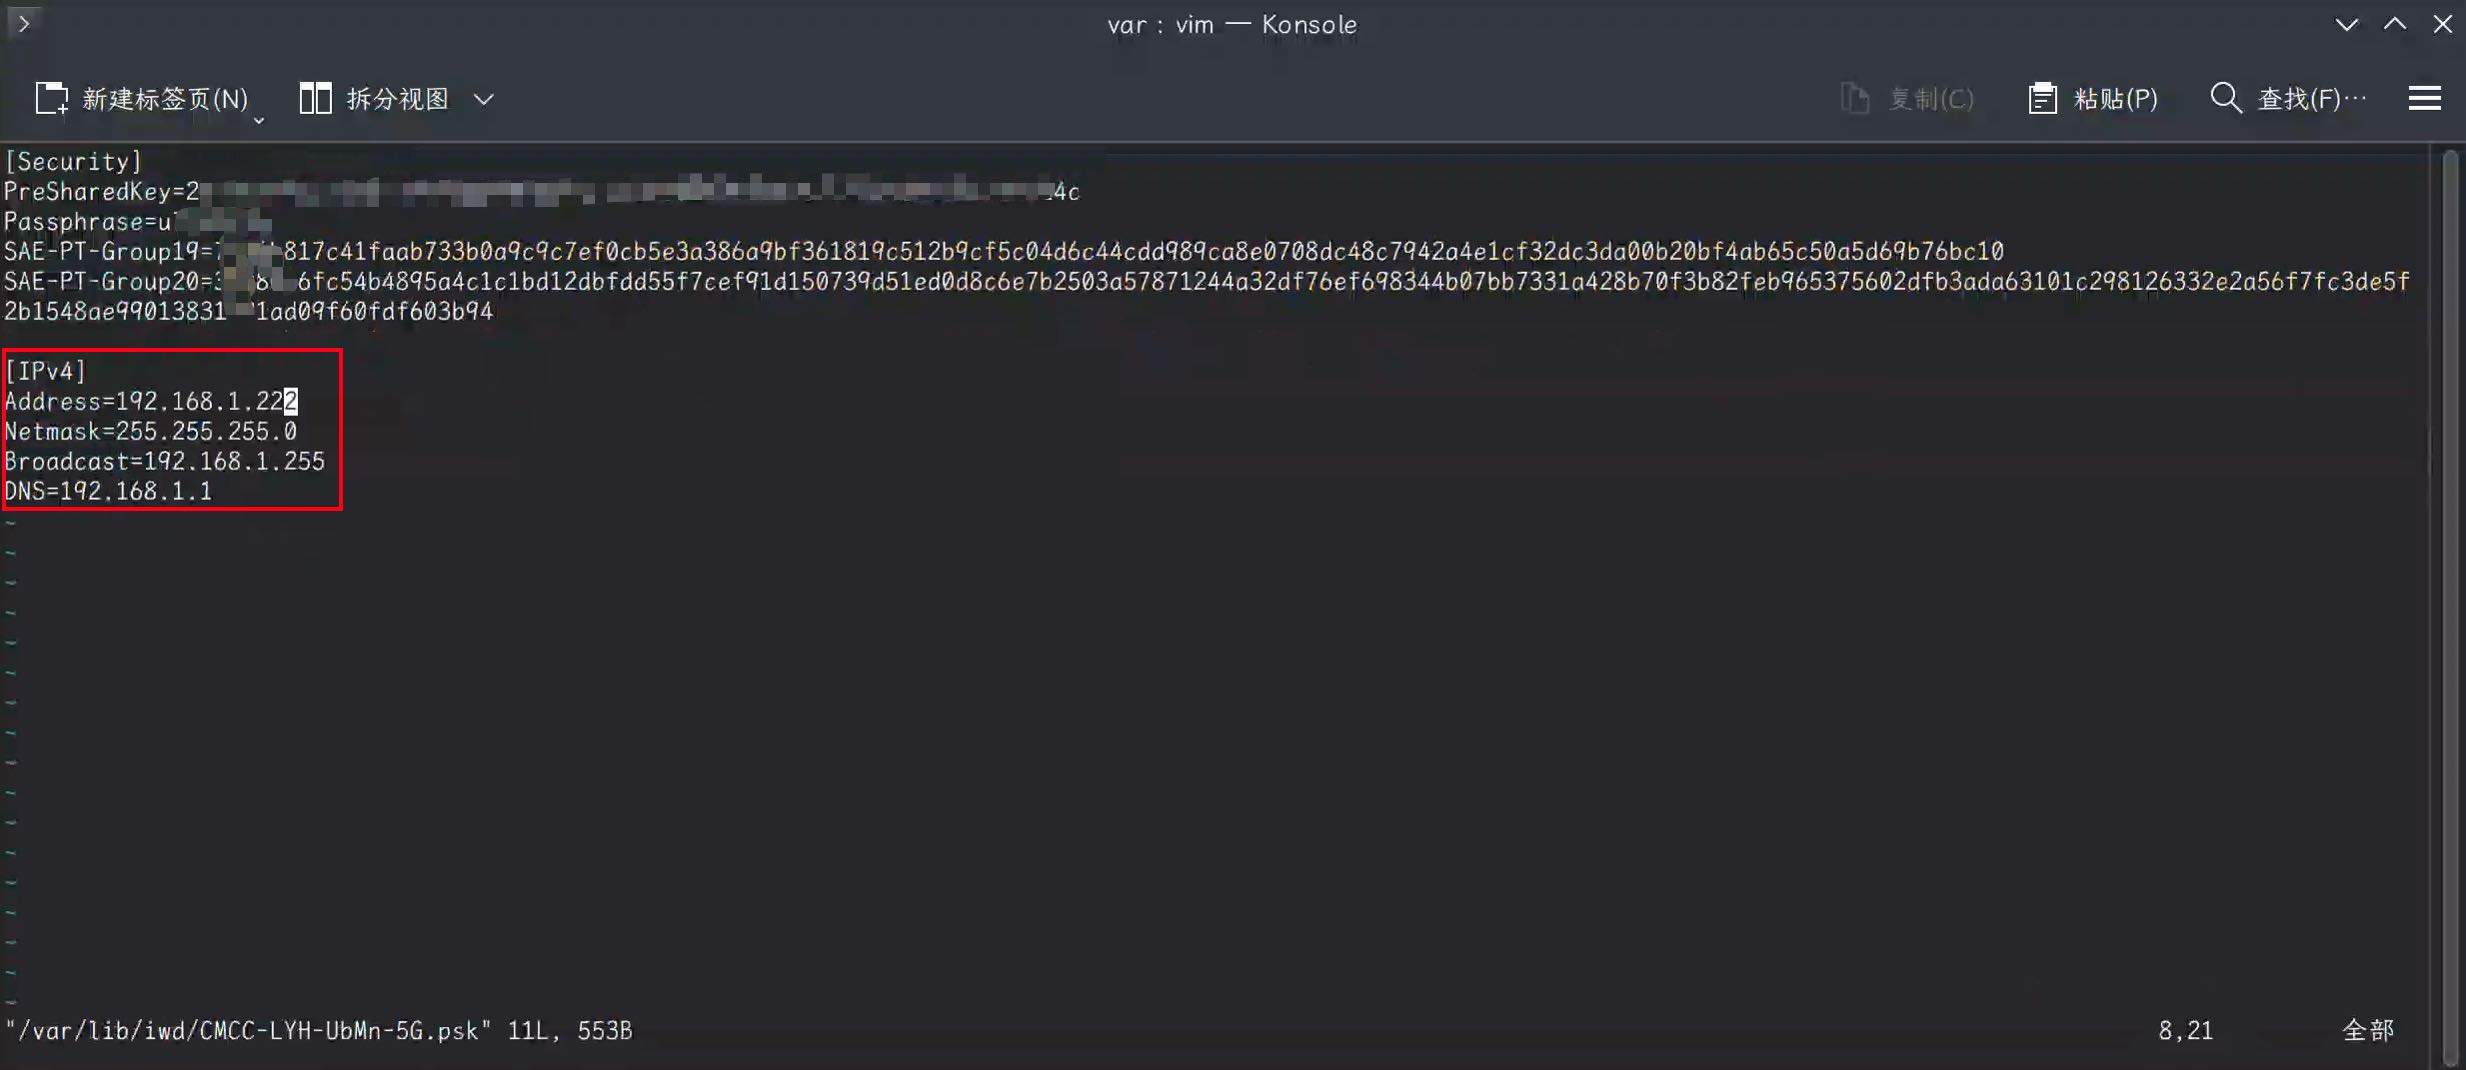
配置静态 IP 地址
之前使用 iwctl 来连接 WiFi 会造成 IP 不断的变动,我希望 MBP 的 IP 是静态的。
可以直接问 ChatGPT 、DeepSeek 等,怎么配置 ArchLinux 的静态 IP。
一个经验是:注意不要使用 networkmanager,因为连不上网,一直说我网络密码不对,但我用 iwd 就能连上。
iwd 是由 Intel 为 Linux 编写的一个无线网络守护程序。该项目的核心目标是不依赖任何外部库,而是最大程度地利用 Linux 内核提供的功能来优化资源利用。一般,使用 iwd 的性能比 wpa_supplicant 要好很多
Tip
虽然 iwd 和 networkmanager 是可以共存的,而 KDE 的网络管理就是用的 networkmanager,我们可以通过配置使用 iwd 作为 NetworkManager 的 WiFi backend。
但我并不推荐这么做,原因还是多个相同功能的软件容易冲突,造成不可知的问题。比如连上网了但又无法上网……这都是亲身经历了。
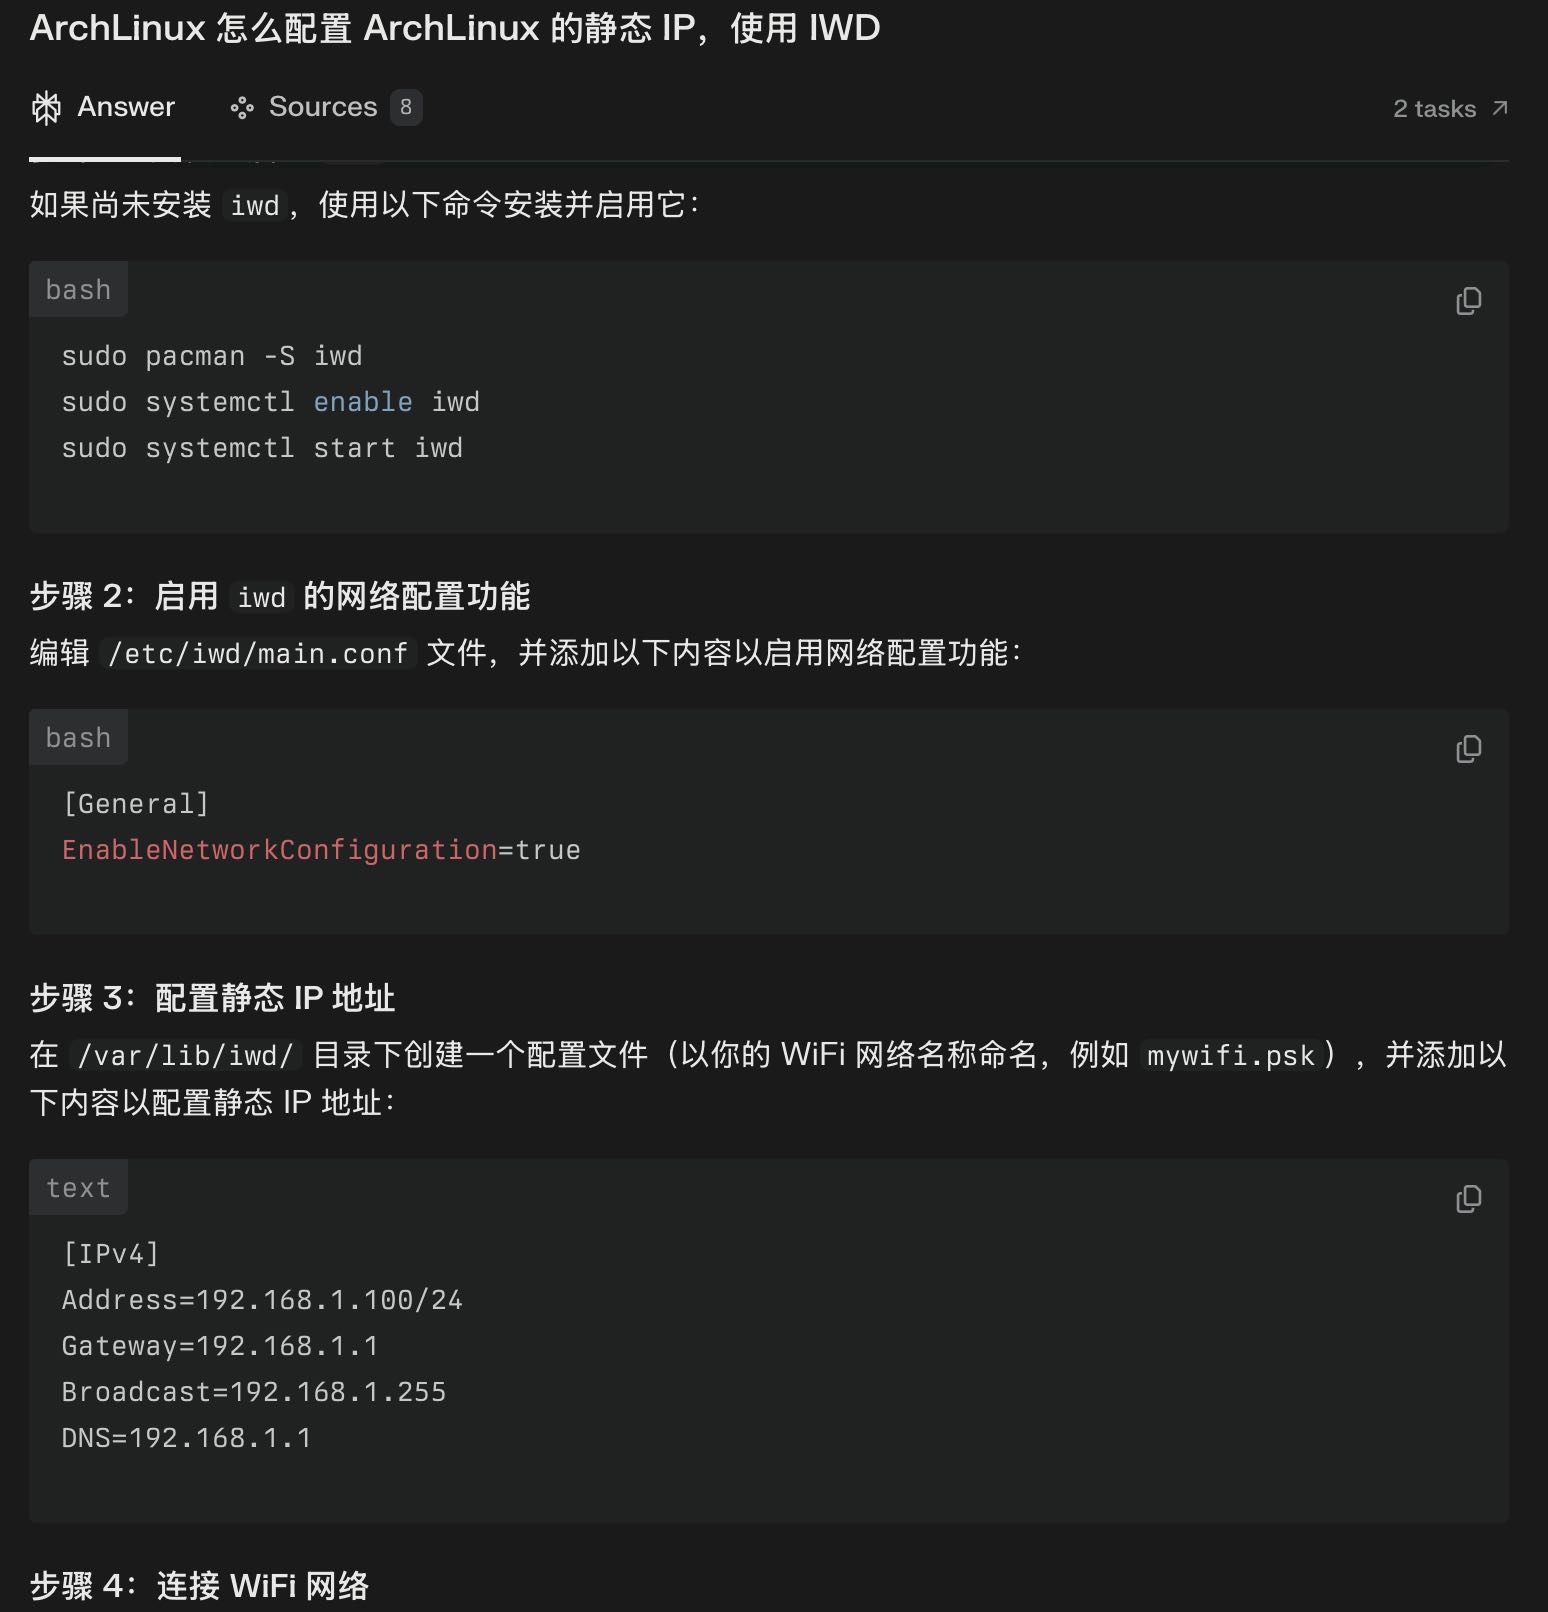
关键是如下的配置:
然后可以重启 iwd 试试:
sudo systemctl restart iwd