先说结论
我的博客不太适合用 BlockSuite 作为编辑器,因为:
- 不知道如何渲染,我可以编辑,但是如何展示给匿名用户看?
- SEO 不太明确,也想着转成 HTML 来做,但是成本太高?
其他博主的调研:https://blog.nineya.com/archives/154.html
开始!
Scratch(QuickStart)
简单安装一下,目前是 canary 版本, AFFiNE 也是用的这个版本,每次都打包的 master 分支,基本上每天都有更新。
npm install \
  @blocksuite/presets@canary \
  @blocksuite/blocks@canary \
  @blocksuite/store@canary
预置了 PageEditor 、EdgelessEditor 组件。
Overview
BlockSuite 是用来构建编辑器和协作应用的套件。
你可以把它看作一个 UI 组件。
基于 vanilla 框架,也就是原生 JS ……
- PageEditor:块编辑器,可定制,非常灵活
- EdgelessEditor:图编辑器,可选择 canvas 渲染,同样兼容块编辑器。顾名思义,真正是"无边记"。
所有的 BlockSuite 组件都是 Native Web Components。
Motivation
- 支持编辑多模态内容:文本、幻灯片、脑图、表格
- 组织和可视化复杂知识:单页很容易,但是如果有很多个页面相互关联,该如何组织呢
- 可协作:实时协作,利用 conflict-free replicated data type (CRDT) 数据结构来做这件事
同样也支持:
- 自定义块:custom blocks
- 持久化:多种格式,如 Markdown、HTML 等
- 文档复用
Architecture
BlockSuite 和 AFFiNE 关系,就像是 Monaco Editor 和 VSCode,但是主要不同在于 技术栈,BlockSuite 是原生 Web Component,而 AFFiNE 则用了 React。
- @blocksuite/store:数据层,用于协作文档状态,基于 CRDT 库: Yjs 。
- @blocksuite/inline:内联编辑的最小富文本组件,把富文本内容拆解为不同的块。
- @blocksuite/block-std:建模可编辑块的跨框架的库,涵盖了事件、选中、剪切板等。
- @blocksuite/blocks:默认的组成预置编辑器的块实现,包含各个块的 Widget。
- @blocksuite/presets:即插即用的编辑器组件(PageEditor、EdgelessEditor)和辅助的UI组件(DocTitle 等)。
Component Types
Fragment 提供了更简单的能力,为了一些 UI 上的目的,比如说目录啊、工具栏啊,这都是相对简单的,也是可独立于编辑功能的。
Editor 就比较复杂了,它提供了编辑上的所有能力。
但是呢,他俩共享数据流。
Block 是组成 Editor 的重要部分,每一个块都封装了数据模式、视图以及组成 Editor 的逻辑。
Widget 则是 Block 中的某个具体实现,抽象了比如 菜单、拖拽等功能。
我们来看看,PageEditor,它就是传统的流式内容编辑器,有这些功能:
- Text, lists, code
- Images, attachments, embed blocks
- Database
- Bidirectional links, synced blocks
- native text selection, block-level selection
- dragging, toolbars
- Real-time collaboration
- Document streaming
Edgeless Editor ,它提供了一个画板,可以无限延展,用于白板等图编辑场景,无边记,苹果的这个产品,是不是引起你的联想呢?
- 包含所有 PageEditor 的富文本编辑功能
- H5 画布,形状、刷子、文本,你想要的一切
- 演讲者模式
- link cards
- 自定义工具栏
- Real-time collaboration
- Document streaming
Data Synchronization
从传统的富文本编辑器来看,你的直观想法是用 JSON 存储,这种想法咱们也支持,使用我们提供的 Snapshot API 即可。
import { Job } from '@blocksuite/store';

const { collection } = doc;

// A job is required for performing the tasks
const job = new Job({ collection });

// Export current doc content to snapshot JSON
const json = await job.docToSnapshot(doc);

// Import snapshot JSON to a new doc
const newDoc = await job.snapshotToDoc(json);
除了 Snapshot 之外,还有 Adapter API,它是建立在 Snapshot 之上的,能处理不同的文档树之间的通信,也能支持第三方格式如 Markdown、HTML 等。
与上面说的传统的存储机制不同,BlockSuite原生支持状态管理,这种情况下,服务器存的就不是 JSON 了,而是 CRDT 数据结构的二进制表示,跟 Protobuf 类似。
CRDT 能自动解决冲突,在远程文档和本地文档之间的同步就能可靠完成了。
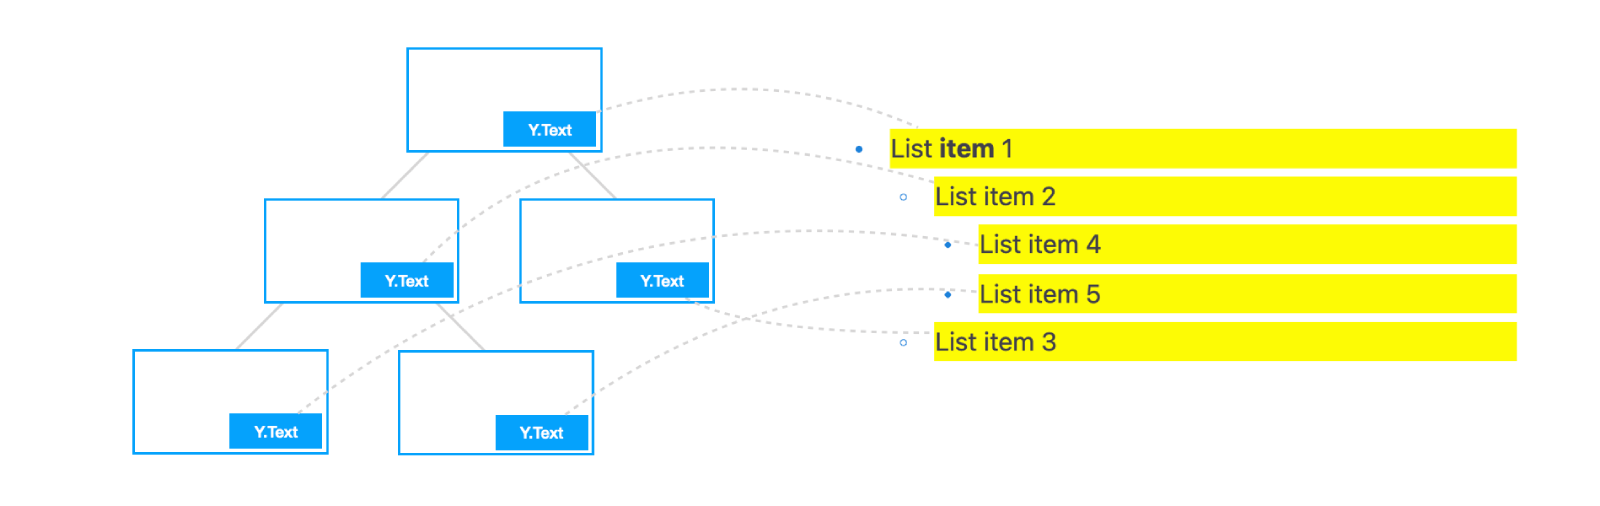
Working with Block Tree
每个 doc 对象管理独立的 block 树,每个 block 有个独一无二的标识 namespace:name。
要操作 block,你可以使用多个 API:
所有 doc 上的 block 操作都可以用 doc.undo() 和 doc.redo() 来撤销和重做。当然,你也可以显式地通过 doc.captureSync() 增加历史记录,这种情况当你一次加入多个块却又想挨个重做时很有用。
又有一些概念出来了,host 和 std。editor.host 也就是 EditorHost 组件,是挂载 block UI 组件的容器,std 是用来无视框架直达 block 标准库的工具,也经常用 host.spec 来简化 host.std.spec 。
其他的,我觉得多少有些不必看了。
集成到 Vue 3
直接看项目下的 examples 文件夹:
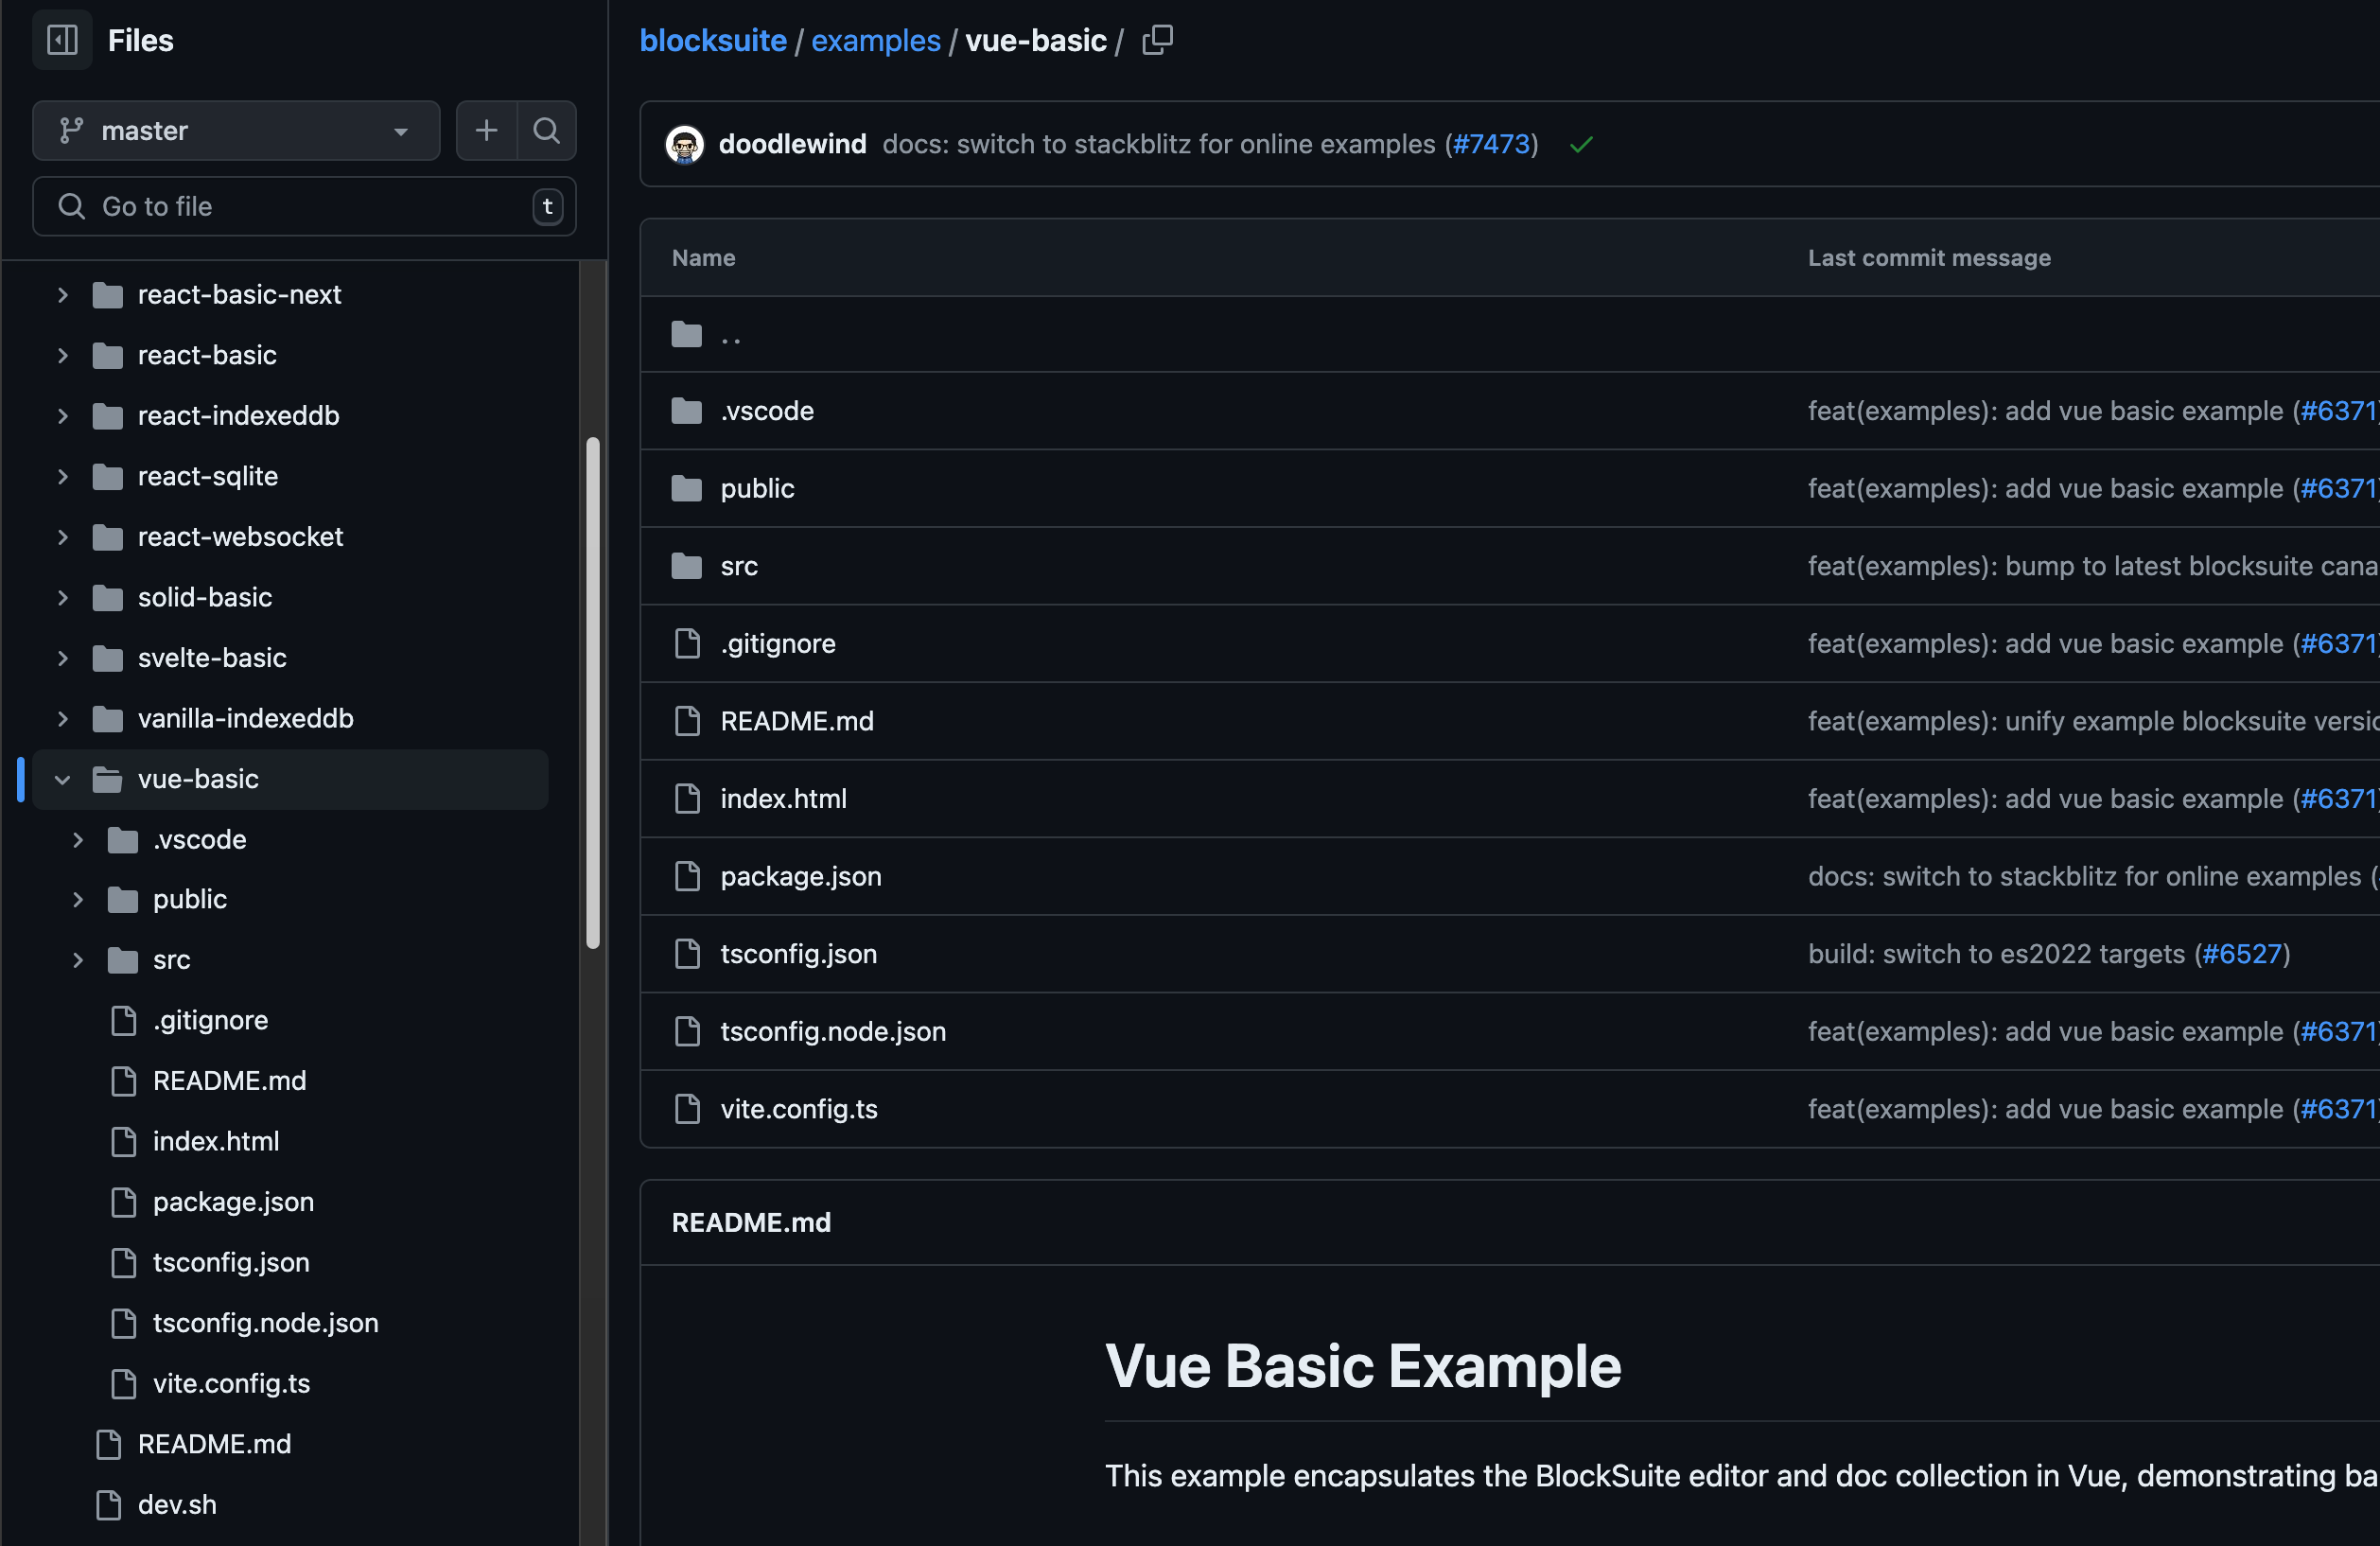
https://github.com/toeverything/blocksuite/tree/master/examples/vue-basic
