搭建起本地的 DevOps 环境
目录
动机
自己作为独立开发者,也想体验那种写完代码效果就出来的感觉,不用又当个运维人员。
想当初 Spring Boot 程序,得手动编译,然后手动复制到目标机器,然后重启服务,可麻烦了。
因此,本地跑一套 DevOps 或者 GitOps 的系统应该会很有趣。
方案
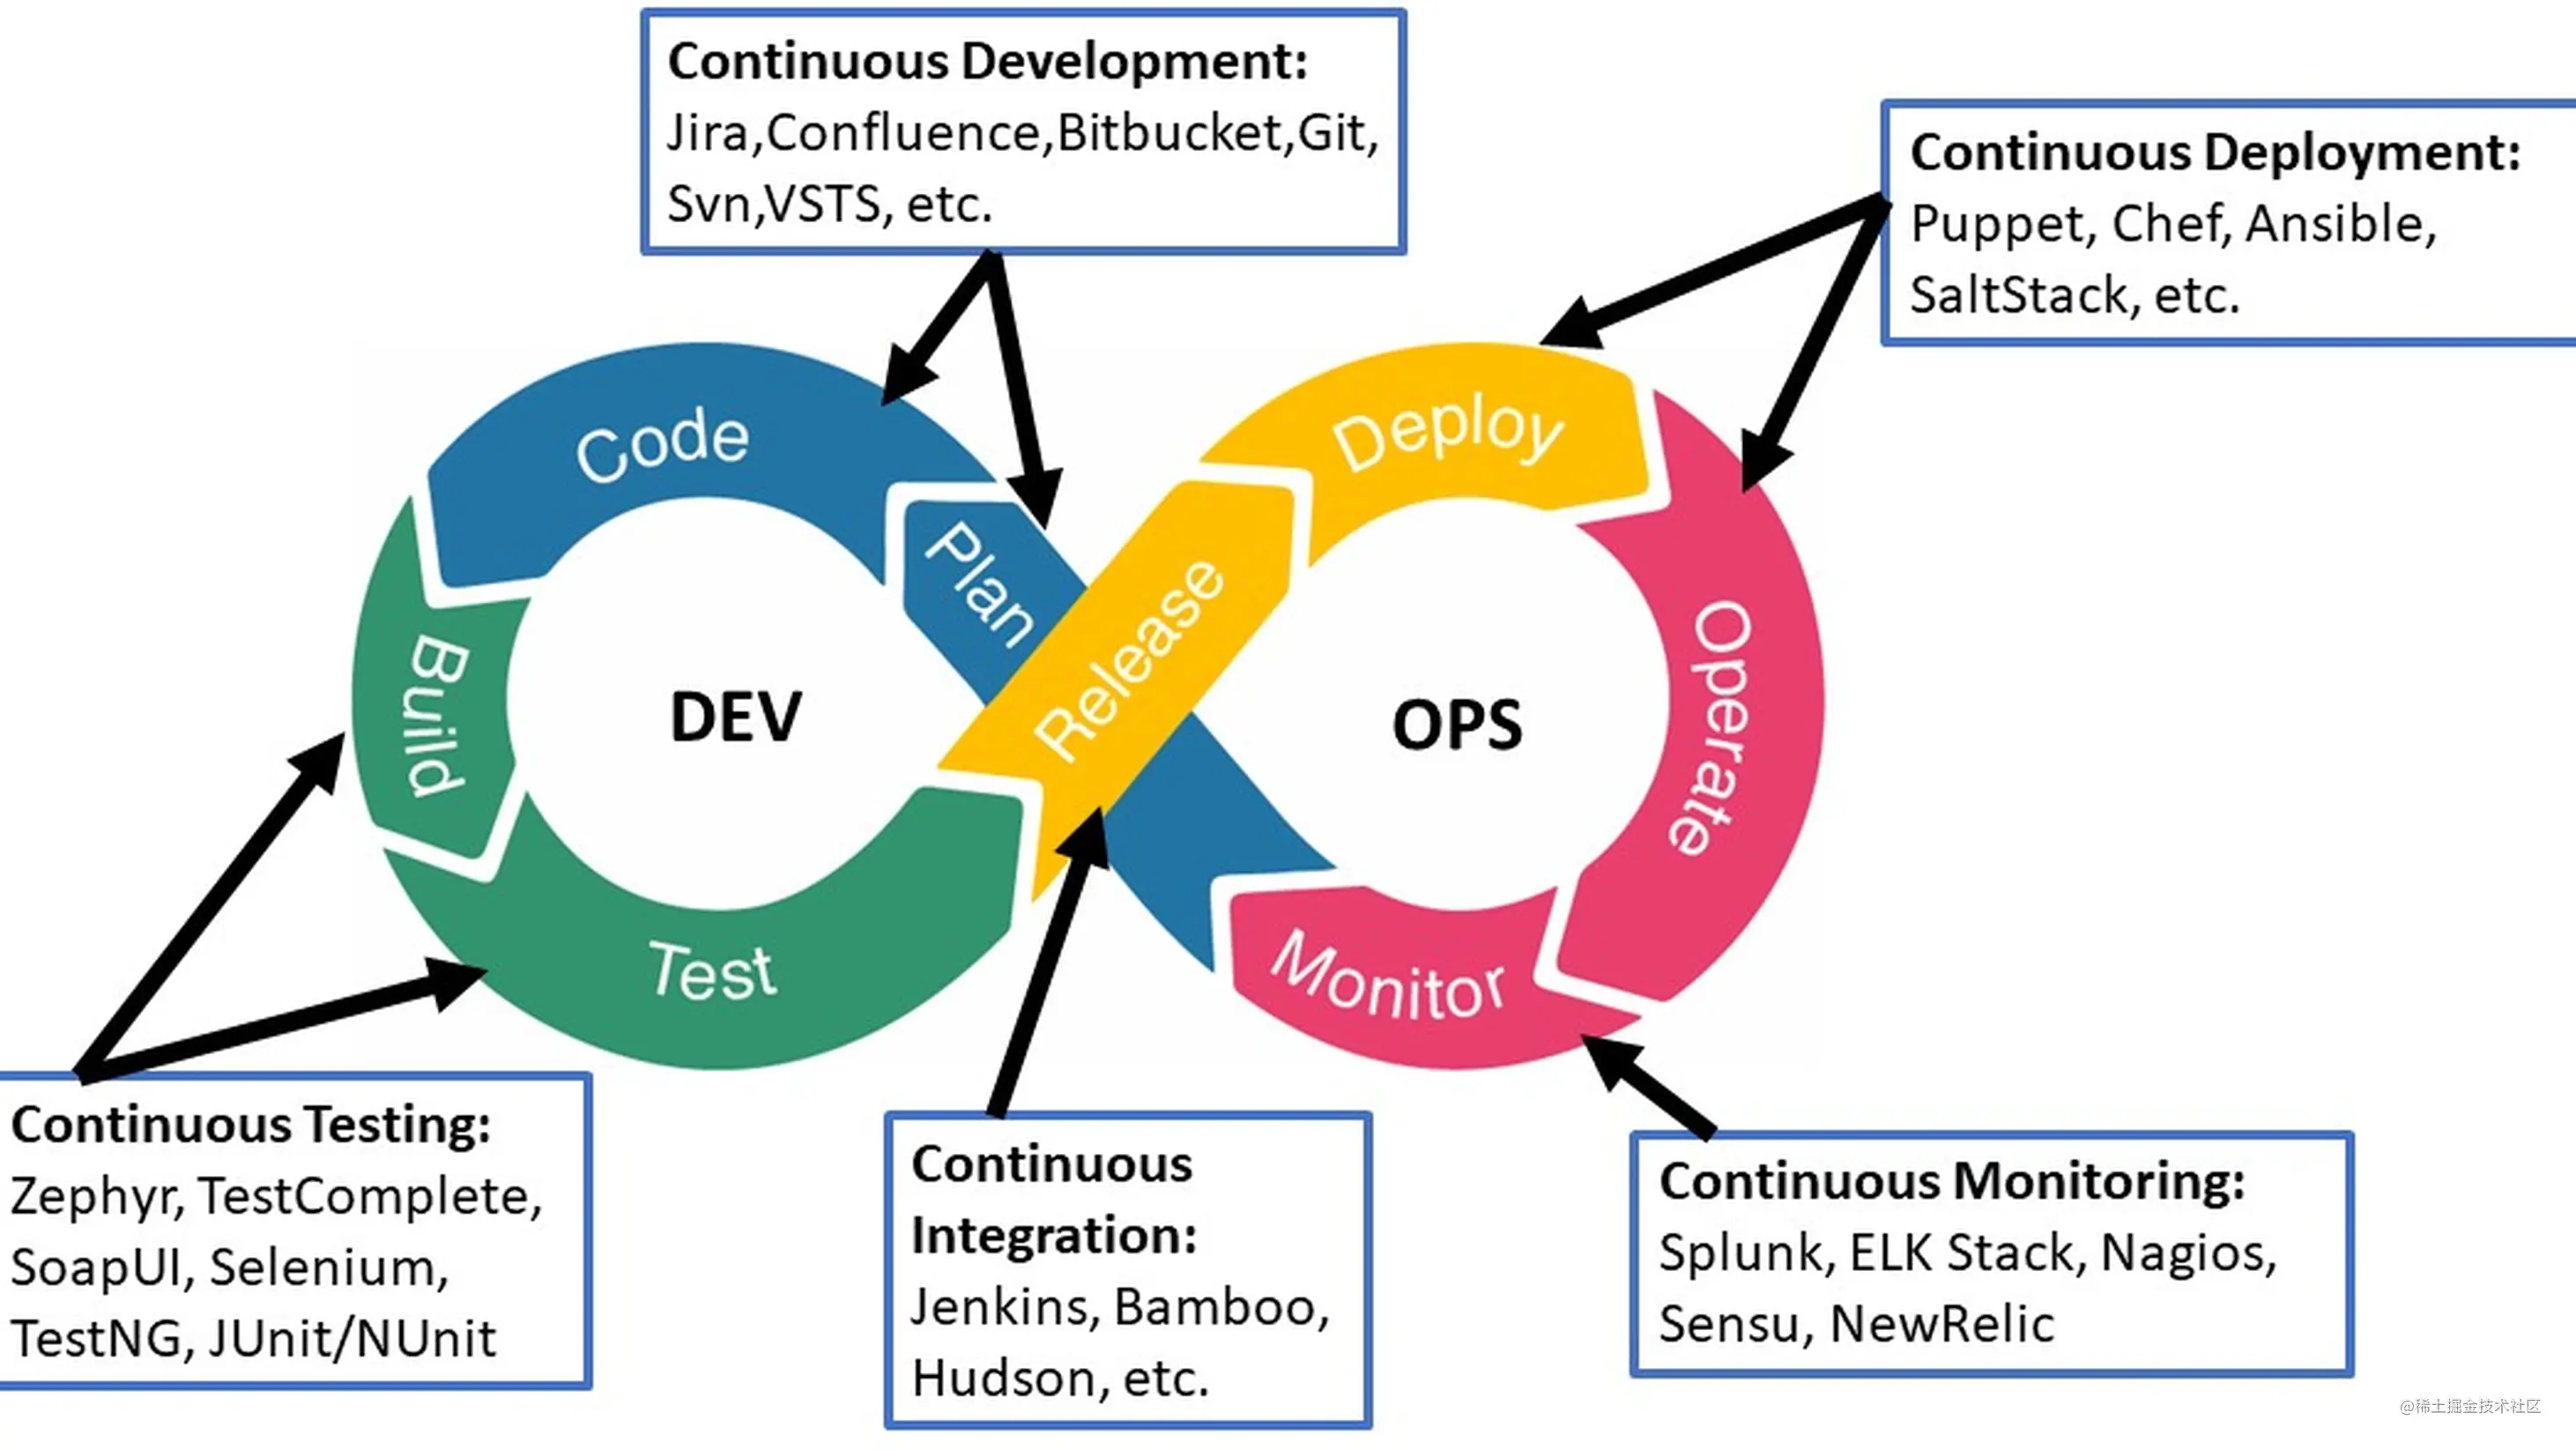
整体方案就是通过 CNCF 等的开源软件。
包括,但不限于:
- microk8s
- Argo CD:遵循声明式 GitOps 理念的持续交付(continuous delivery, CD)工具
- Argo Workflows:CI 工具,开源的容器原生的工作流引擎,替代 Jenkins
- GitLab
microk8s
windows 启动 3 台 hyper v 虚拟机安装
这个方式,是我在 mac 启动 3 台 vmware 虚拟机安装 之后尝试的。
原因是一台 mac 带不动了。
想起还有一台 windows 台式机,想拿来用用。
虽然官方 microk8s 的 windows 版就是快速启动 1 台 hyper v 虚拟机,但我还是想自己尝试手动创建。
使用的是 ubuntu 22.04.1 的 server 镜像。
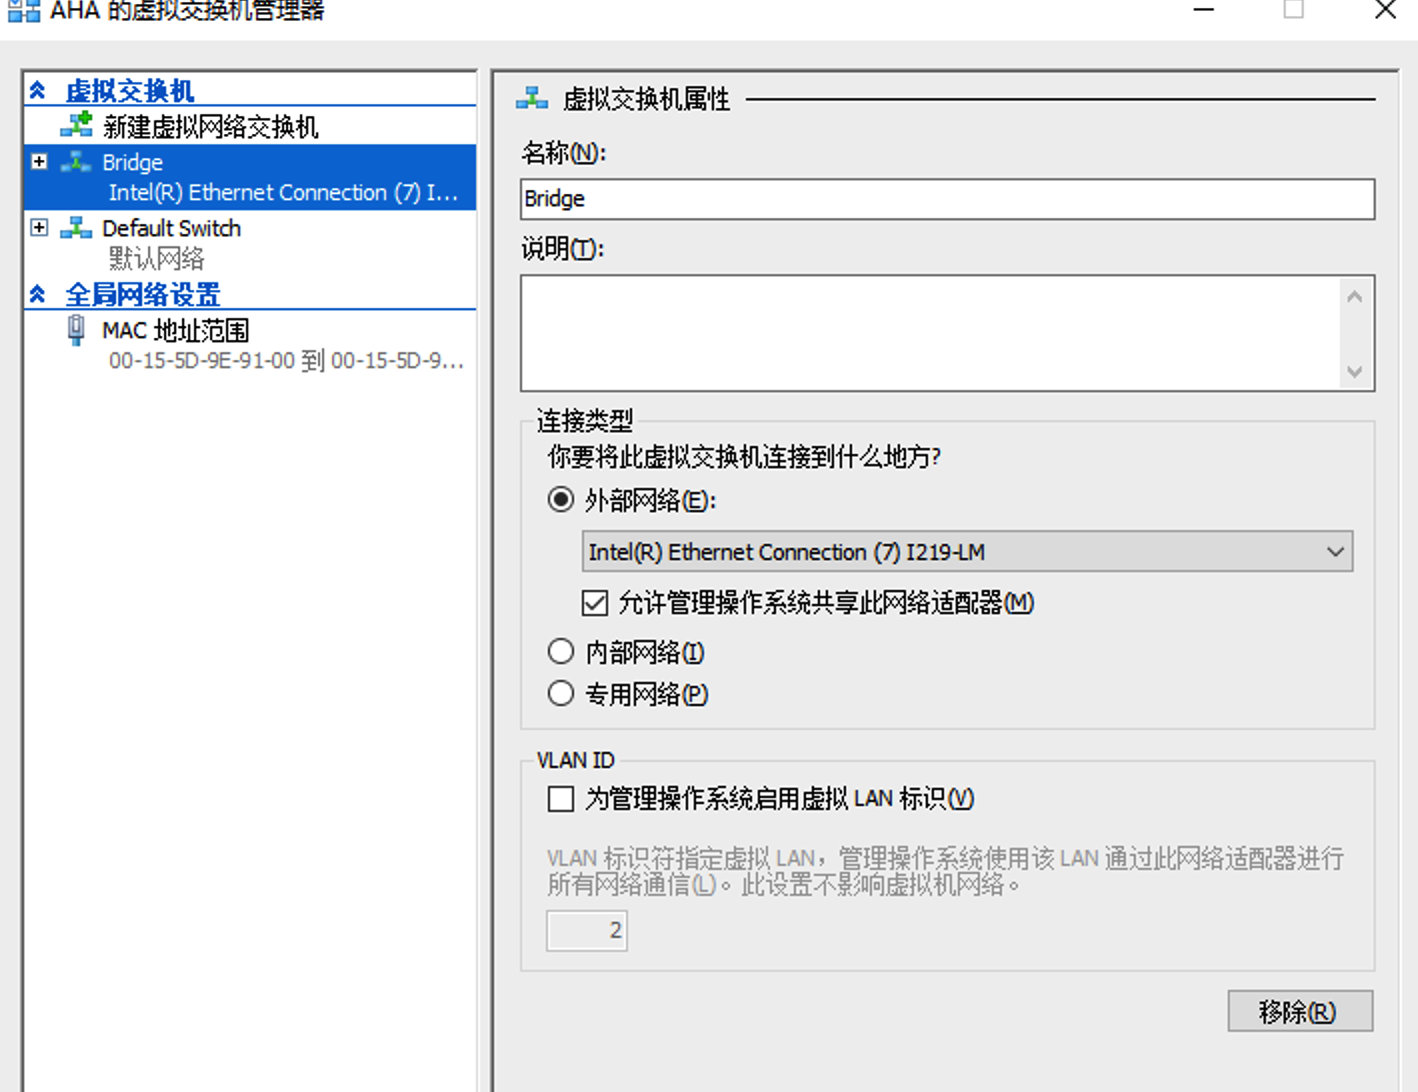
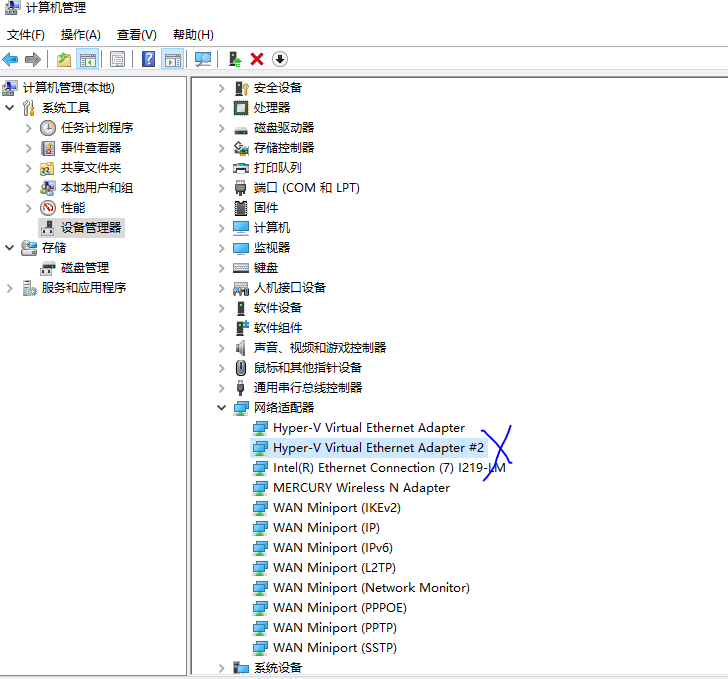
注意设置桥接之后,主机可能就上不了网了,去网络适配器配置,提示说 IP 已经分配给了图中 #2 的适配器。解决办法就是把那个适配器给删除!然后虚拟机和主机都能正常访问了!
然后怎么安装,就是直接在 Ubuntu 里面操作了,请参见 mac 启动 3 台 vmware 虚拟机安装。
如果之后虚拟机 ping 不通主机,我想要不把 IP 与 MAC 绑定下?ARP 协议!
VM虚拟机桥接模式下连接路由器与主机PING不通_Happy_Enger的博客-CSDN博客_vm主机ping不通桥接win7
mac 启动 3 台 vmware 虚拟机安装
如果遇到 Disk Pressure,注意进行虚拟机 Linux 磁盘扩容,从物理卷到逻辑卷。
在我学习 k8s 的时候做过,ubuntu 的 lts 版系统直接 snap 装。
就一条命令:sudo snap install microk8s --classic --channel=1.27/stable
装完可能没启动起来,因为 k8s 必须设置科学上网代理:
sudo vim /var/snap/microk8s/current/args/containerd-envHTTP_PROXY=http://10.130.158.145:7890 HTTPS_PROXY=http://10.130.158.145:7890 NO_PROXY=10.1.0.0/16,10.152.183.0/24 microk8s.stop microk8s.start microk8s.status看看 pod 情况
kubectl get po -n kube-system,如果有 pod 不正常,要查看:sudo kubectl describe pods metrics-server-5f8f64cb86-8fpp4 -n kube-system设置别名:
sudo snap alias microk8s.kubectl kubectlsudo snap alias microk8s.ctr ctrsudo snap alias microk8s.helm helmsudo snap alias microk8s.helm3 helm3本地启动了 3 台 VMware 虚拟机,都装有 microk8s(克隆完,还得配置静态 IP + /etc/hosts + /etc/hostname 都得改)
特别注意:静态IP 的配置在
/etc/netplan/00-xxx.yml文件其中,
gateway4非常重要,配错了就上不了网了,连不上外部了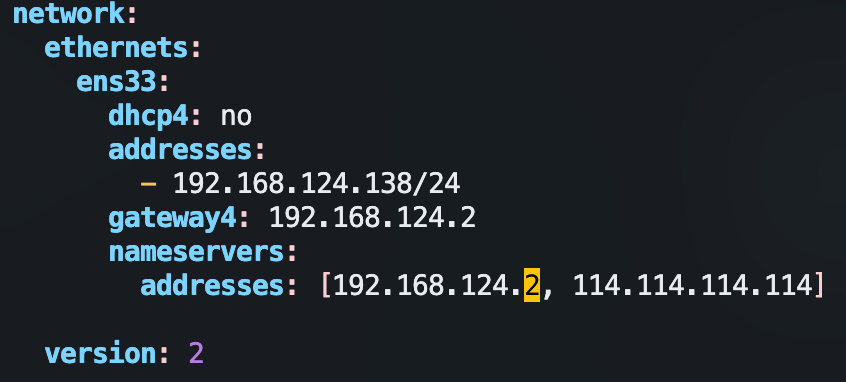
我的 mbp 在 vmware 网络下地址为
192.168.124.1,而对应的网关其实是192.168.124.**2**这个地址在 mac 的 vmware fusion 还看不出来,我是之前在 windows 下的 vmware workstation 中看到的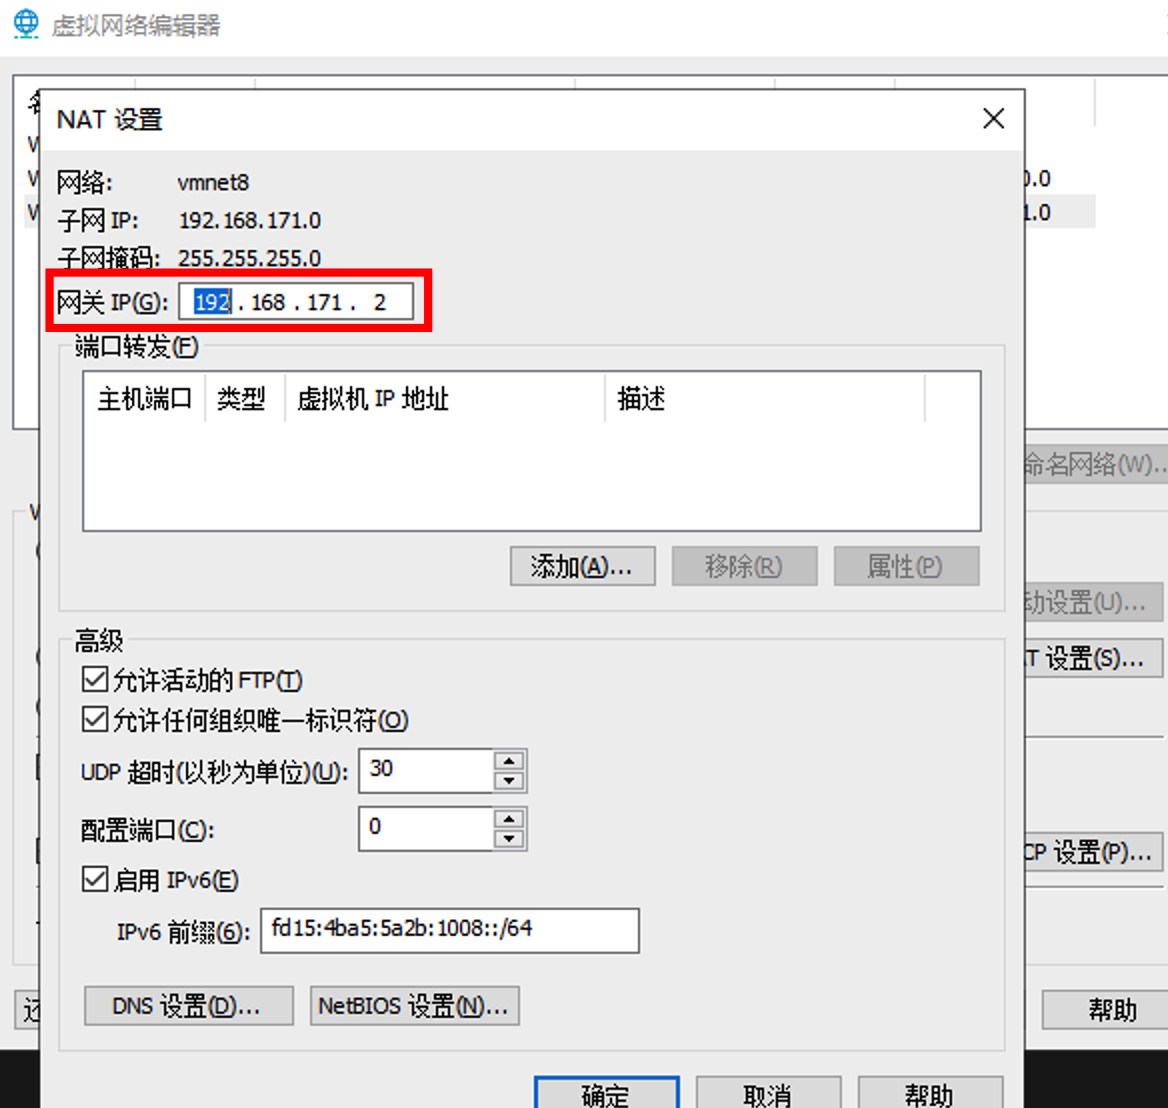
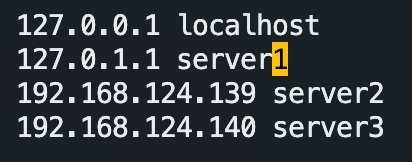
改 /etc/hosts + /etc/hostname:
组网
构造器一主,二工作的格局
查看所有 Pods 运行情况:
kubectl get pods --all-namespaces声明主节点:
microk8s add-node,(选择性的将上面日志中输出的三种命令,分别在另外两台虚拟机spud和murphy中执行)此时microk8s status多了一行“datastore master nodes“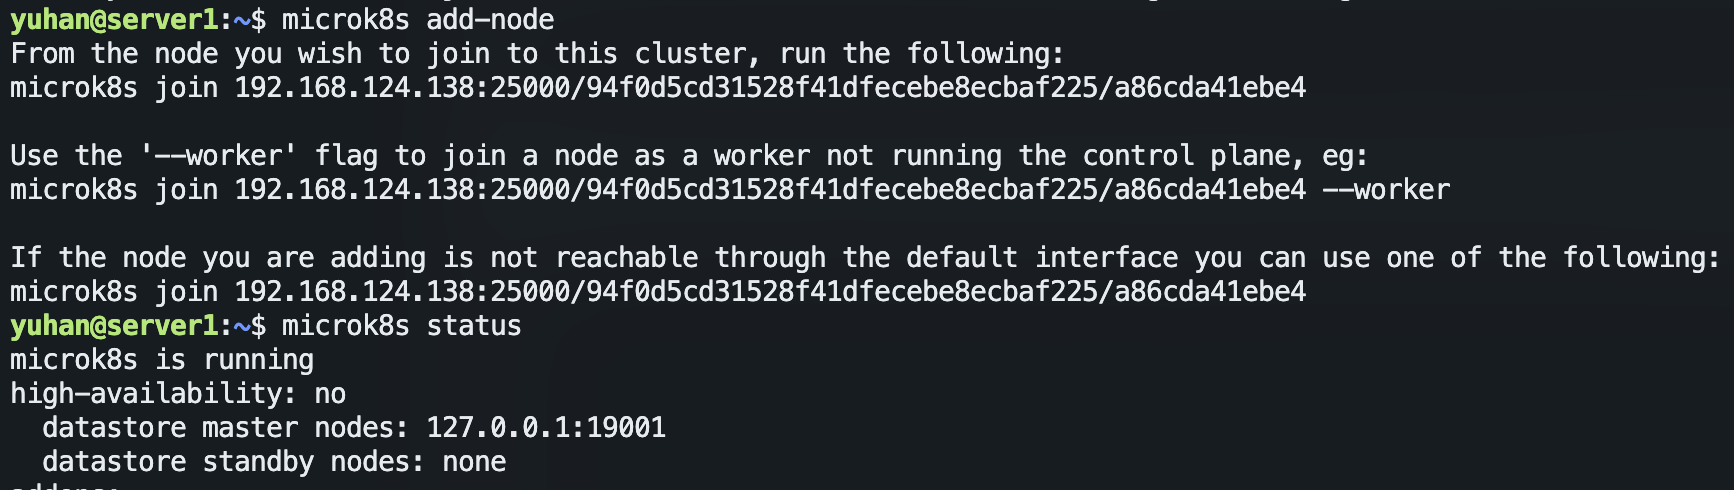
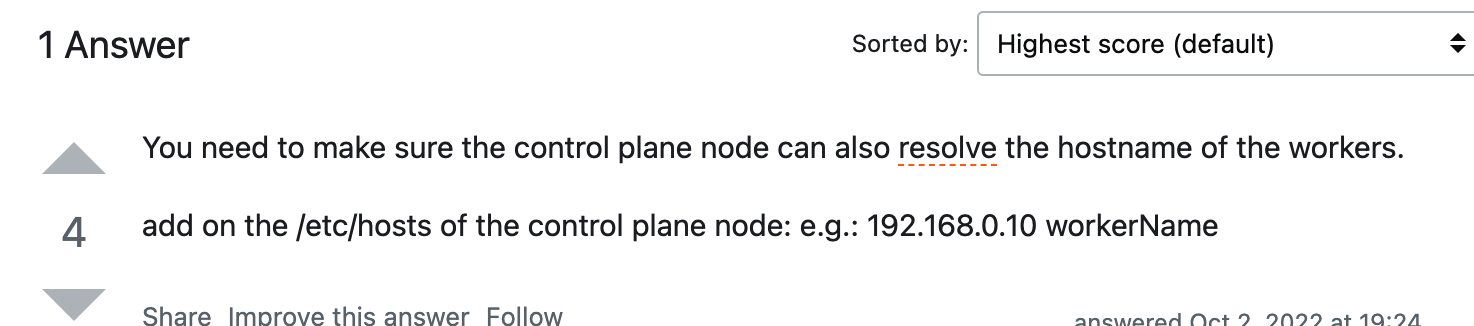
如果报 “Connection failed. The hostname (c221) of the joining node does not resolve to the IP “10.130.159.221”. Refusing join (400).“ 说明得配置
/etc/hosts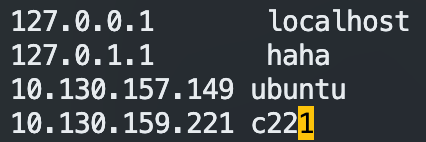
此外,如果 microk8s 权限不过,记得 sudo:
microk8s join 10.130.158.191:25000/3c039d6cd09f44ecdd87d86e56d7e2cd/bd6ec9df0b3a --worker
注意 token 是一次性的,若我们需要添加多个工作节点,需要重复在第一个节点中执行
microk8s add-node,获得带有不同的token参数的命令。
删除节点:
kubectl get nodes,组网结束,去主节点:
kubectl get pod -o=custom-columns=NAME:.metadata.name,STATUS:.status.phase,NODE:.spec.nodeName --all-namespaces
dashboard :
microk8s enable dns dashboard生成证书:
docker run --rm -it -vpwd/ssl:/ssl -e "FOR_K8S=on" -e "CERT_DNS=*.yuhan.tech" -e "CERT_CN=yuhan" soulteary/certs-maker注意 Docker share 磁盘问题

替换证书:
kubectl -n kube-system delete secret kubernetes-dashboard-certs- 注意文件名不要带 * ,记得改过来 regex used for validation is ‘[-._a-zA-Z0-9]+’
- 生成 secret:
kubectl -n kube-system create secret generic kubernetes-dashboard-certs --from-file=ssl/yuhan.tech.crt --from-file=ssl/yuhan.tech.key
编辑 K8s 配置,让 K8s 不再自动生成证书
kubectl -n kube-system edit deploy kubernetes-dashboard -o yaml找到
--auto-generate-certificates,将其注释掉,并添加我们刚刚导入的证书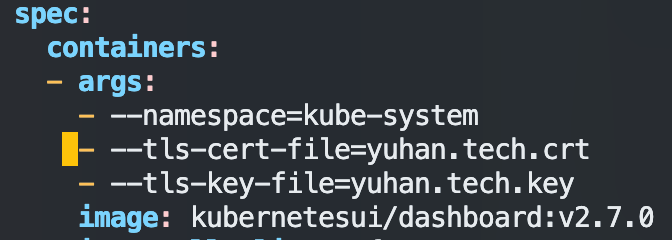
查看 certs 配置
kubectl -n kube-system get secrets kubernetes-dashboard-certs -o yaml外部访问:
microk8s dashboard-proxy- 用于登录的 token 获取:
microk8s kubectl describe secret -n kube-system microk8s-dashboard-token
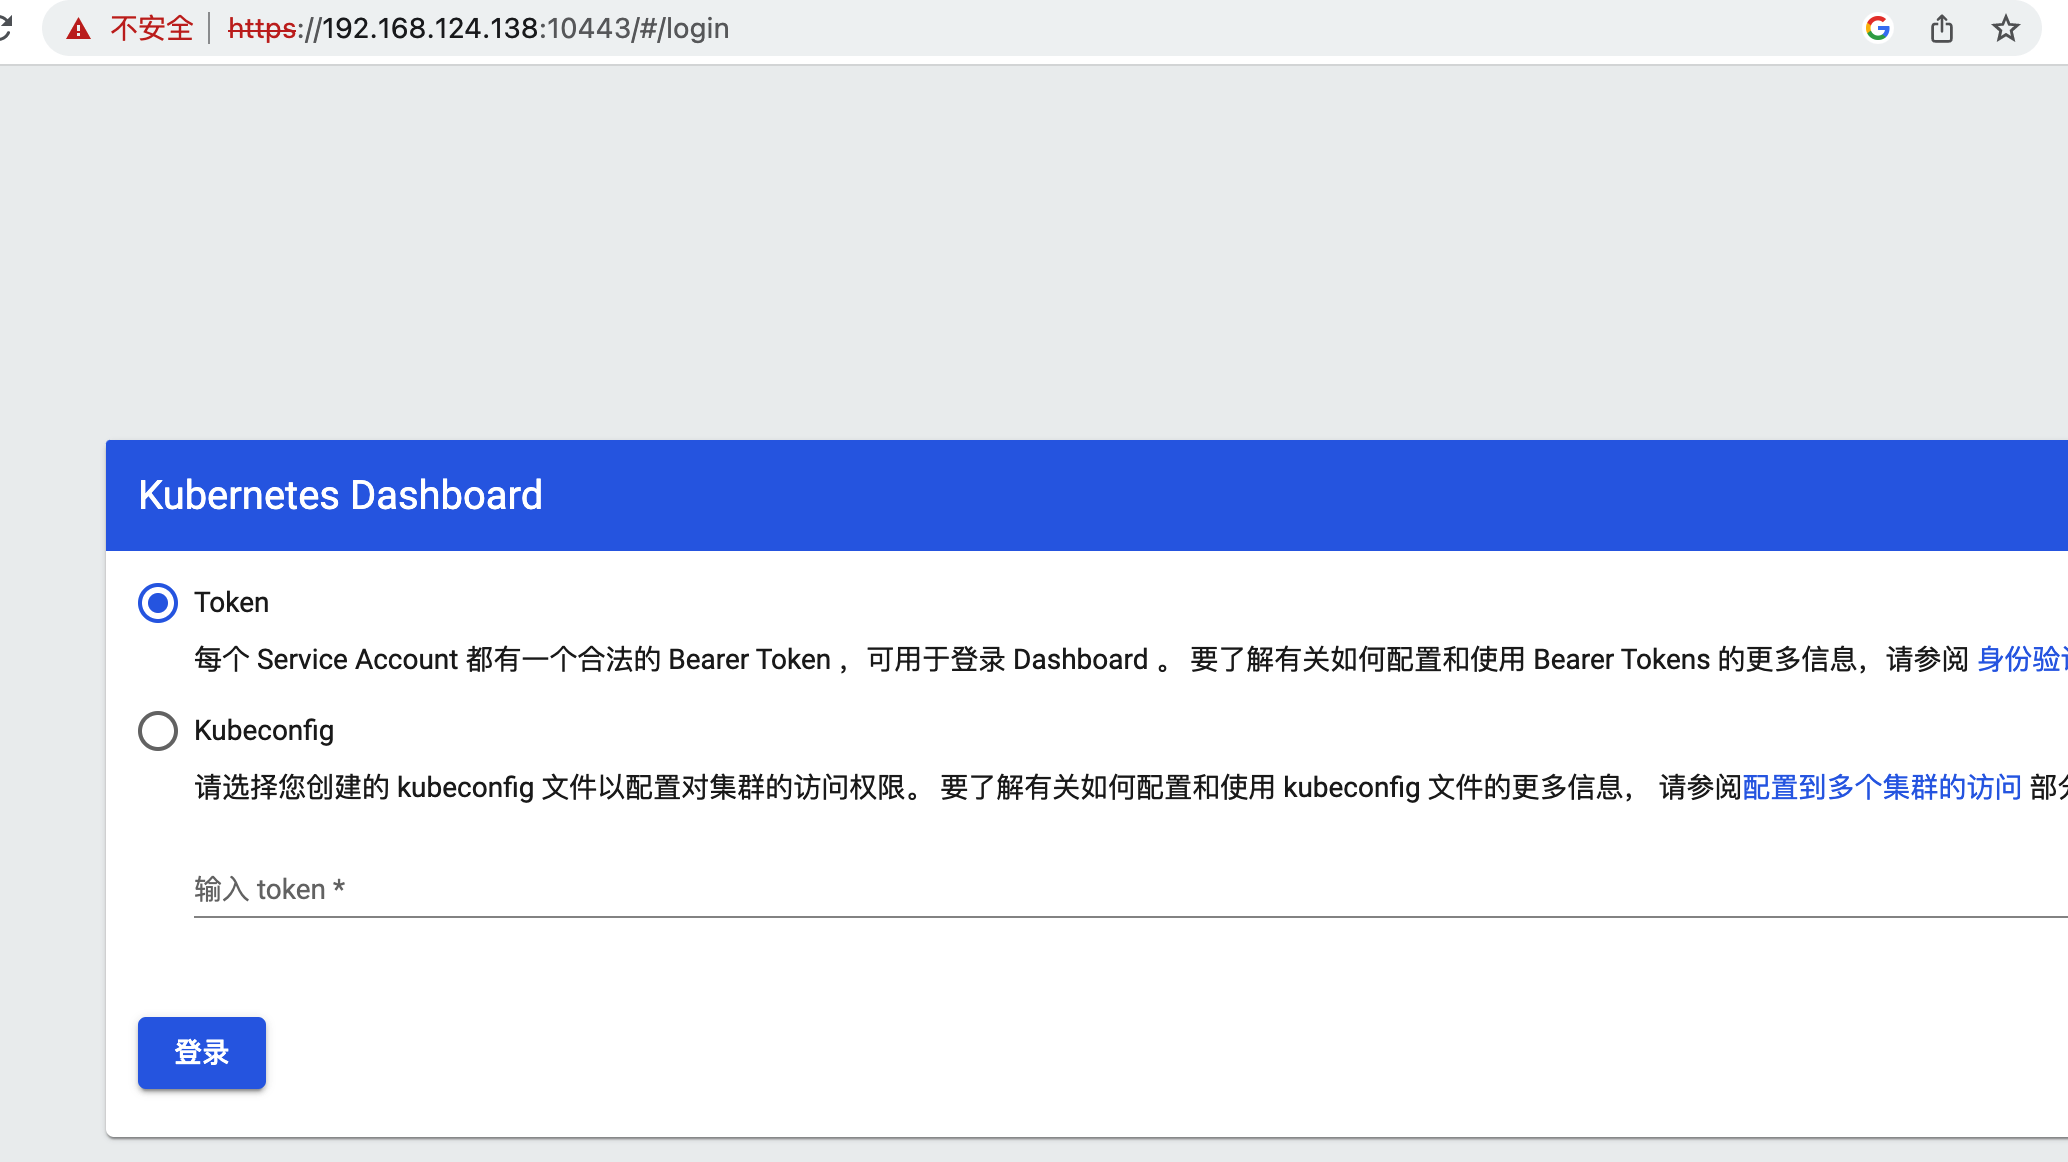
- 用于登录的 token 获取:
后序 ingress 配置:

Warning: annotation “kubernetes.io/ingress.class” is deprecated, please use ‘spec.ingressClassName’ instead
apiVersion: networking.k8s.io/v1
kind: Ingress
metadata:
  name: dashboard
  namespace: kube-system
  annotations:
    # use the shared ingress-nginx
    nginx.ingress.kubernetes.io/backend-protocol: "HTTPS"
    cert-manager.io/cluster-issuer: letsencrypt
spec:
  ingressClassName: public
  # https://kubernetes.io/docs/concepts/services-networking/ingress/
  # https://kubernetes.github.io/ingress-nginx/user-guide/tls/
  tls:
  - hosts:
    - k8s.yuhan.tech
    secretName: all-yuhan-tech-tls
  rules:
  - host: k8s.yuhan.tech
    http:
      paths:
      - path: "/"
        pathType: Prefix
        backend:
          service:
            name: kubernetes-dashboard
            port:
              number: 443

常见问题
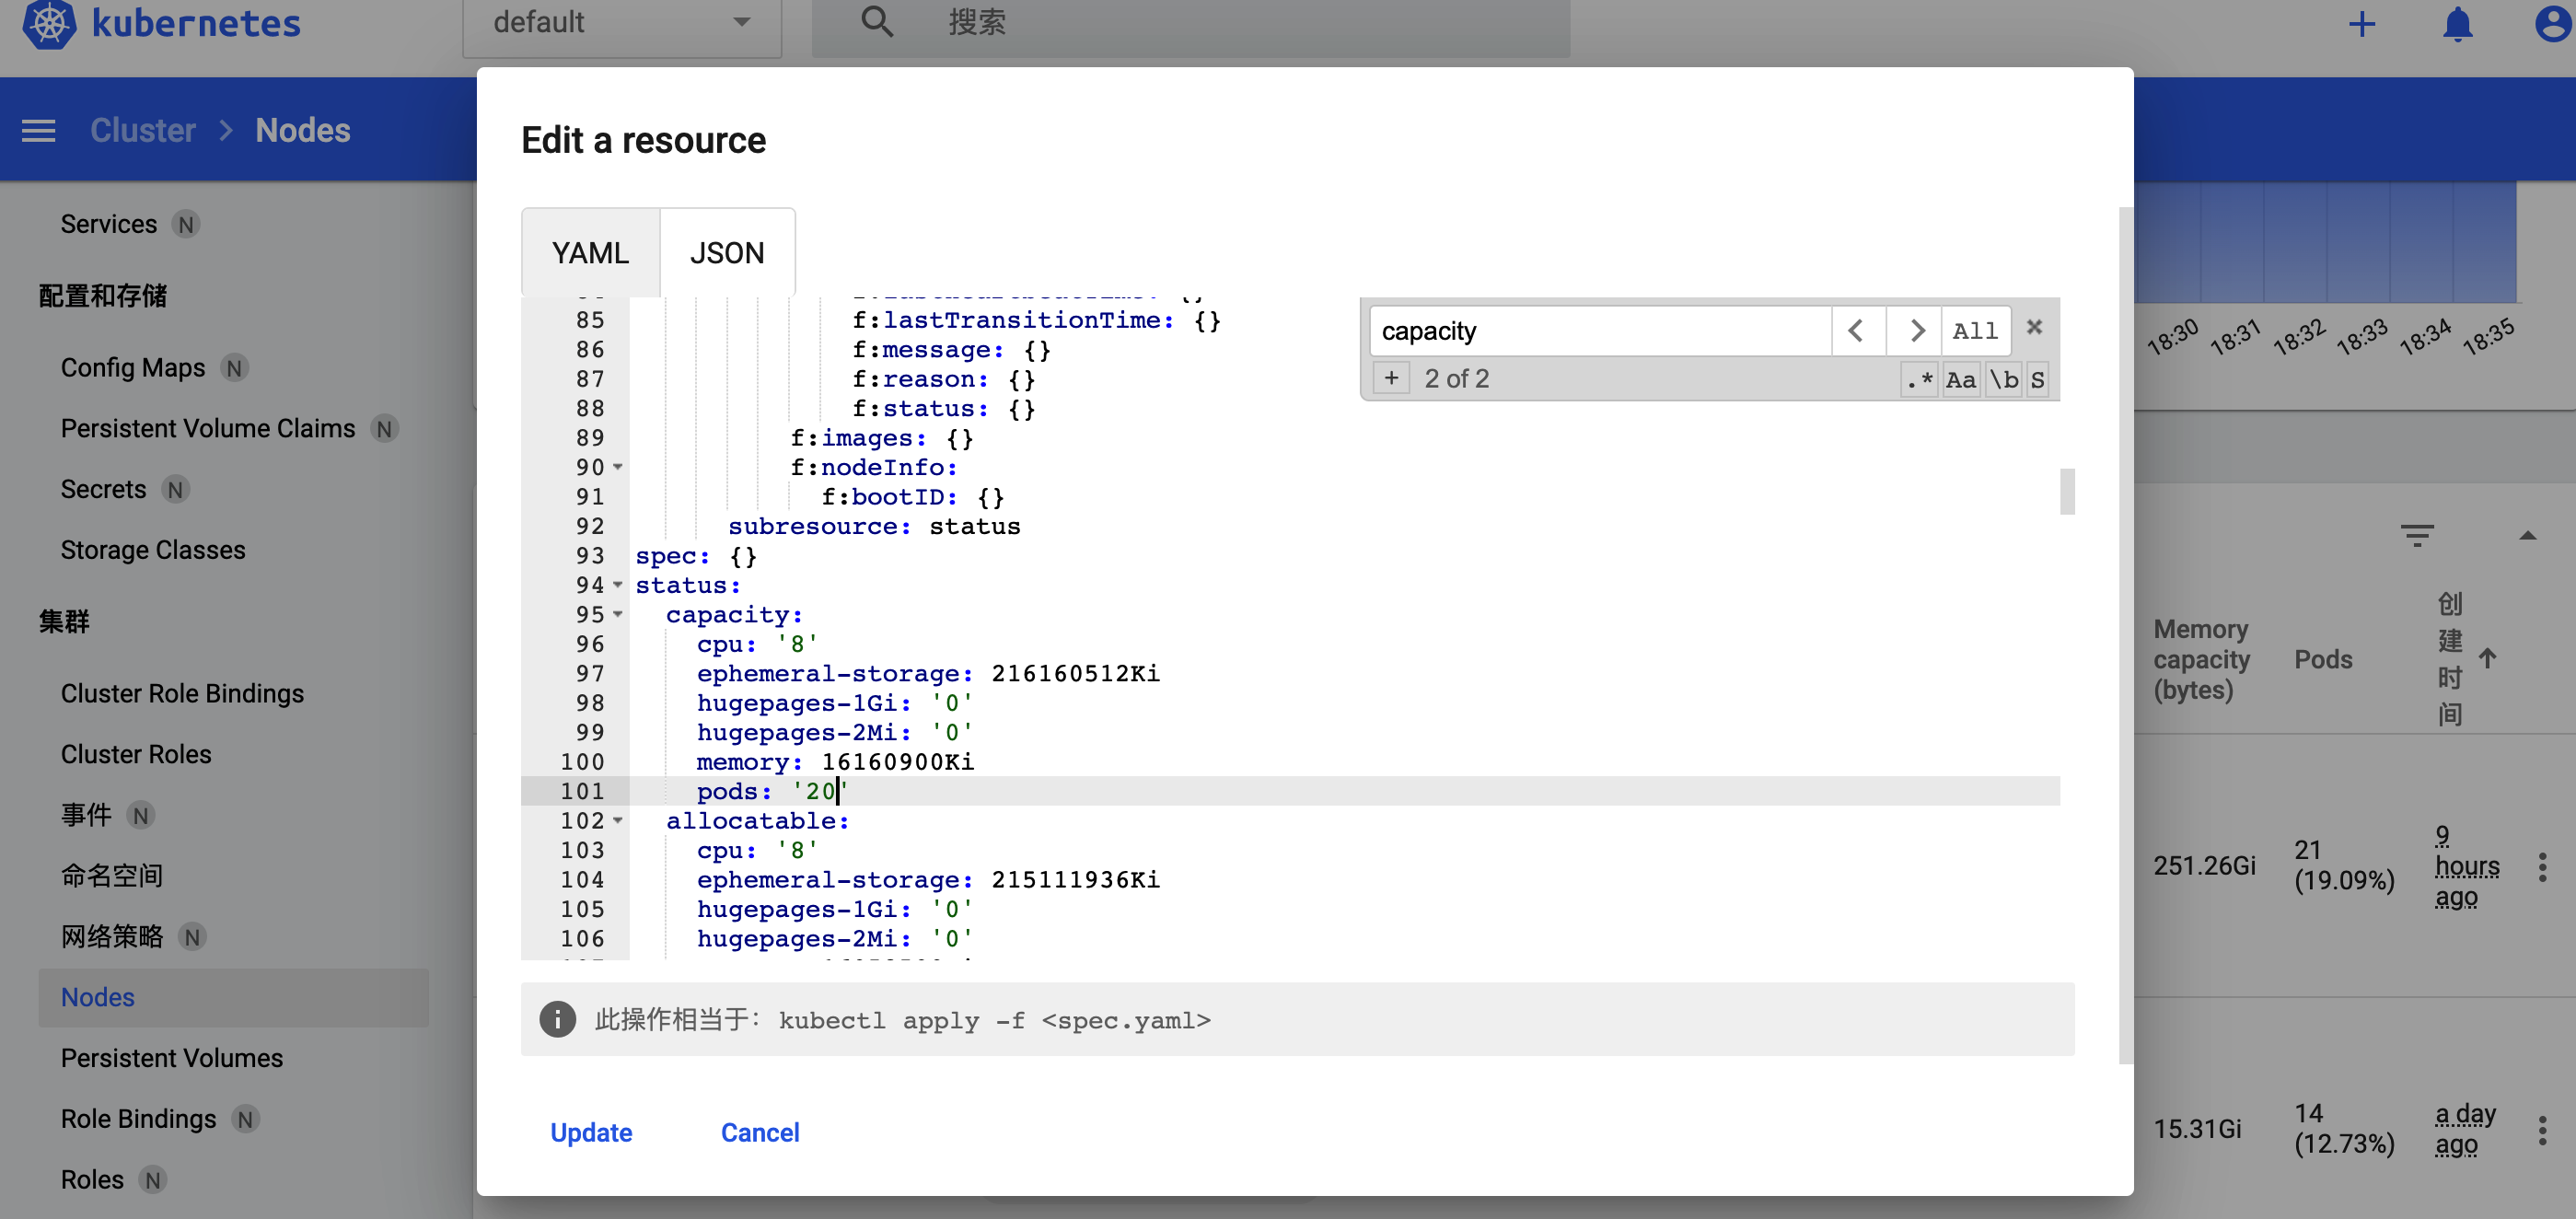
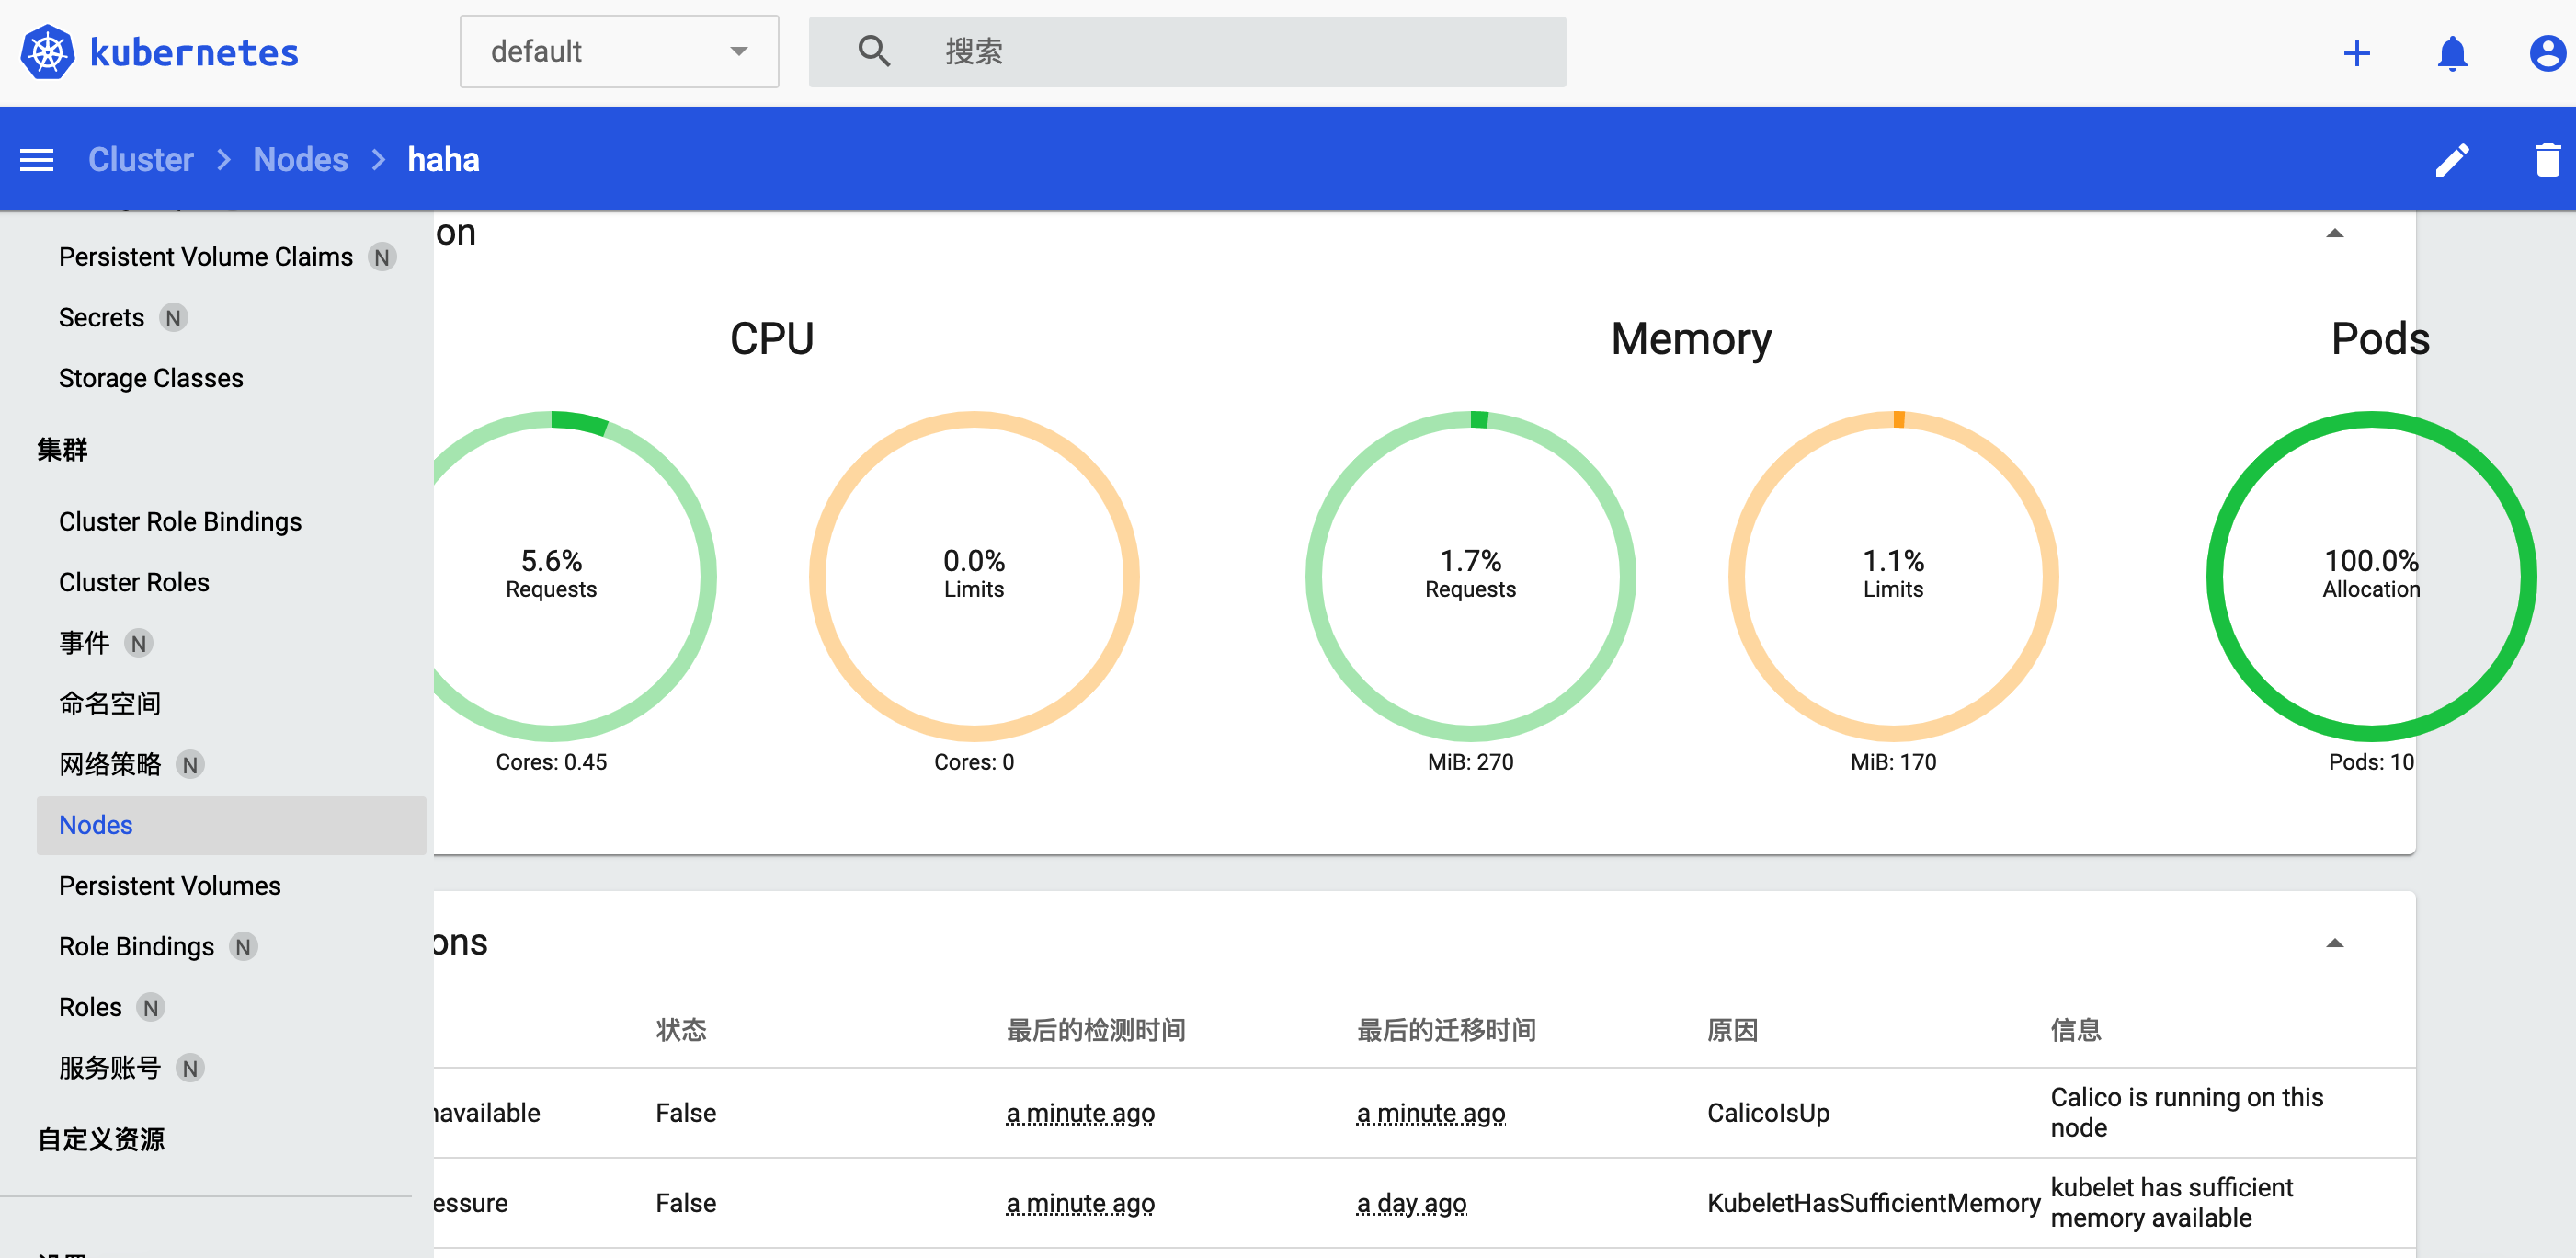
Node Capacity 是 110 ?能不能调大些?
Kubernetes v1.26 单个集群支持的最大节点数为 5,000。 更具体地说,Kubernetes 旨在适应满足以下所有标准的配置:
- 每个节点的 Pod 数量不超过 110
- 节点数不超过 5,000
- Pod 总数不超过 150,000
- 容器总数不超过 300,000
可从图形界面改(好像不生效):
又对应这篇文章:
The Kubernetes 110 pod limit per node
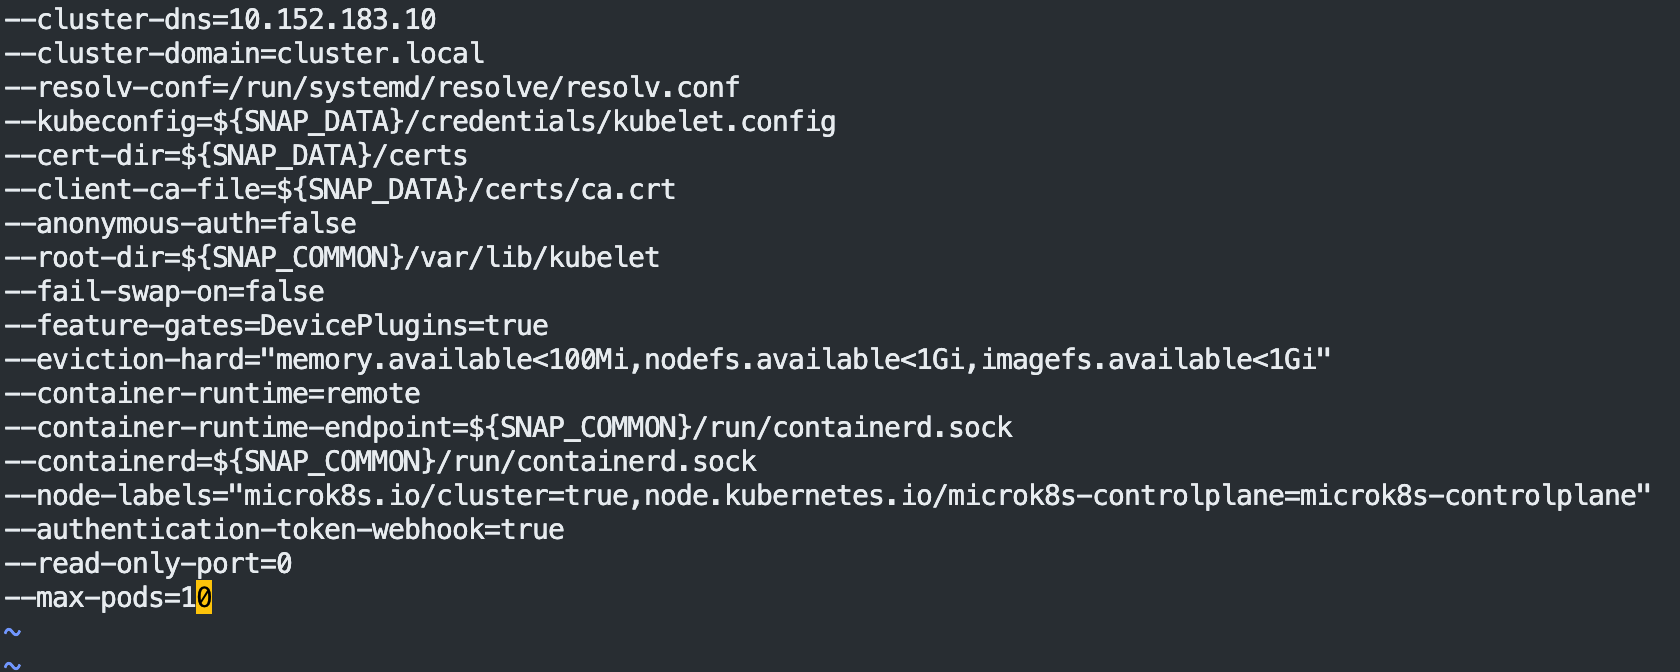
/var/snap/microk8s/current/args/kubelet
Add line to the bottom (limit to 200 pods):
--max-pods=200-resolv-conf=/run/systemd/resolve/resolv.conf(已经有了啊)
And restart the service
相当有效!!!!!
登录能不能方便一点?
microk8s kubectl describe secret -n kube-system microk8s-dashboard-token
eyJhbGciOiJSUzI1NiIsImtpZCI6IllJVm5ZclljcDE5WUxxT1dMYS01d3FkbG44WEc4TVZrSzRyY1pOMDlmdFEifQ.eyJpc3MiOiJrdWJlcm5ldGVzL3NlcnZpY2VhY2NvdW50Iiwia3ViZXJuZXRlcy5pby9zZXJ2aWNlYWNjb3VudC9uYW1lc3BhY2UiOiJrdWJlLXN5c3RlbSIsImt1YmVybmV0ZXMuaW8vc2VydmljZWFjY291bnQvc2VjcmV0Lm5hbWUiOiJtaWNyb2s4cy1kYXNoYm9hcmQtdG9rZW4iLCJrdWJlcm5ldGVzLmlvL3NlcnZpY2VhY2NvdW50L3NlcnZpY2UtYWNjb3VudC5uYW1lIjoiZGVmYXVsdCIsImt1YmVybmV0ZXMuaW8vc2VydmljZWFjY291bnQvc2VydmljZS1hY2NvdW50LnVpZCI6ImFiYWMxMGIwLTQ3MDYtNGU5OS05MjRjLWNhNThiNjQxYWQ5MSIsInN1YiI6InN5c3RlbTpzZXJ2aWNlYWNjb3VudDprdWJlLXN5c3RlbTpkZWZhdWx0In0.GhXt1HsJ1QrNYhGyAHw67FucOFRxkFEzdVX6Sz-iWVjvVy9Es6zIip19DFQjN20KnL00Jki8vclGNqKiOfTpw9UbGjIUOknUwhbmmGjbHjIESKIGQKoOjYx3_q9FnOU8re03x_g74HN2vB-PAKRCpvOM4wMx-HZpCUIjWRnCDpaSsn8RfwgEMbDVa8Ccl0oANE5TuycCoLmnsxGxxBgtmzhFlOtKwYDaKM8TIJdc3CHcCefz2mrnUTsm55gzQCPpOiUS5iBfeIJOFDDoZZdw5PvyiBdTBxZAqFTTUb44CMybZCjyzjZhEwq9wykGQeWoKvyIW5VGZ-TFesZ2zGoKbA
设置 master 节点不参与调度
kubectl cordon haha
取消则是:kubectl uncordon haha
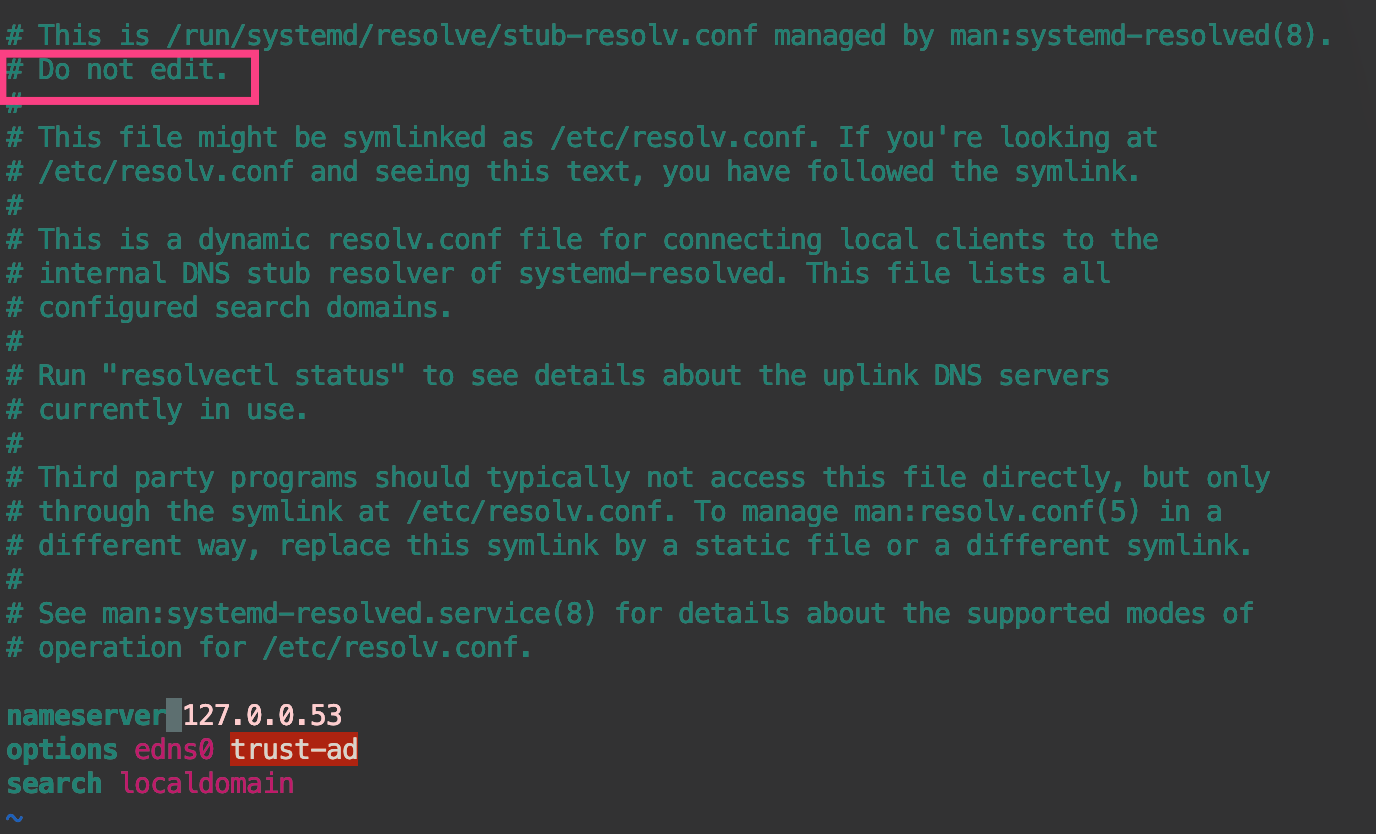
CoeDNS 已知问题
有些 Linux 发行版本(比如 Ubuntu)默认使用一个本地的 DNS 解析器(systemd-resolved)。 systemd-resolved 会用一个存根文件(Stub File)来覆盖 /etc/resolv.conf 内容, 从而可能在上游服务器中解析域名产生转发环(forwarding loop)。 这个问题可以通过手动指定 kubelet 的 --resolv-conf 标志为正确的 resolv.conf(如果是 systemd-resolved, 则这个文件路径为 /run/systemd/resolve/resolv.conf)来解决。 kubeadm 会自动检测 systemd-resolved 并对应的更改 kubelet 的命令行标志。
microk8s 已解决,但我想换上游 DNS为 8.8.8.8,参考:2022学习0616【K8S coredns日志报错】_qq_43264065的博客-CSDN博客,
kubectl edit cm coredns -n kube-system -o yaml,然后立马好使:

kubectl logs --namespace=kube-system -l k8s-app=kube-dns

cert-manager
后期 gitlab 好像是需要的。
使用 cert-manager 签发免费证书 | kubernetes 学习笔记
microk8s enable cert-manager
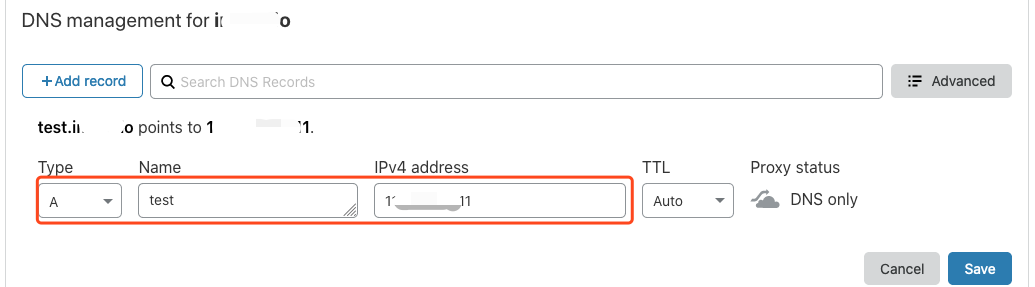
采用 DNS 验证方式。
首先必须配置这个 DNS,登录你的 DNS 提供商后台,配置域名的 DNS A 记录,指向你需要证书的后端服务对外暴露的 IP 地址。(不管这个 IP 是局域网还是广域网)
apiVersion: cert-manager.io/v1
kind: ClusterIssuer
metadata:
  name: letsencrypt
spec:
  acme:
    privateKeySecretRef:
      name: letsencrypt-account-key
    server: https://acme-v02.api.letsencrypt.org/directory
    solvers:
    - dns01:
        cloudflare:
          email: [email protected] # 替换成你的 cloudflare 邮箱账号,API Token 方式认证非必需,API Keys 认证是必需
          apiTokenSecretRef:
            key: api-token
            name: cloudflare-api-token-secret # 引用保存 cloudflare 认证信息的 Secret
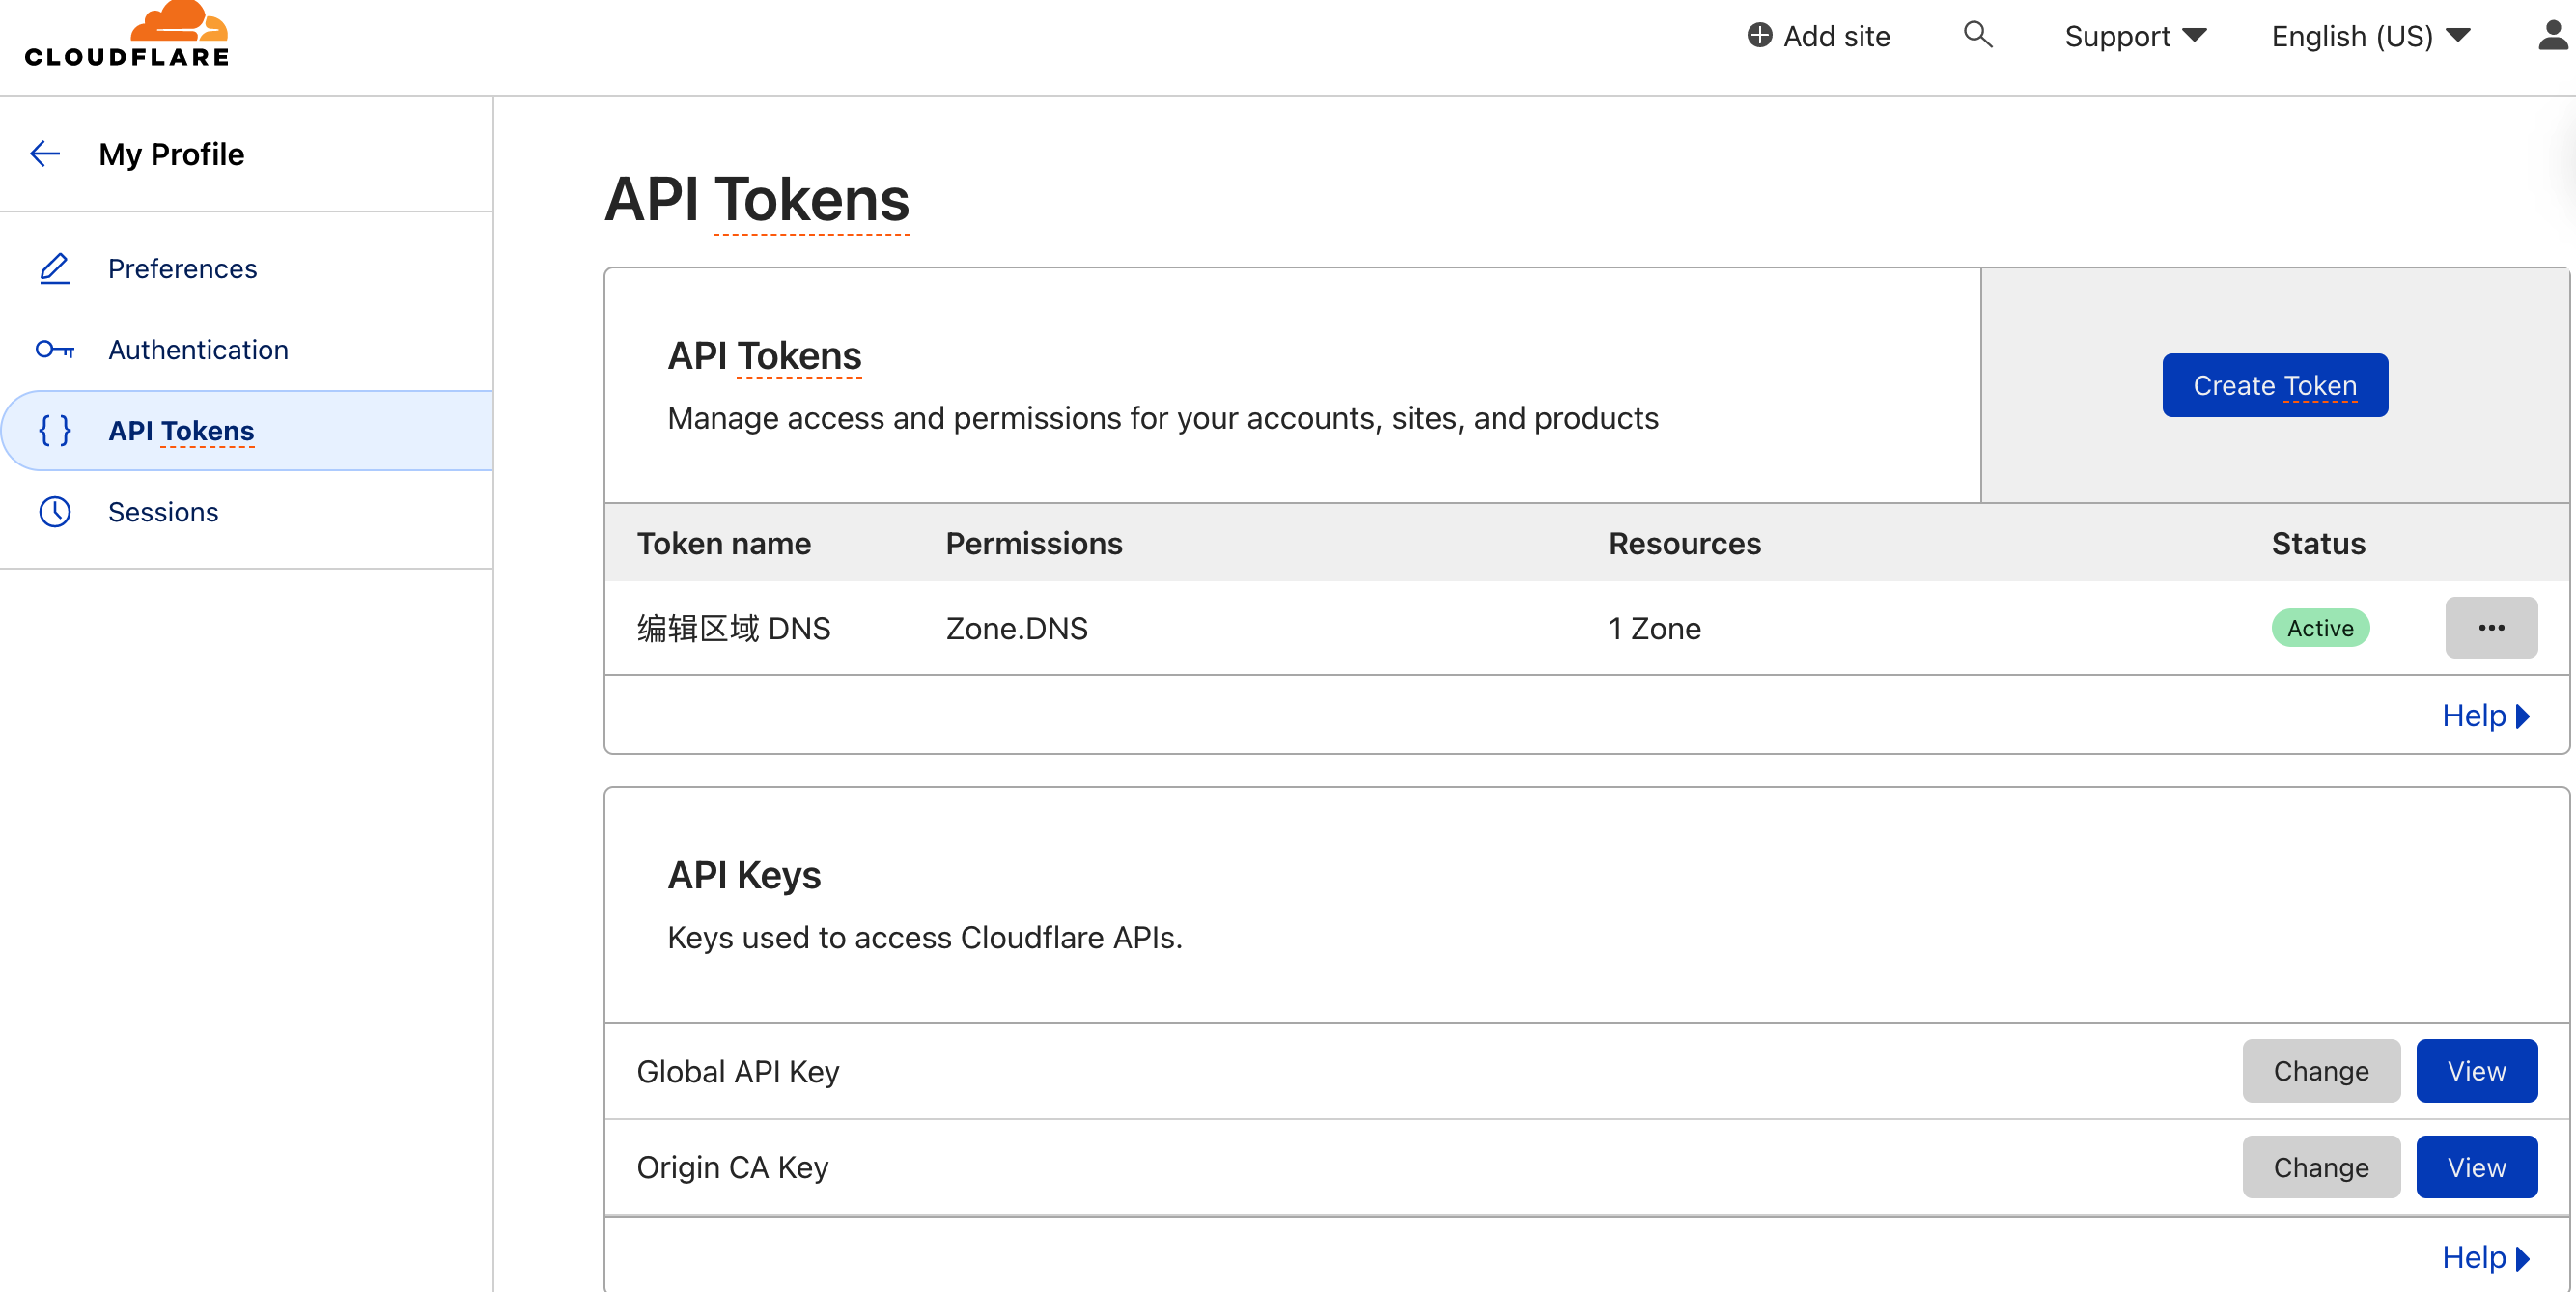
点到 My Profile > API Tokens > Create Token来创建 Token,选择 zone DNS
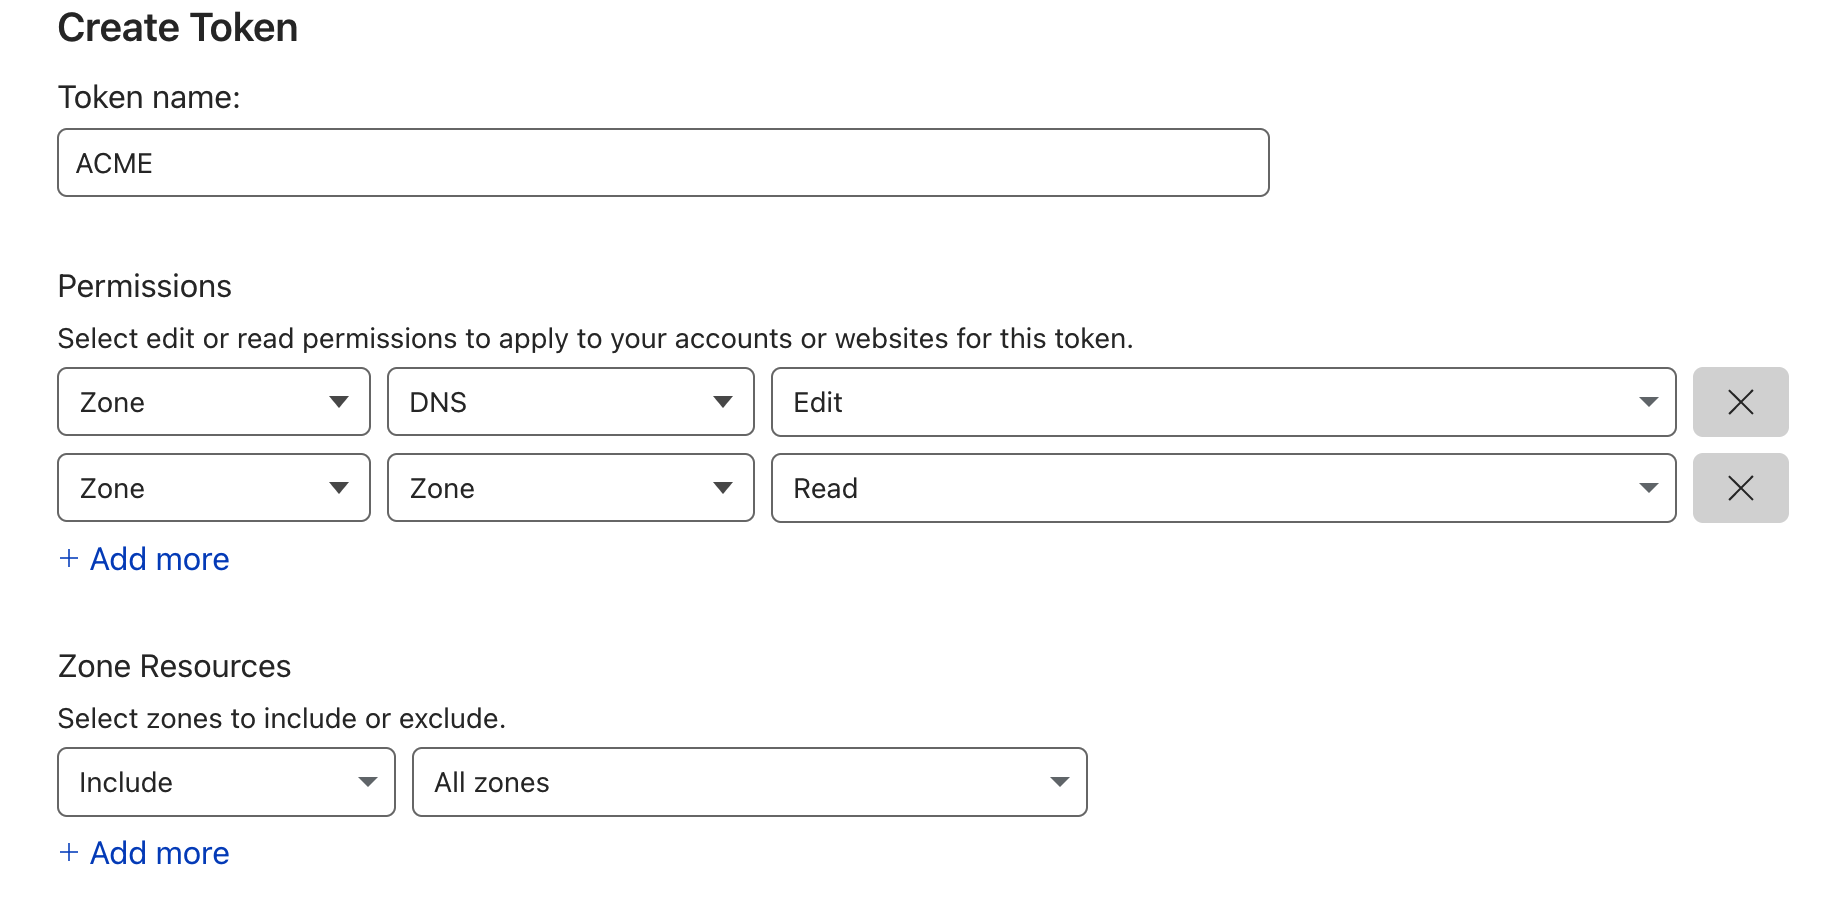
- Permissions:
Zone - DNS - EditZone - Zone - Read
- Zone Resources:
Include - All Zones
Token 需要保存到 Secret 中:
apiVersion: v1
kind: Secret
metadata:
  name: cloudflare-api-token-secret
  namespace: cert-manager  # 需要在这个命名空间
type: Opaque
stringData:
  api-token: <API Token> # 粘贴 Token 到这里,不需要 base64 加密。
创建证书(单独颁发证书,其实是一种手动的方式,一般不这么使用,但这却能加深我们对这整套流程的理解。):
apiVersion: cert-manager.io/v1
kind: Certificate
metadata:
  name: test-mydomain-com
  namespace: default
spec:
  dnsNames:
  - test.mydomain.com # 要签发证书的域名
  issuerRef:
    kind: ClusterIssuer
    name: letsencrypt # 引用 ClusterIssuer,指示采用 dns01 方式进行校验
  secretName: test-mydomain-com-tls # 最终签发出来的证书会保存在这个 Secret 里面
创建好证书 后,等一小会儿,我们可以 kubectl 查看是否签发成功(前提域名要创建好):
kubectl get certificate -A
如果 READY 为 False 表示失败,可以通过 describe 查看 event 来排查失败原因:
kubectl describe **cert** test-mydomain-com
更多的时候我们不需要手动创建 Certificate,只需要在创建 Ingress 时作好对应的注释,cert-manager 就将自动为我们创建。对应的 yaml 文件大致是长这样的:
apiVersion: networking.k8s.io/v1
kind: Ingress
metadata:
  annotations:
    # add an annotation indicating the issuer to use.
    cert-manager.io/cluster-issuer: nameOfClusterIssuer
  name: myIngress
  namespace: myIngress
spec:
  rules:
  - host: example.com
    http:
      paths:
      - pathType: Prefix
        path: /
        backend:
          service:
            name: myservice
            port:
              number: 80
  tls: # < placing a host in the TLS config will determine what ends up in the cert's subjectAltNames
  - hosts:
    - example.com
    secretName: myingress-cert # < cert-manager will store the created certificate in this secret.
创建泛域名证书
apiVersion: cert-manager.io/v1
kind: Certificate
metadata:
  name: all-yuhan-tech-tls
spec:
  dnsNames:
  - yuhan.tech
  - "*.yuhan.tech"
  issuerRef:
    name: letsencrypt
    kind: ClusterIssuer
  secretName: all-yuhan-tech-tls
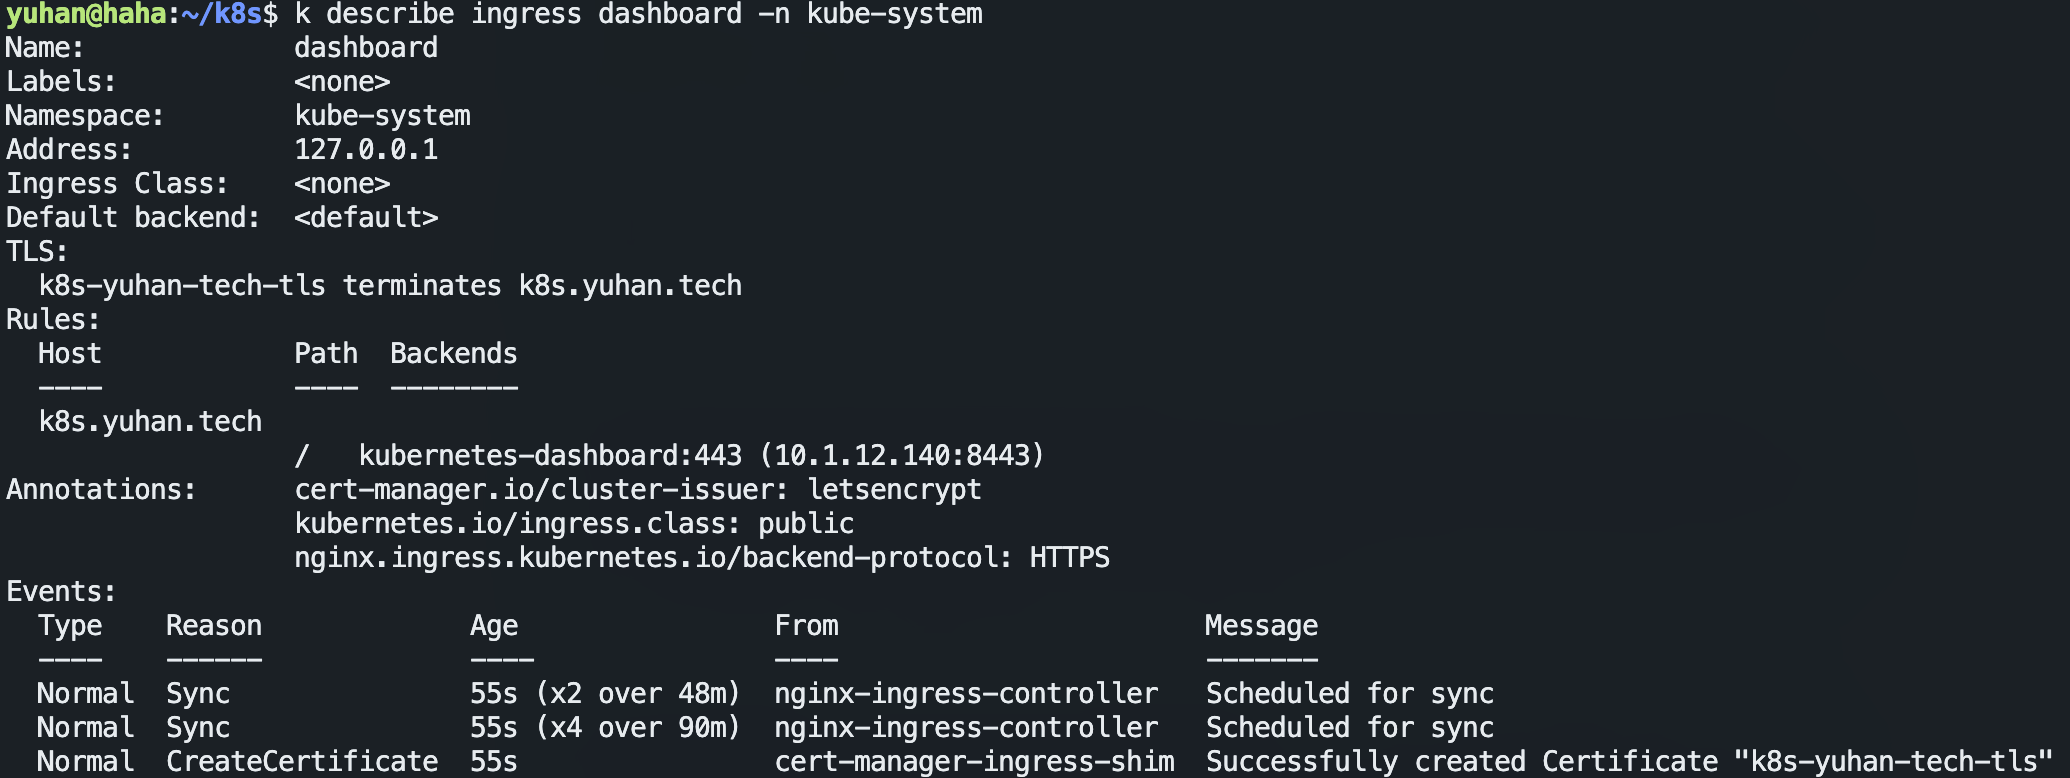
遇到问题了怎么排查?
kubectl get certificate
kubectl get certificaterequest
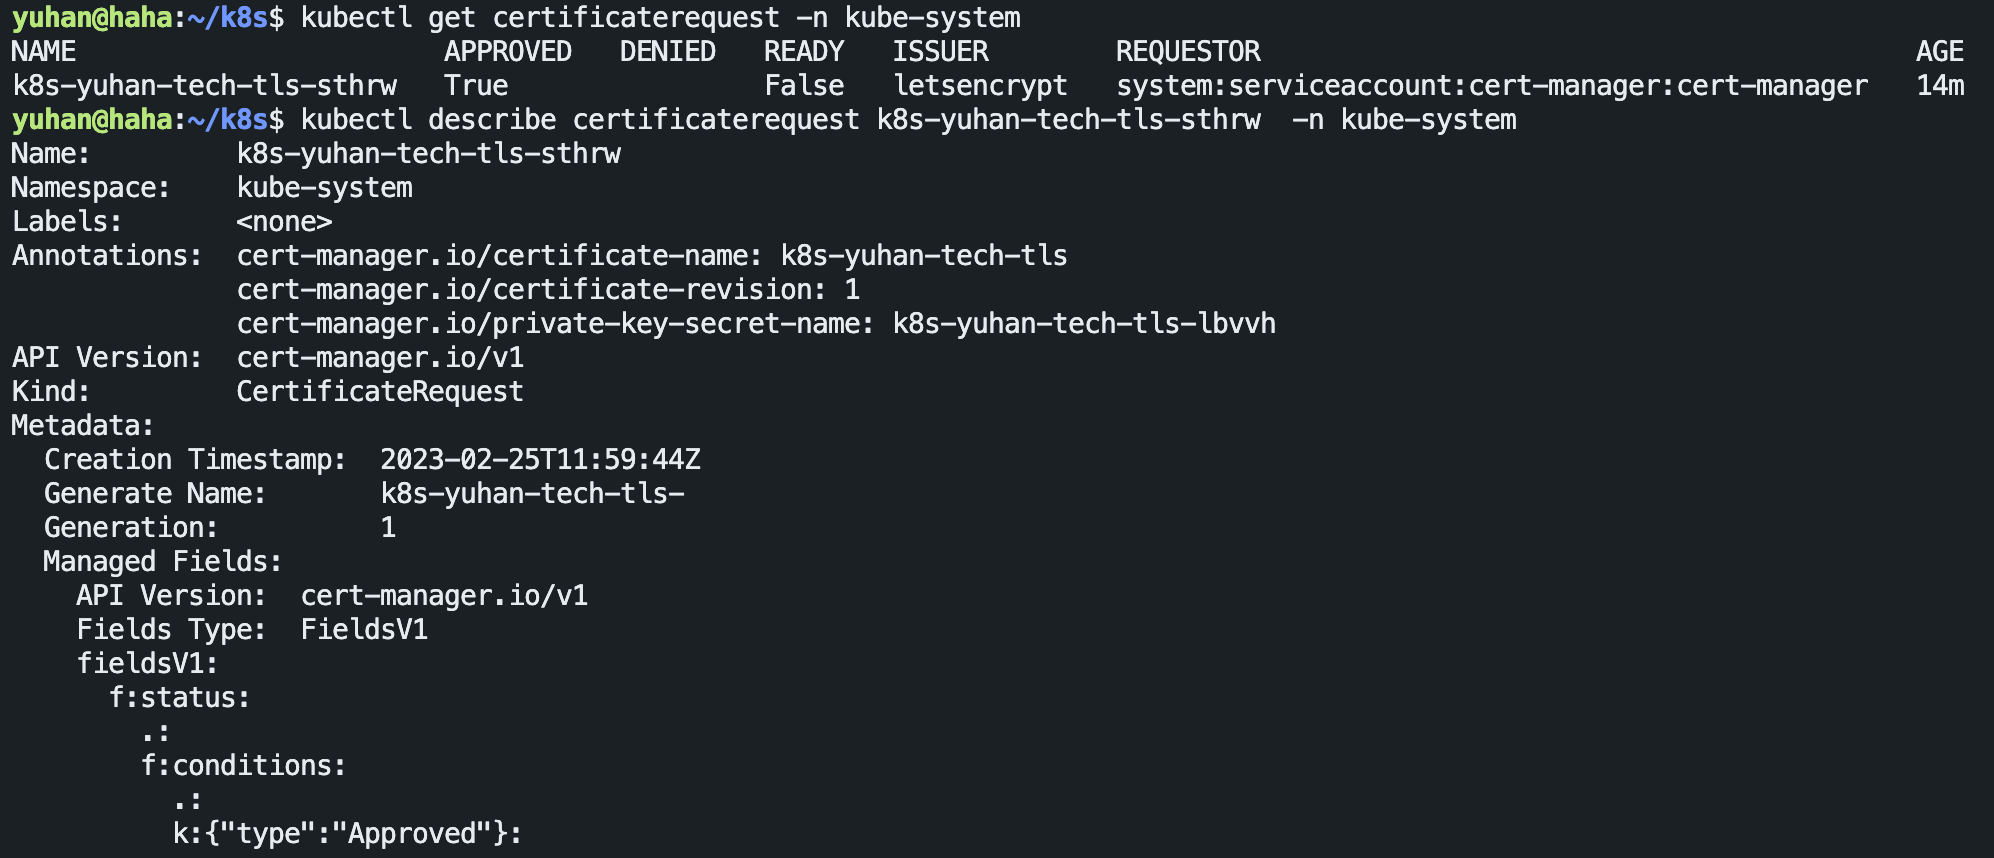
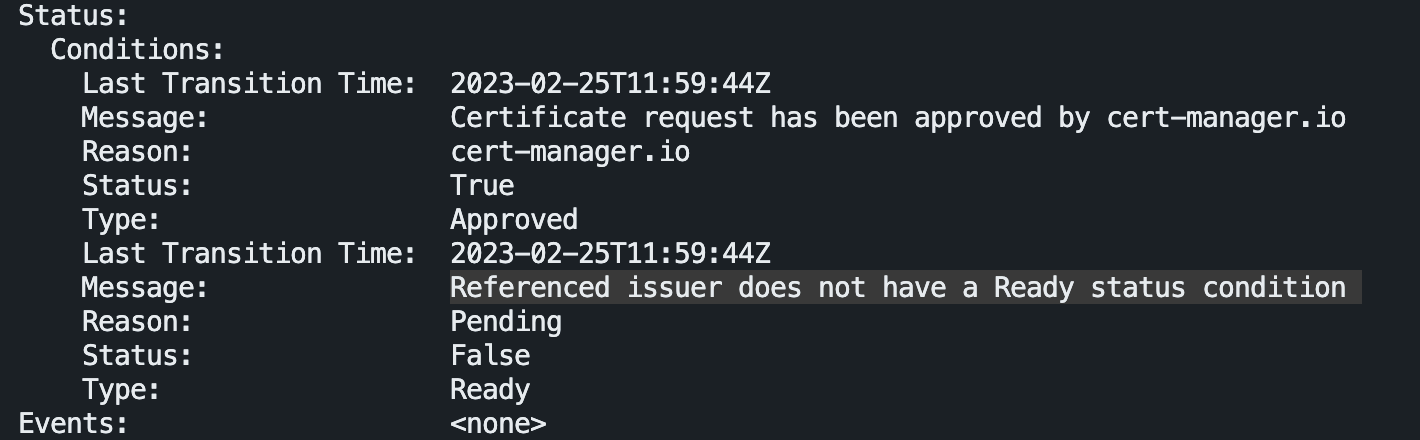
哦吼,再看 cluster issuer:
kubectl get clusterissuer
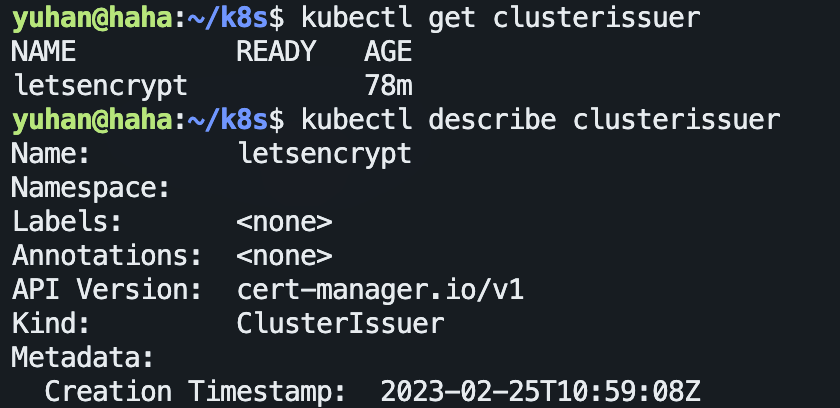

感觉又是代理的锅:

果然,IP 又被挤掉了:

把老 cert 删除,然后 k8s 会自动新建:
k delete cert k8s-yuhan-tech-tls -n kube-system
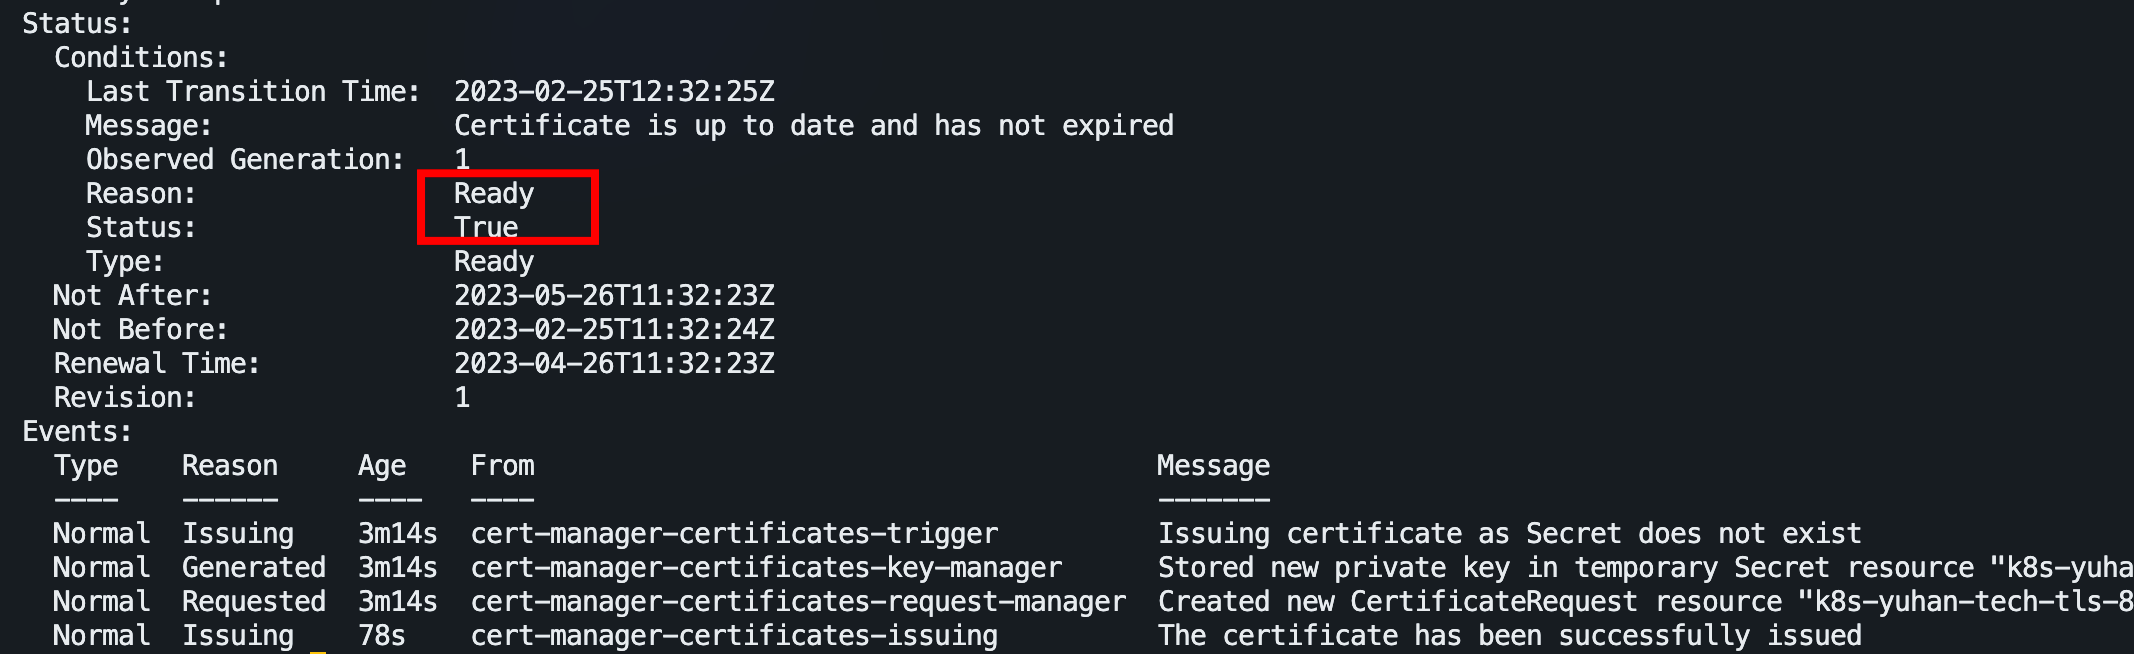
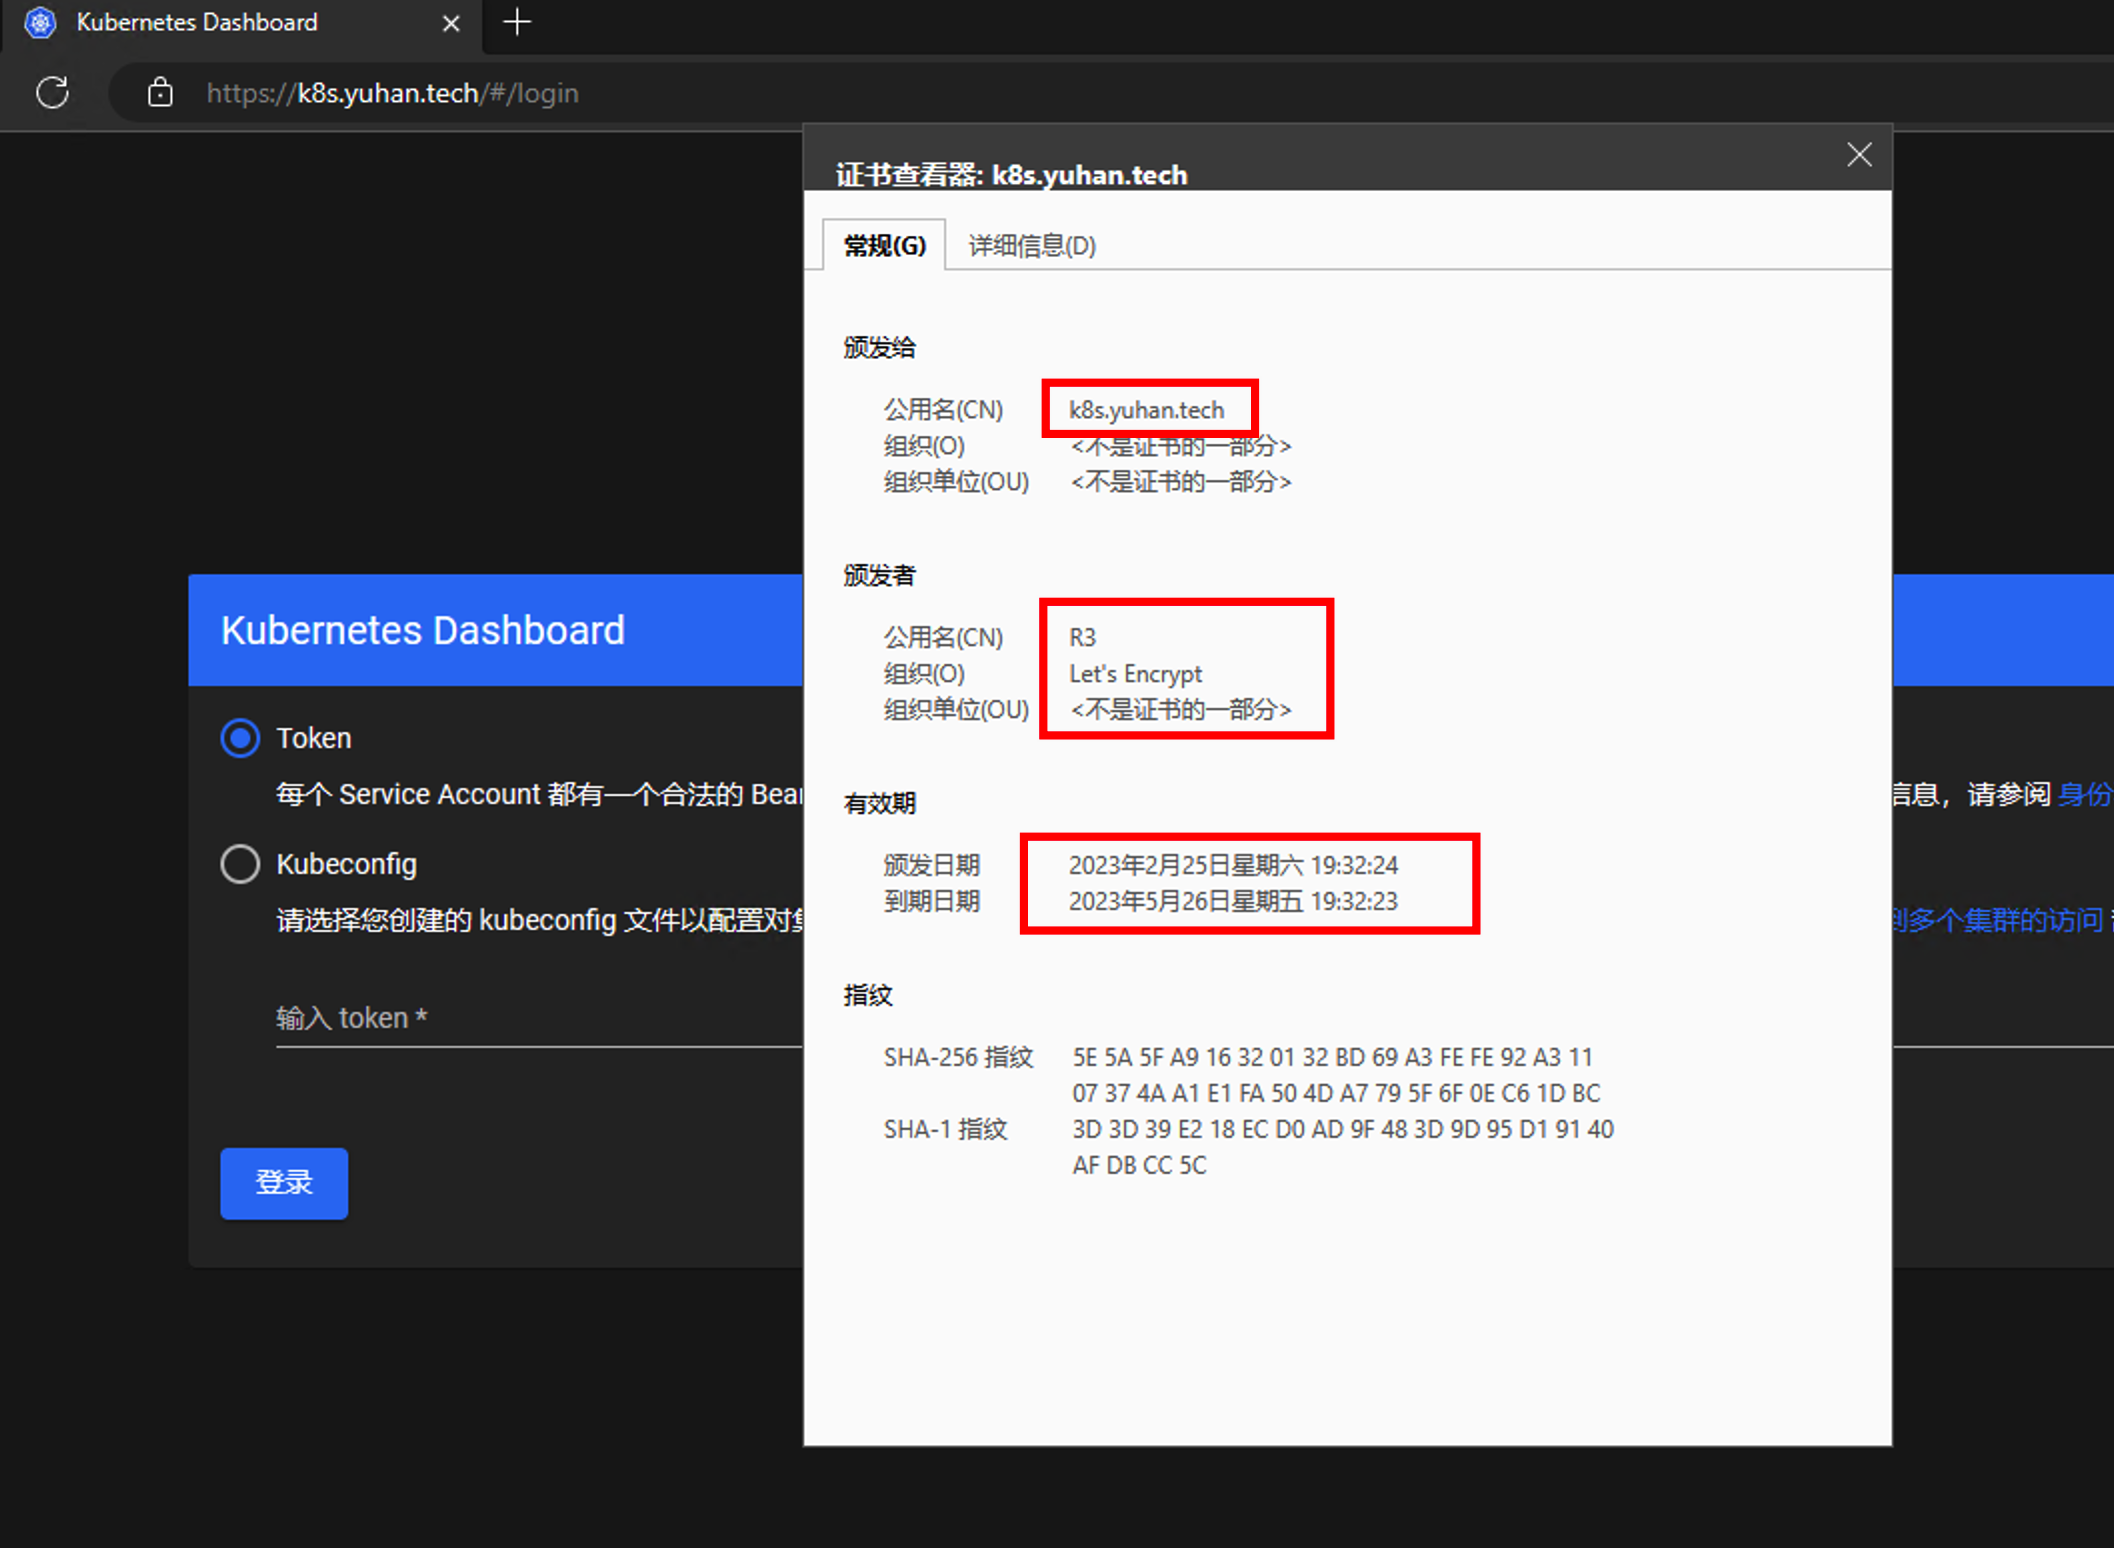
大功告成!如果之前改过 /etc/hosts 的域名, 记得删除哦
volume
得有个本地持久化卷!(但我感觉用 NFS 更好呢)
local 卷所代表的是某个被挂载的本地存储设备,例如磁盘、分区或者目录。
local 卷只能用作静态创建的持久卷。不支持动态配置。
👉注意,
fdisk /dev/sda并mkfs.xfs之后需要mount /dev/sda6 /data,但重启系统之后之前的mount就没了,因此需开机自动挂载!blkid获取 UUID ,然后编写/etc/fstab文件。 详情查看 《Linux 速查表》有关磁盘管理的“开机自动挂载分区”一节。
NFS 服务器启动
sudo apt install nfs-kernel-server
👀注意各个节点上都得有 nfs-common,不然 mount 不上:
sudo apt install nfs-common
sudo systemctl start nfs-kernel-server.service
把路径加到 /etc/exports 文件即可共享,该文件内容类似:
/srv     *(ro,sync,subtree_check)
/home    *.hostname.com(rw,sync,no_subtree_check)
/scratch *(rw,async,no_subtree_check,no_root_squash)

# "insecure"必须有,否则mac上的finder会报找不到服务器的错误。
/data *.yuhan.tech(rw,sync,no_subtree_check,no_root_squash,insecure)
sudo exportfs -a 使配置生效!
注意 *.hostname.com将匹配 foo.hostname.com但不匹配 foo.bar.my-domain.com
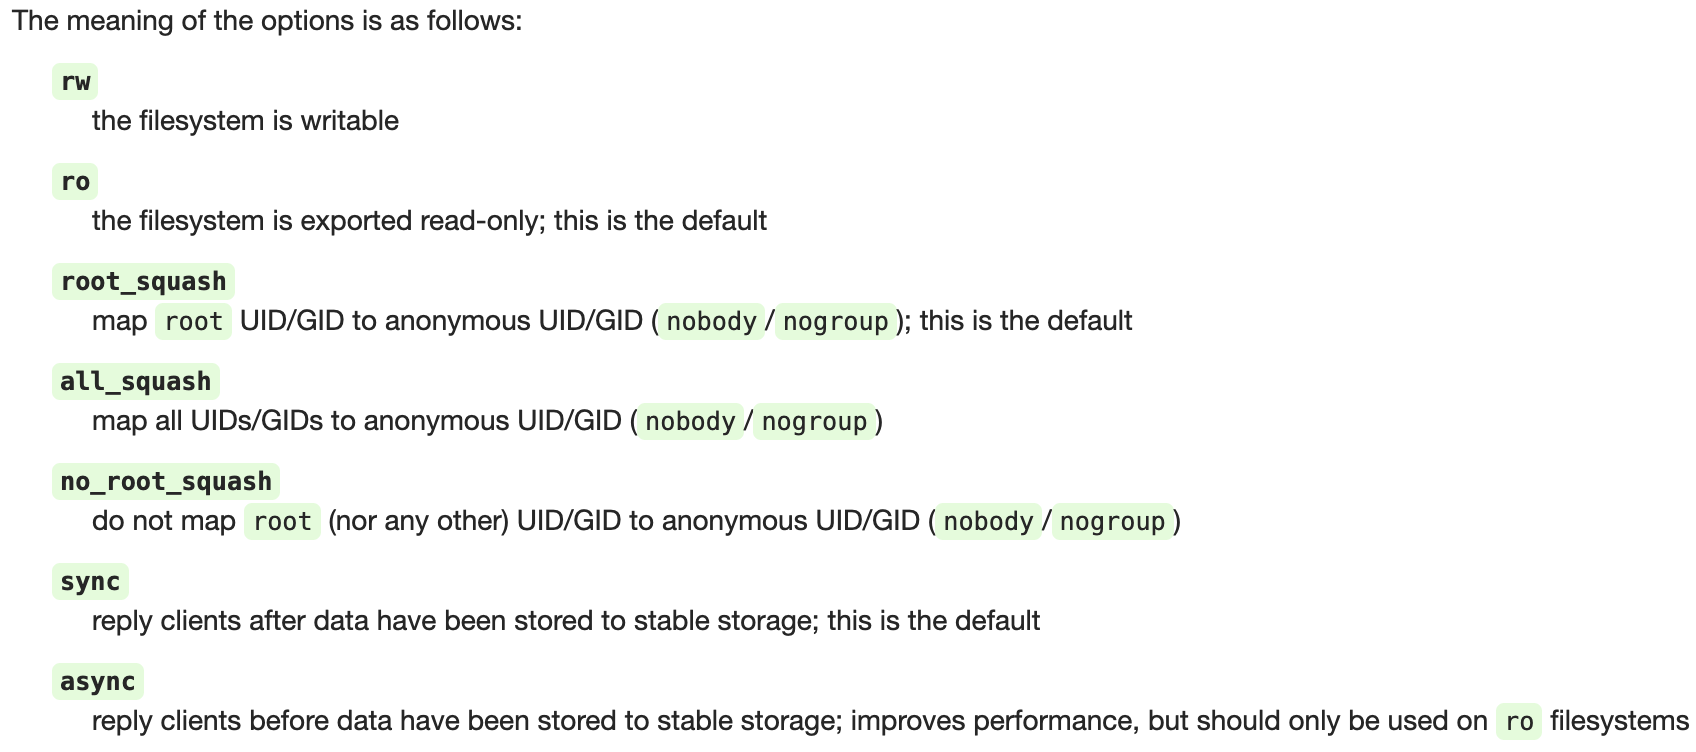
no_root_squash adds a convenience to allow root-owned files to be modified by any client system’s root user
subtree_check and no_subtree_check enables or disables a security verification that subdirectories a client attempts to mount for an exported filesystem are ones they’re permitted to do so.
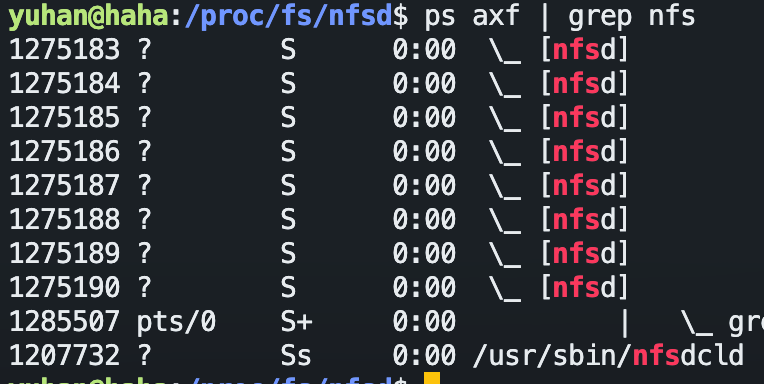
使用 service 命令无法看到 nfs 运行状态,毕竟它其实是内核应用:
mac 上试试:
showmount -e k8s.yuhan.tech

mount: /Users/yuhanliu/data failed with 13,失败
但是另一个 ubuntu 可以(用umount取消挂载):

本地测试也没问题:
sudo mount -t nfs localhost:/data /nfs
To check whether the kernel NFS server is actually running, run ps axf or htop and search for kthreads named “[nfsd]”. You can also check information found in /proc/fs/nfsd:
nfs卷的内容在删除 Pod 时会被保存,卷只是被卸载。 这意味着 nfs卷可以被预先填充数据,并且这些数据可以在 Pod 之间共享。
apiVersion: v1
kind: Pod
metadata:
  name: test-pd
spec:
  containers:
  - image: registry.k8s.io/test-webserver
    name: test-container
    volumeMounts:
    - mountPath: /my-nfs-data
      name: test-volume
  volumes:
  - name: test-volume
    nfs:
      server: my-nfs-server.example.com
      path: /my-nfs-volume
      readOnly: true
建立一个 storage class:
apiVersion: storage.k8s.io/v1
kind: StorageClass
metadata:
  name: haha-nfs
provisioner: example.com/external-nfs
parameters:
  server: nfs.yuhan.tech
  path: /data
  readOnly: "false"
创建一个 PVC:
apiVersion: v1
kind: PersistentVolumeClaim
metadata:
  name: haha-nfs-claim
spec:
  accessModes:
    - ReadWriteOnce
  volumeMode: Filesystem
  resources:
    requests:
      storage: 200Gi
  storageClassName: haha-nfs
然后可这么使用:
apiVersion: v1
kind: Pod
metadata:
  name: mypod
spec:
  containers:
    - name: myfrontend
      image: nginx
      volumeMounts:
      - mountPath: "/var/www/html"
        name: mypd
  volumes:
    - name: mypd
      persistentVolumeClaim:
        claimName: haha-nfs-claim
但还需要 provisioner ,NFS 驱动呢。
所以一般我们不手动搞,只要有一个 NFS server 就好了。
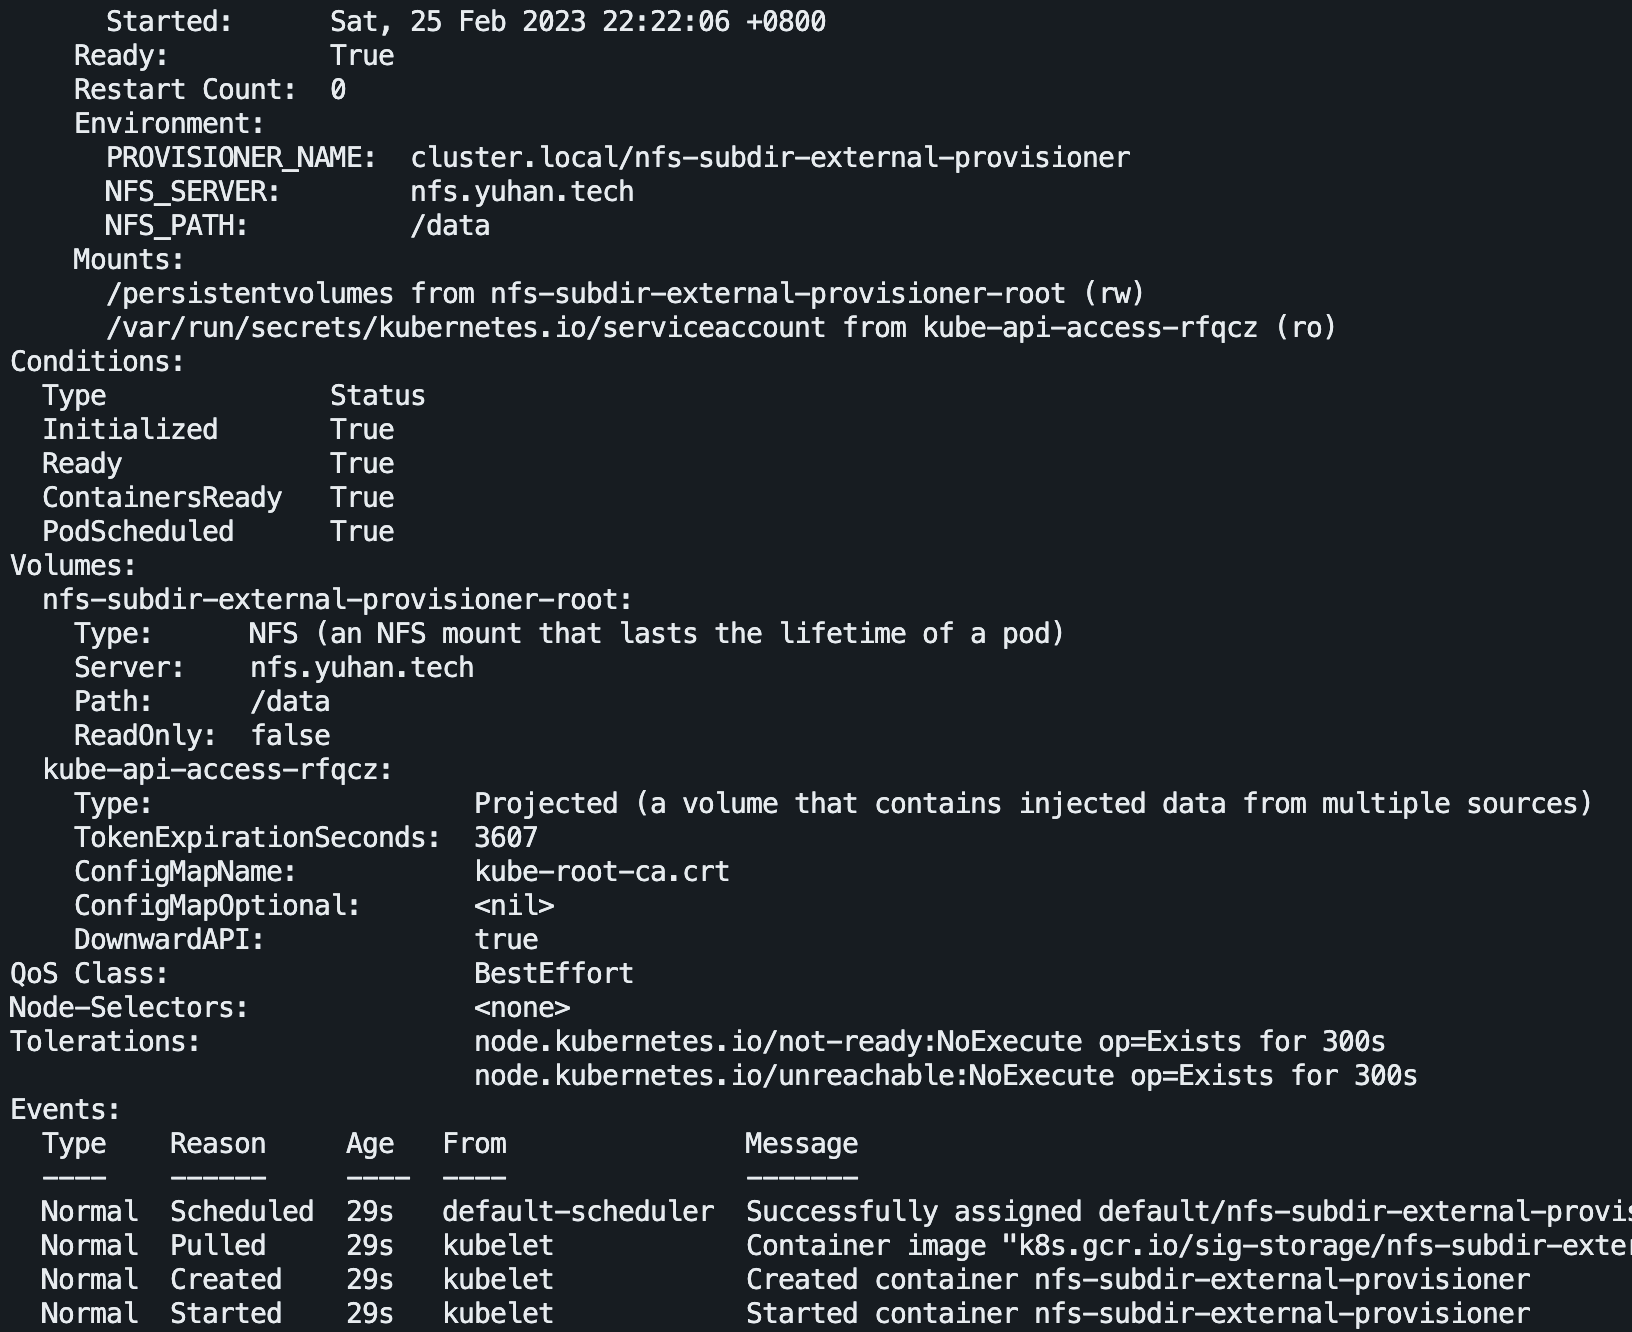
NFS 驱动搞成 provisioner 的服务

helm repo add nfs-subdir-external-provisioner https://kubernetes-sigs.github.io/nfs-subdir-external-provisioner/
helm install nfs-subdir-external-provisioner nfs-subdir-external-provisioner/nfs-subdir-external-provisioner **--set nfs.server=nfs.yuhan.tech --set nfs.path=/data**
helm upgrade nfs-subdir-external-provisioner nfs-subdir-external-provisioner/nfs-subdir-external-provisioner -f nfs-subdir-external-provisioner-0.yml

helm upgrade nfs-subdir-external-provisioner-1 nfs-subdir-external-provisioner/nfs-subdir-external-provisioner -f nfs-subdir-external-provisioner-1.yml
自动就创建了存储类、pod:
kubectl get storageclass

PostgreSQL
前提:上面的 nfs-client 弄好
helm repo add bitnami https://charts.bitnami.com/bitnami

# 创建密码,按指定的规则随机生成密码
kubectl create secret generic postgresql-secret \
  --from-literal=postgres-password=$(openssl rand -base64 18)

# 安装,nfs 这就用上了
~~helm upgrade --install \
  --set auth.existingSecret=postgresql-secret \
  --set primary.persistence.enabled=true \
  --set primary.persistence.size=50Gi \
  --set primary.persistence.storageClass=nfs-client \
  postgresql bitnami/postgresql~~

helm show values bitnami/postgresql > postgresql.yml

helm install my-postgresql bitnami/postgresql -f postgresql.yml
配置文件主要修改了:
- auth.existingSecret
- primary.persistence.size: 50Gi
- primary.persistence.storageClass: “nfs-client”
- primary.persistence.existingClaim: “postgresql-pvc”
- primary.service.type: NodePort
- primary.service.nodePorts.postgresql: “30101”
自己要提前创建 PVC:
apiVersion: v1
kind: PersistentVolumeClaim
metadata:
  name: postgresql-pvc
spec:
  accessModes:
  - ReadWriteOnce
  storageClassName: nfs-client
  resources:
    requests:
      storage: 50Gi
测试外部连接
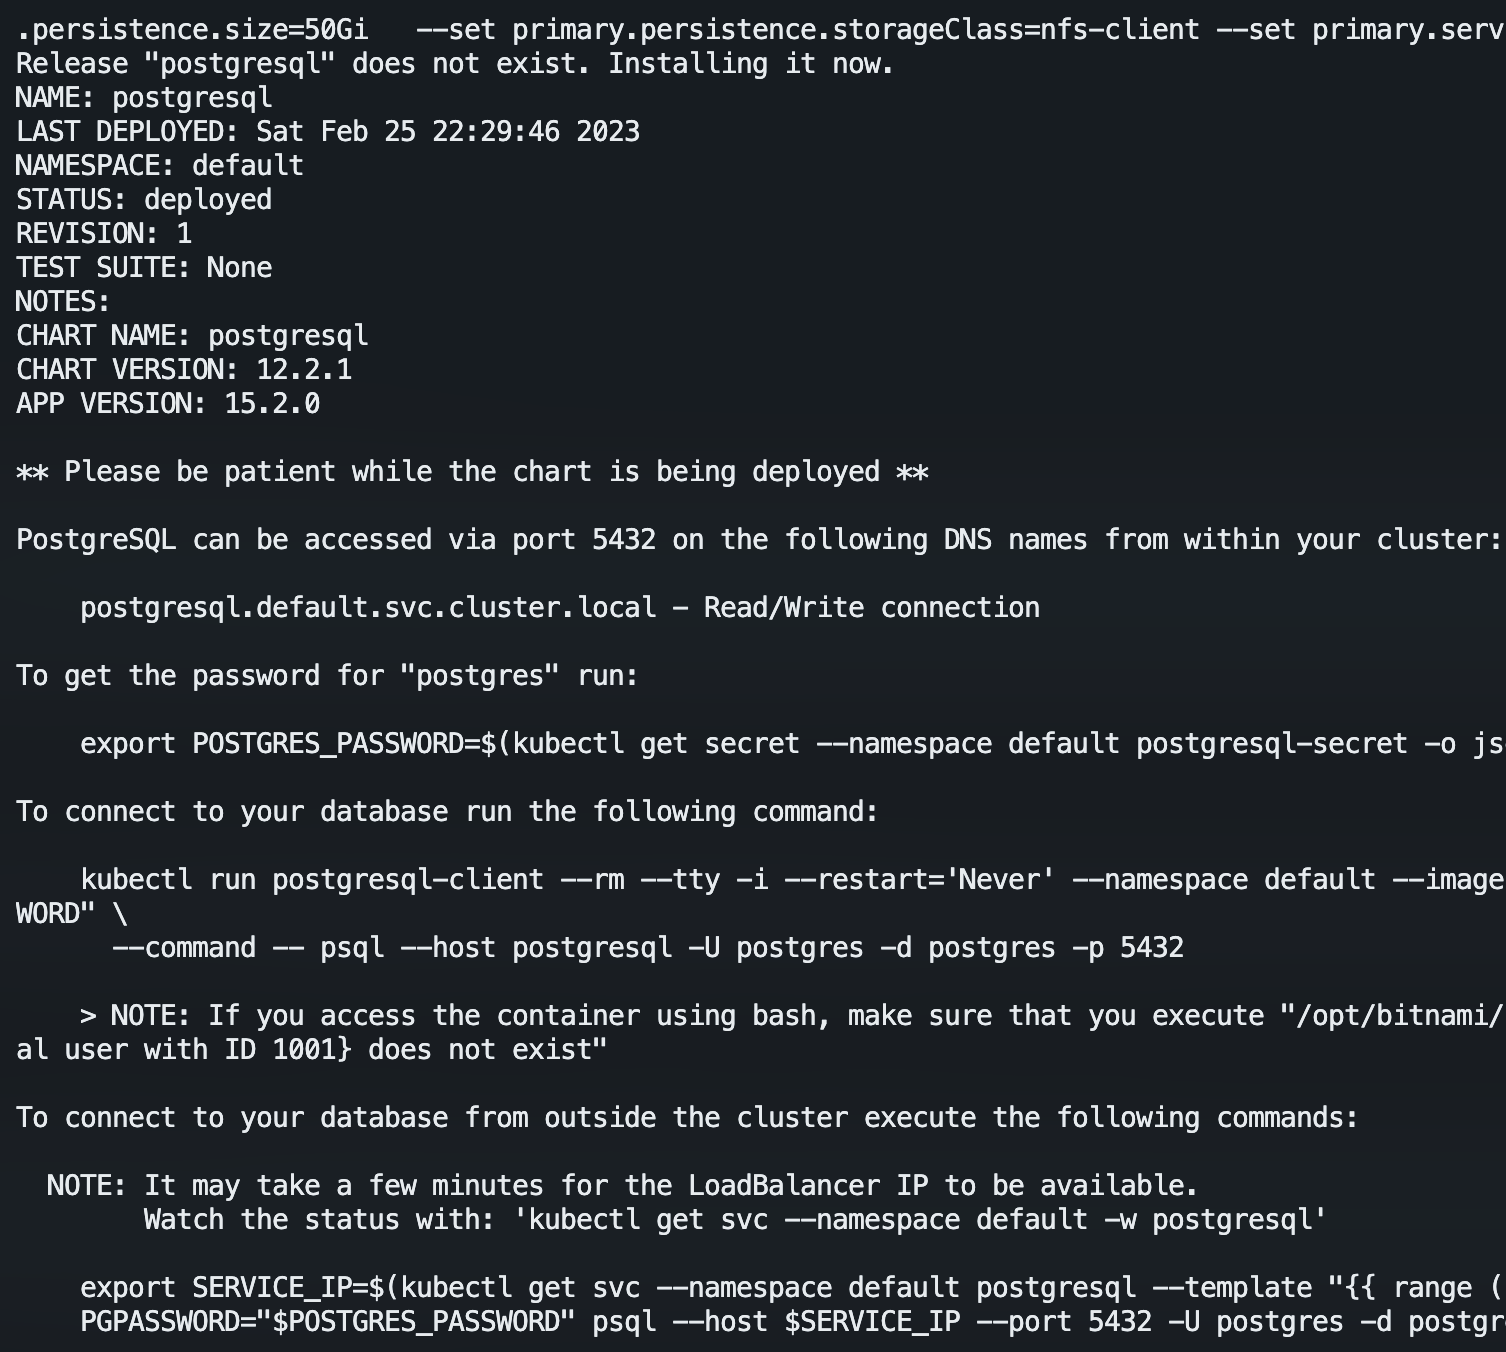
PostgreSQL can be accessed via port 5432 on the following DNS names from within your cluster:

    my-postgresql.default.svc.cluster.local - Read/Write connection

To get the password for "postgres" run:

    export POSTGRES_PASSWORD=$(kubectl get secret --namespace default my-postgresql -o jsonpath="{.data.postgres-password}" | base64 -d)

To connect to your database run the following command:

    kubectl run my-postgresql-client --rm --tty -i --restart='Never' --namespace default --image docker.io/bitnami/postgresql:15.3.0-debian-11-r24 --env="PGPASSWORD=$POSTGRES_PASSWORD" \
      --command -- psql --host my-postgresql -U postgres -d postgres -p 5432

    > NOTE: If you access the container using bash, make sure that you execute "/opt/bitnami/scripts/postgresql/entrypoint.sh /bin/bash" in order to avoid the error "psql: local user with ID 1001} does not exist"

To connect to your database from outside the cluster execute the following commands:

    export NODE_IP=$(kubectl get nodes --namespace default -o jsonpath="{.items[0].status.addresses[0].address}")
    export NODE_PORT=$(kubectl get --namespace default -o jsonpath="{.spec.ports[0].nodePort}" services my-postgresql)
    PGPASSWORD="$POSTGRES_PASSWORD" psql --host $NODE_IP --port $NODE_PORT -U postgres -d postgres
按照上面的命令,成功从外部连上:
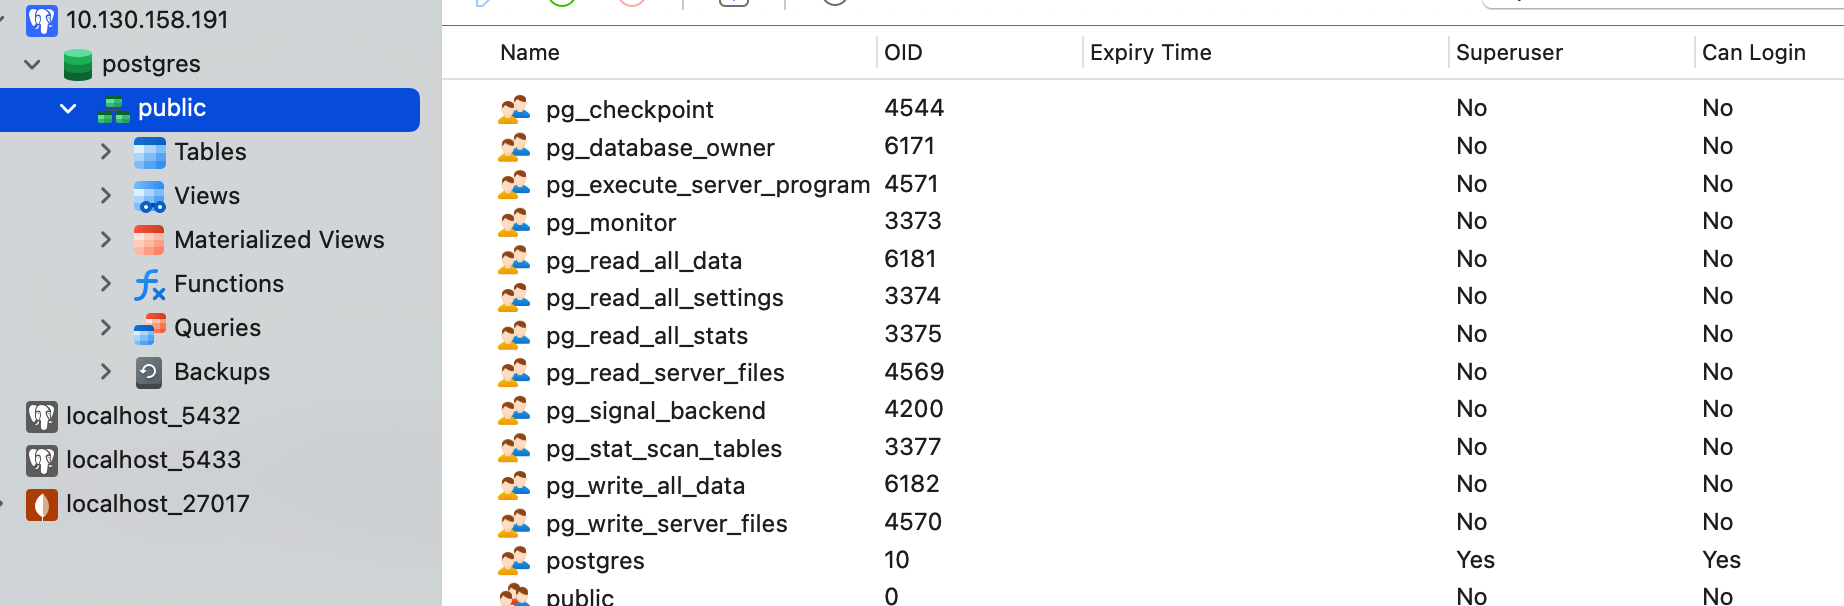
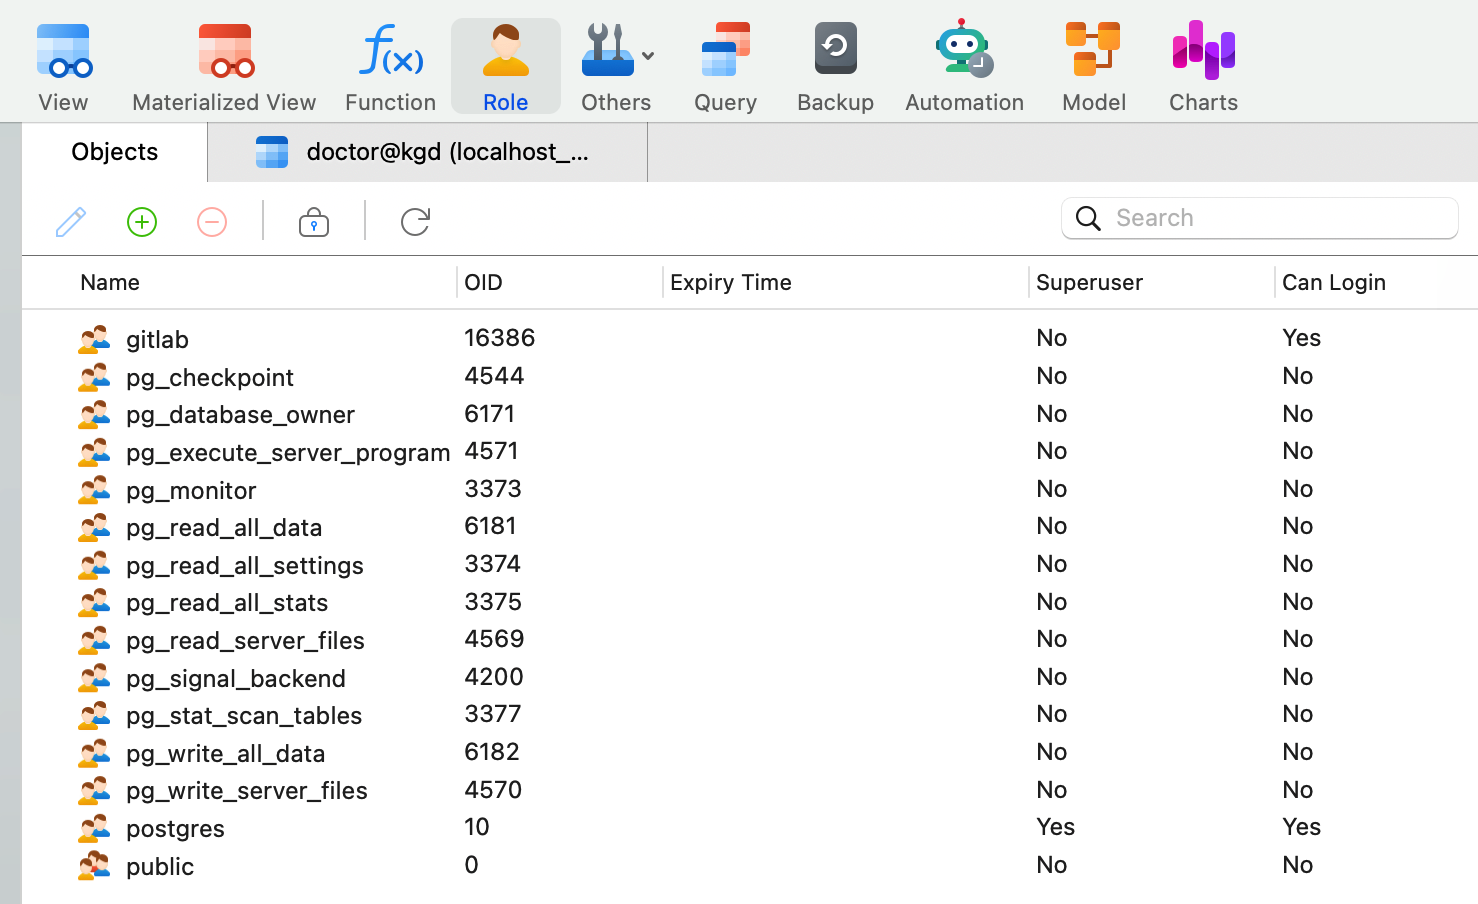
用户和数据库的创建
额,我比较喜欢用图形界面。
# 创建密码,按指定的规则随机生成密码
kubectl create secret generic postgresql-gitlab-secret \
  --from-literal=postgres-password=$(openssl rand -base64 18)

# 查看密码
kubectl get secret postgresql-gitlab-secret -o jsonpath="{.data.postgres-password}" | base64 -d
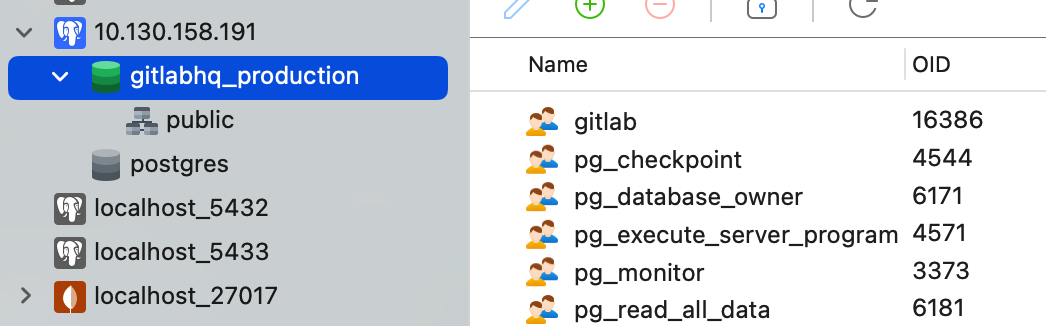
就用上面的密码,创建一个 gitlab 用户和 gitlabhq_production 数据库:
CREATE ROLE "gitlab" CREATEDB CREATEROLE LOGIN REPLICATION BYPASSRLS PASSWORD 'tO+Qo4jvFoyDGpgef44j69+r';

CREATE DATABASE "gitlabhq_production"
WITH
  OWNER = "gitlab"
;
测试 StatefulSet 卷绑定的不变性
我们删除这个应用再用之前的 pvc 和 secret 重新部署:
helm uninstall my-postgresql

helm install my-postgresql bitnami/postgresql -f postgresql.yml
然后原来创建的一切都在,真的太好了:
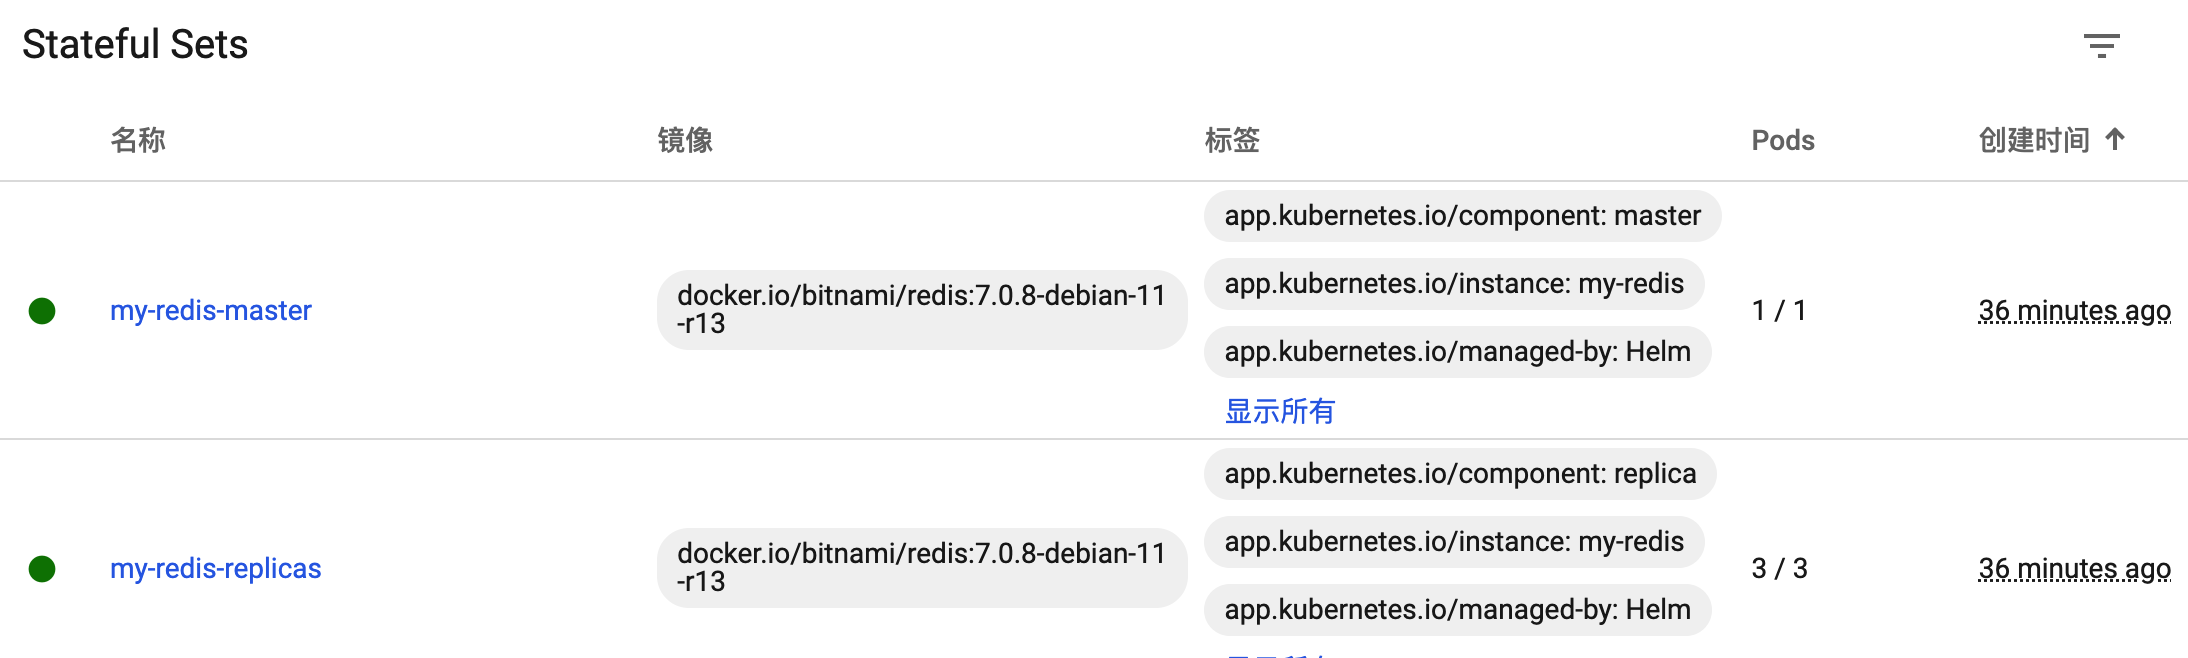
Redis
前提有 nfs-client 的 storageClass,然后创建一个 pvc:
apiVersion: v1
kind: PersistentVolumeClaim
metadata:
  name: redis-pvc
spec:
  accessModes:
  - ReadWriteOnce
  storageClassName: nfs-client
  resources:
    requests:
      storage: 20Gi

---
apiVersion: v1
kind: PersistentVolumeClaim
metadata:
  name: redis-pvc-replica
spec:
  accessModes:
  - ReadWriteOnce
  storageClassName: nfs-client
  resources:
    requests:
      storage: 40Gi
然后修改默认的配置,主要加上:existingClaim: "redis-pvc" 和 storageClass: "nfs-client",以及 replica 的要加上:existingClaim: "redis-pvc-replica" 和 storageClass: "nfs-client"
helm repo add bitnami https://charts.bitnami.com/bitnami

~~helm install my-redis bitnami/redis --version 17.8.0  --set persistence.storageClass=nfs-client~~

helm delete my-redis

~~~~helm show values bitnami/redis > redis.yml

helm install my-redis bitnami/redis -f redis.yml
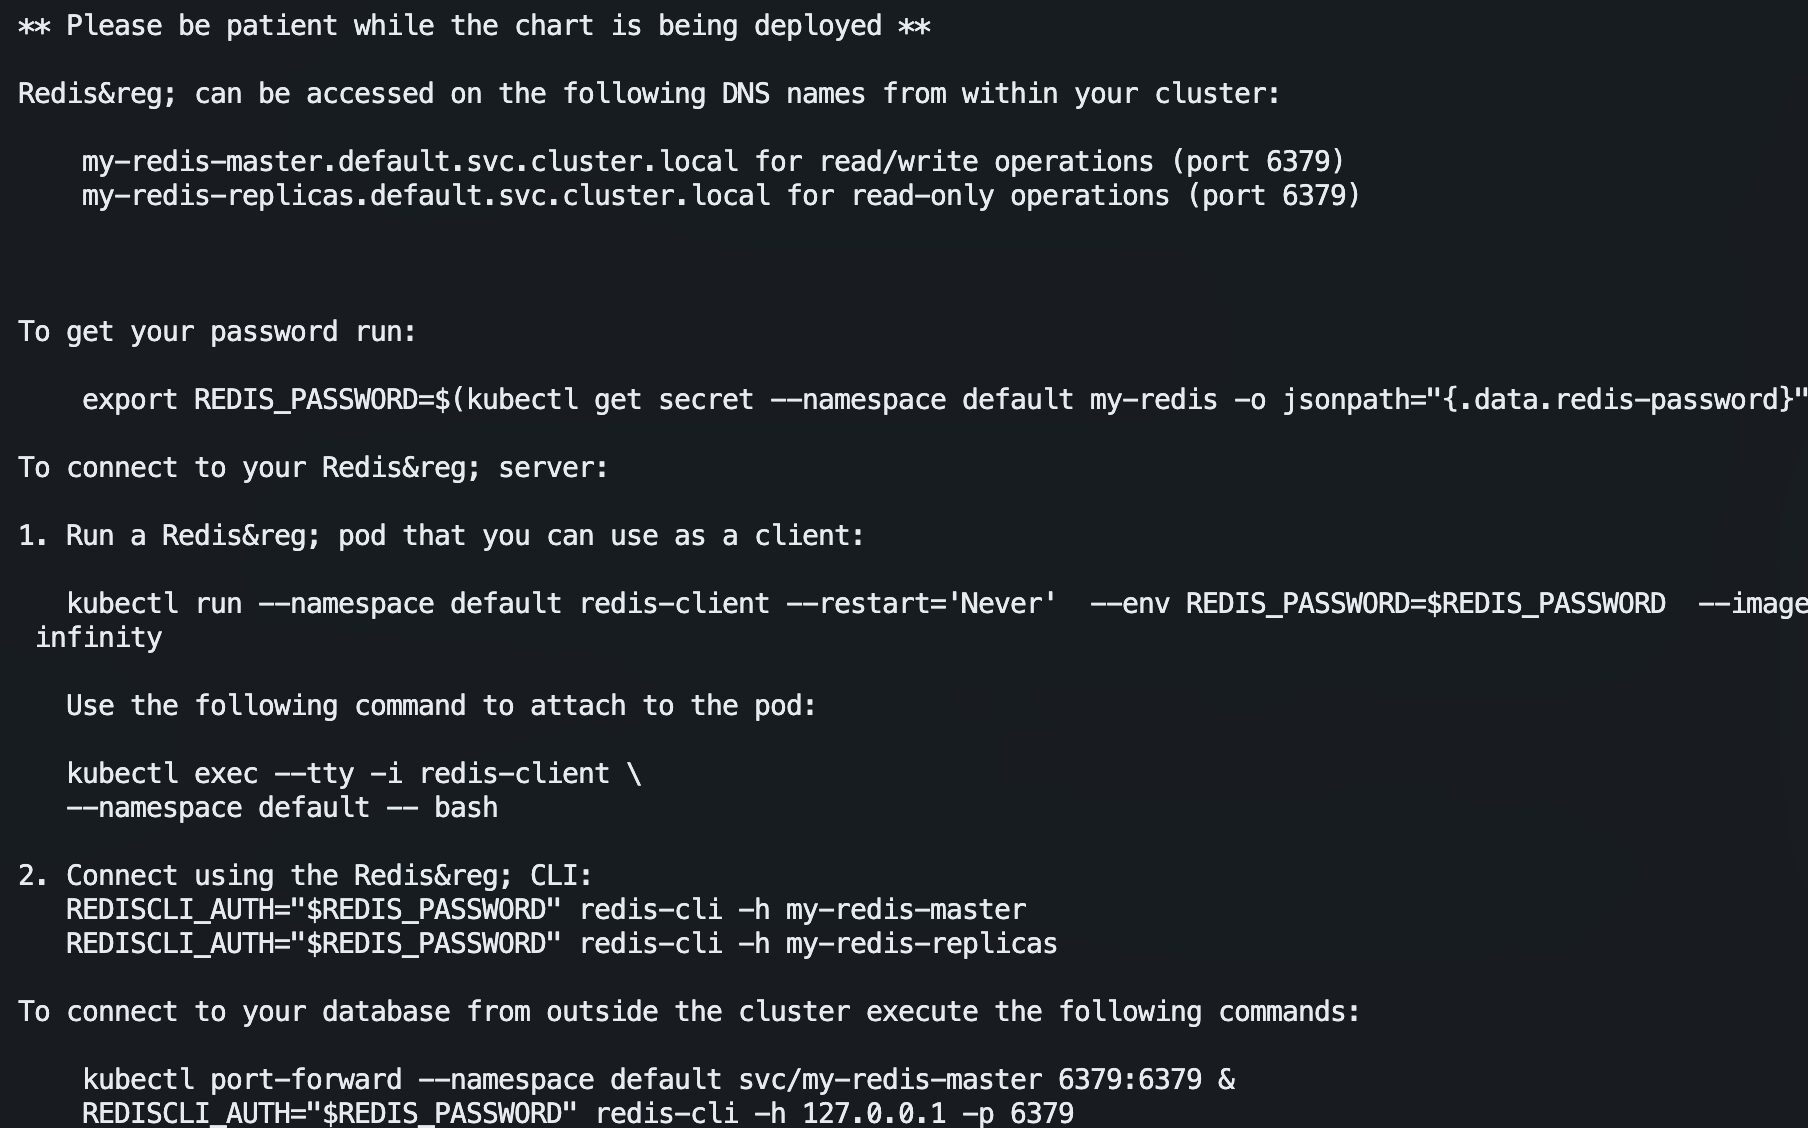
my-redis-master.default.svc.cluster.local for read/write operations (port 6379)
my-redis-replicas.default.svc.cluster.local for read-only operations (port 6379)

export REDIS_PASSWORD=$(kubectl get secret --namespace default my-redis -o jsonpath="{.data.redis-password}" | base64 -d)

kubectl run --namespace default redis-client --restart='Never'  --env REDIS_PASSWORD=$REDIS_PASSWORD  --image docker.io/bitnami/redis:7.0.8-debian-11-r13 --command -- sleep infinity

kubectl exec --tty -i redis-client \
   --namespace default -- bash

REDISCLI_AUTH="$REDIS_PASSWORD" redis-cli -h my-redis-master
REDISCLI_AUTH="$REDIS_PASSWORD" redis-cli -h my-redis-replicas

kubectl port-forward --namespace default svc/my-redis-master 6379:6379 &
    REDISCLI_AUTH="$REDIS_PASSWORD" redis-cli -h 127.0.0.1 -p 6379
然后就可以装 GitLab 了。
通过 helm delete my-redis 命令可卸载。
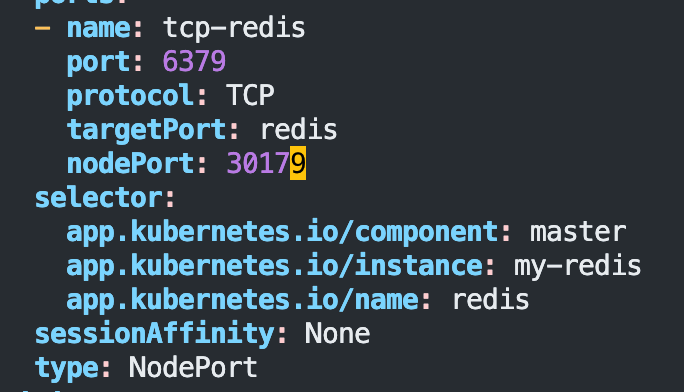
后期
改 master 的 NodePort 访问。
k edit svc my-redis-master (是 service 啊喂,不是 statefulset)
添加用户,因为有人不是用的 “default” 用户名,而是 “redis”:

> ACL GENPASS 64
5fd1203ac95a0424

> ACL SETUSER redis on >5fd1203ac95a0424 ~* +@all
OK
Gitea
helm3 repo add bitnami https://charts.bitnami.com/bitnami

helm install my-gitea bitnami/gitea --version 0.3.6

helm show values bitnami/gitea > gitea.yml

helm install my-gitea bitnami/gitea -f gitea.yml
1. Get the Gitea URL:

  Or running:

  export NODE_PORT=$(kubectl get --namespace default -o jsonpath="{.spec.ports[0].nodePort}" services my-gitea)
  export NODE_IP=$(kubectl get nodes --namespace default -o jsonpath="{.items[0].status.addresses[0].address}")
  echo "Gitea URL: http://$NODE_IP:$NODE_PORT/"

2. Get your Gitea login credentials by running:

  echo Username: admin
  echo Password: $(kubectl get secret --namespace default my-gitea -o jsonpath="{.data.admin-password}" | base64 -d)
- 注意 ReadWriteMany 不仅要在 pvc 中配置,gitea.yml 中也要
apiVersion: v1
kind: PersistentVolumeClaim
metadata:
  name: gitea-pvc
spec:
  accessModes:
  - ReadWriteMany
  storageClassName: nfs-client
  resources:
    requests:
      storage: 10Gi

------
persistence:
  ## @param persistence.enabled Enable persistence using PVC
  ##
  enabled: true
  ## @param persistence.storageClass PVC Storage Class for Gitea volume
  ## If defined, storageClassName: <storageClass>
  ## If set to "-", storageClassName: "", which disables dynamic provisioning
  ## If undefined (the default) or set to null, no storageClassName spec is
  ##   set, choosing the default provisioner.  (gp2 on AWS, standard on
  ##   GKE, AWS & OpenStack)
  ##
  storageClass: ""
  ## @param persistence.accessModes PVC Access Mode for Gitea volume
  ## Requires persistence.enabled: true
  ## If defined, PVC must be created manually before volume will be bound
  ##
  accessModes:
    - ReadWriteMany
  ## @param persistence.size PVC Storage Request for Gitea volume
  ##
  size: 10Gi
  ## @param persistence.dataSource Custom PVC data source
  ##
  dataSource: {}
  ## @param persistence.existingClaim A manually managed Persistent Volume Claim
  ## Requires persistence.enabled: true
  ## If defined, PVC must be created manually before volume will be bound
  ##
  existingClaim: "gitea-pvc"
  ## @param persistence.hostPath If defined, the gitea-data volume will mount to the specified hostPath.
  ## Requires persistence.enabled: true
  ## Requires persistence.existingClaim: nil|false
  ## Default: nil.
  ##
service:
  ## @param service.type Kubernetes Service type
  ##
  type: NodePort
	nodePorts:
	    http: 30005
	    ssh: 30006
	  ## @param service.externalTrafficPolicy Enable client source IP preservation
	  ## ref https://kubernetes.io/docs/tasks/access-application-cluster/create-external-load-balancer/#preserving-the-client-source-ip
	  ##
	  externalTrafficPolicy: Local
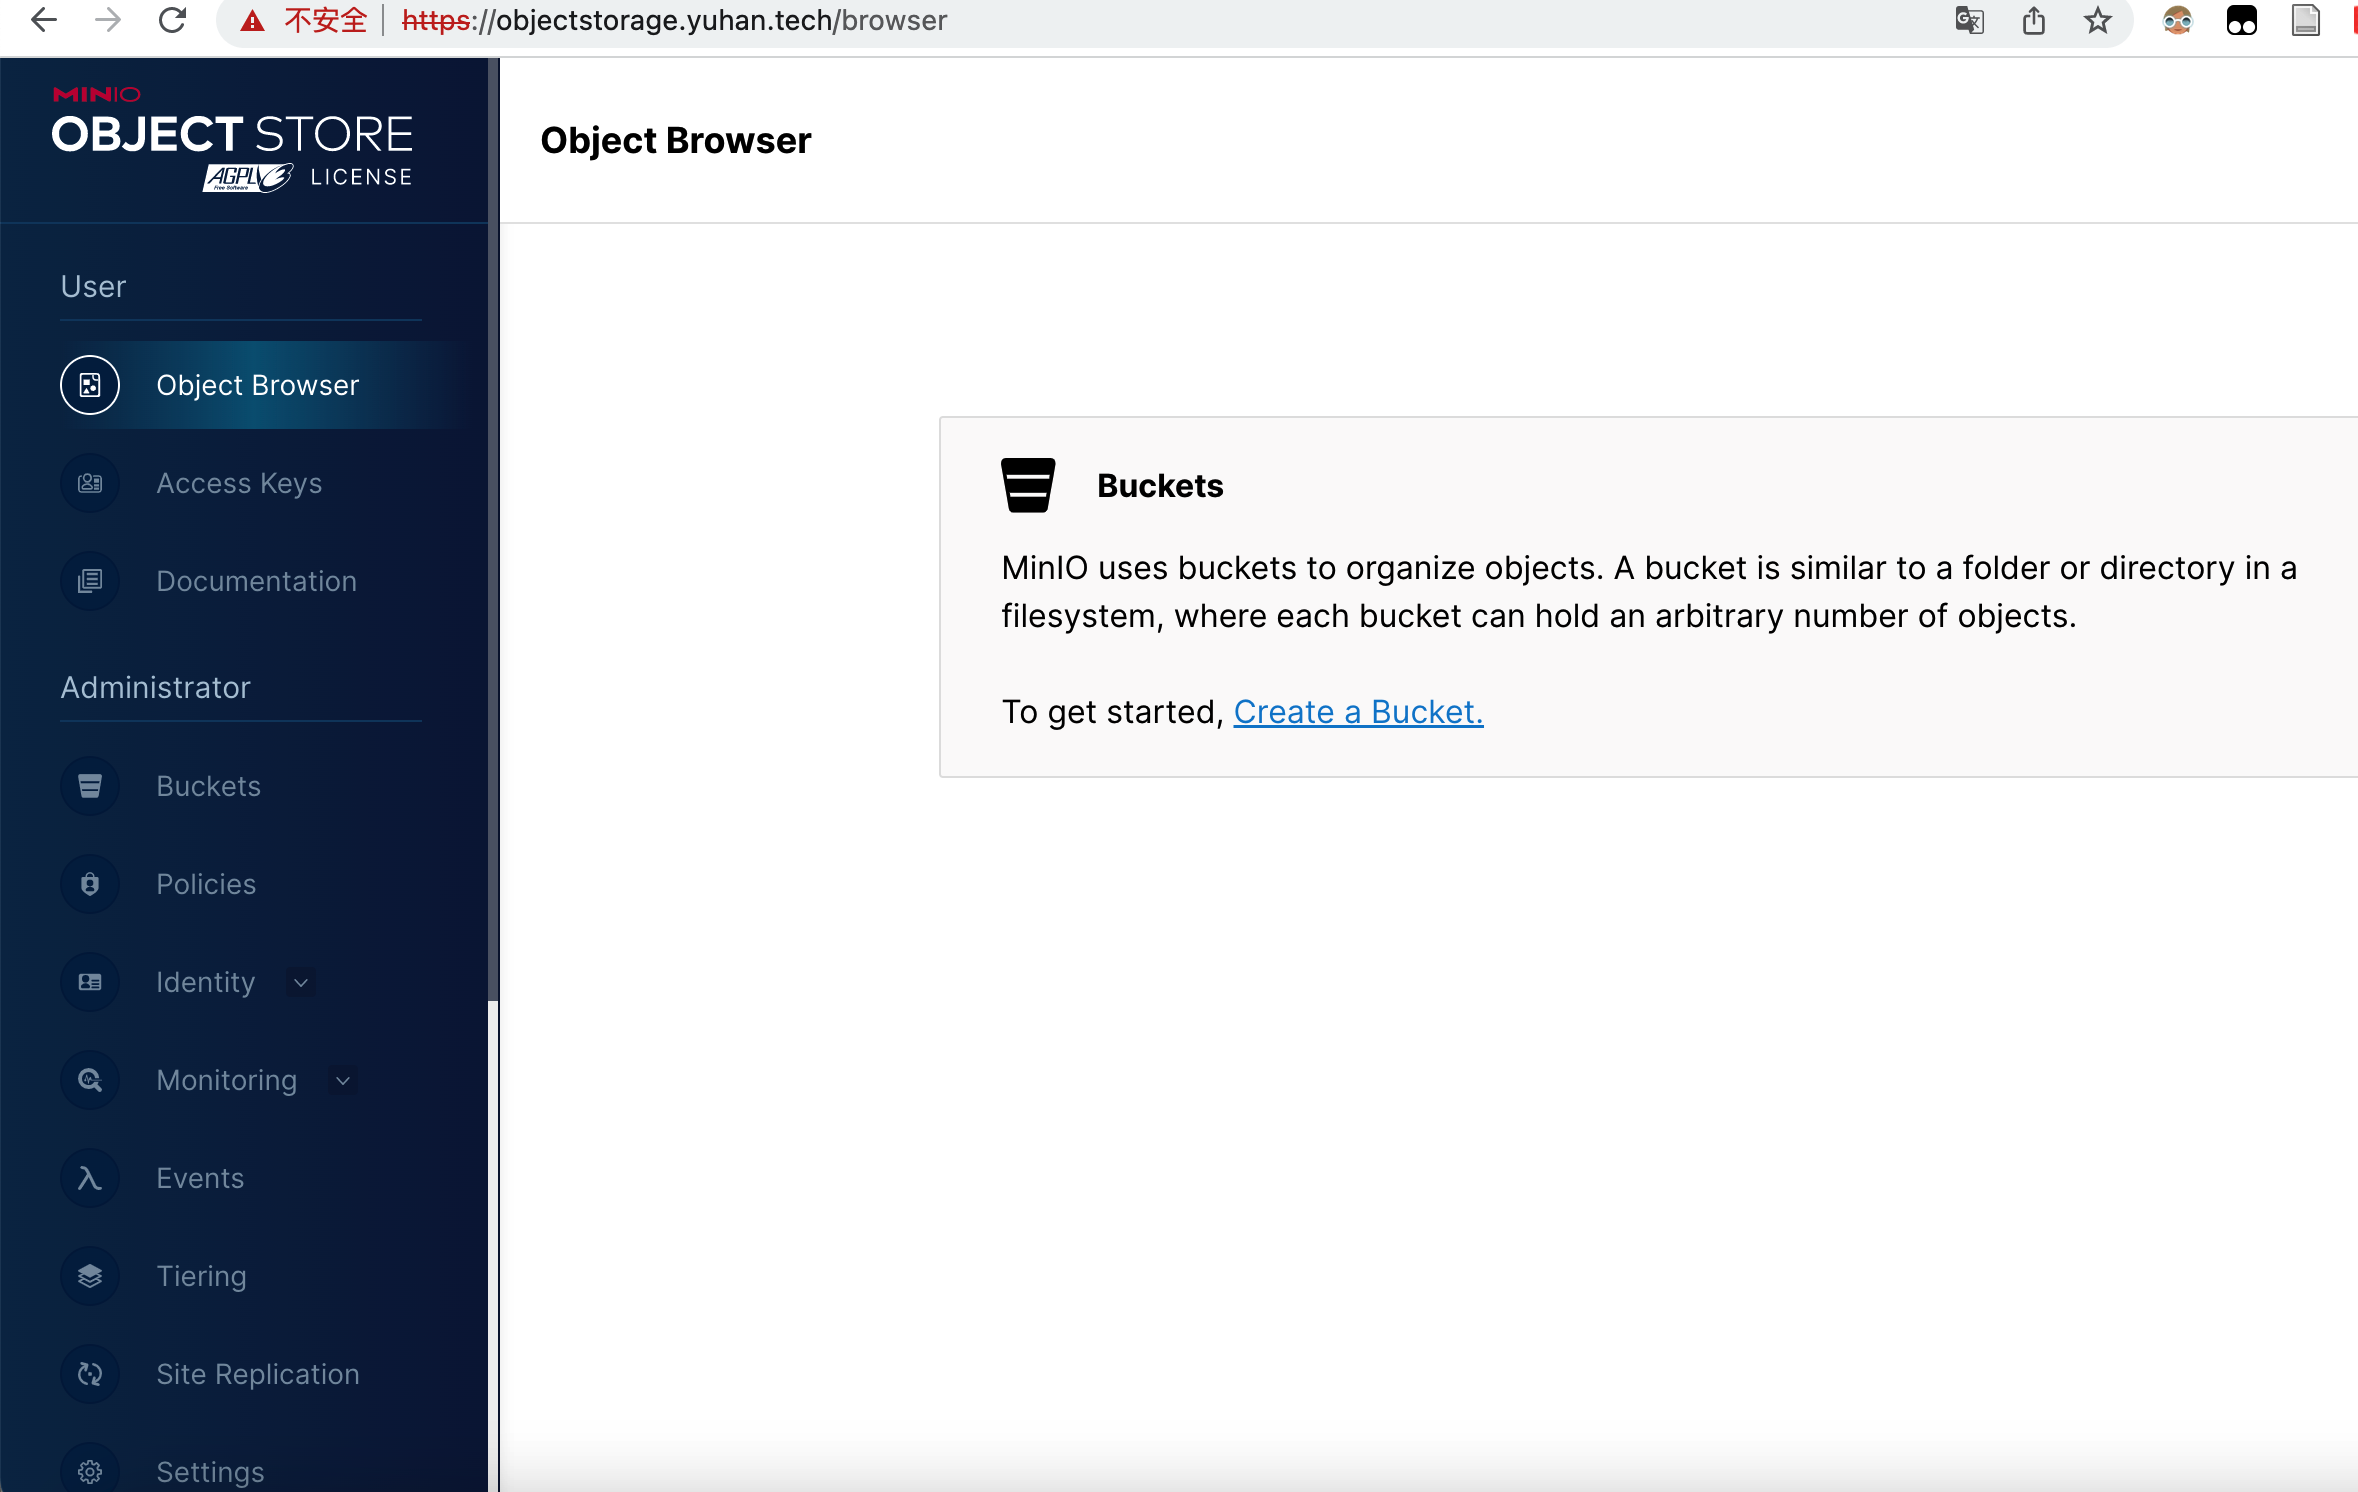
minio
这是个对象存储服务器,安装 GitLab 需要。
MinIO(R) is an object storage server, compatible with Amazon S3 cloud storage service, mainly used for storing unstructured data (such as photos, videos, log files, etc.).
helm show values bitnami/minio  > minio-helm-values.yml

helm install my-minio bitnami/minio -f minio-helm-values.yml
apiVersion: v1
kind: PersistentVolumeClaim
metadata:
  name: minio-pvc
spec:
  accessModes:
  - ReadWriteOnce
  storageClassName: nfs-client
  resources:
    requests:
      storage: 60Gi
主要修改了:
persistence.storageClass: “nfs-client”
persistence.size: 50Gi
persistence.existingClaim: “minio-pvc”
ingress.enabled: false
ingress.enabled: trueingress.apiVersion: “networking.k8s.io/v1"ingress.ingressClassName: “public”ingress.hostname: objectstorage.yuhan.techingress.annotations: {cert-manager.io/cluster-issuer: letsencrypt }ingress.tls: true
** Please be patient while the chart is being deployed **

MinIO® can be accessed via port  on the following DNS name from within your cluster:

   my-minio.default.svc.cluster.local

To get your credentials run:

   export ROOT_USER=$(kubectl get secret --namespace default my-minio -o jsonpath="{.data.root-user}" | base64 -d)
   export ROOT_PASSWORD=$(kubectl get secret --namespace default my-minio -o jsonpath="{.data.root-password}" | base64 -d)

To connect to your MinIO® server using a client:

- Run a MinIO® Client pod and append the desired command (e.g. 'admin info'):

   kubectl run --namespace default my-minio-client \
     --rm --tty -i --restart='Never' \
     --env MINIO_SERVER_ROOT_USER=$ROOT_USER \
     --env MINIO_SERVER_ROOT_PASSWORD=$ROOT_PASSWORD \
     --env MINIO_SERVER_HOST=my-minio \
     --image docker.io/bitnami/minio-client:2023.2.16-debian-11-r1 -- admin info minio

To access the MinIO® web UI:

- Get the MinIO® URL:

   echo "MinIO® web URL: http://127.0.0.1:9001/minio"
   kubectl port-forward --namespace default svc/my-minio 9001:9001
手动暴露服务
它自动生成的 Ingress 好像有点问题,我们自己弄一个:
apiVersion: networking.k8s.io/v1
kind: Ingress
metadata:
  name: default-ingress
  namespace: default
  annotations:
    # use the shared ingress-nginx
    # kubernetes.io/ingress.class: public
    # nginx.ingress.kubernetes.io/backend-protocol: "HTTPS"
    cert-manager.io/cluster-issuer: letsencrypt
spec:
  ingressClassName: public  # 最新用法,不是在注解里面了
  # https://kubernetes.io/docs/concepts/services-networking/ingress/
  # https://kubernetes.github.io/ingress-nginx/user-guide/tls/
  tls:
  - hosts:
    - objectstorage.yuhan.tech
    - objectstorage-web.yuhan.tech
    secretName: objectstorage-yuhan-tech-tls
  rules:
  - host: objectstorage.yuhan.tech
    http:
      paths:
      - path: "/"
        pathType: Prefix
        backend:
          service:
            name: my-minio
            port:
              number: 9000  # 这是 API 不是网页,网页是 9001 需要另外配置
  - host: objectstorage-web.yuhan.tech
    http:
      paths:
      - path: "/"
        pathType: Prefix
        backend:
          service:
            name: my-minio
            port:
              number: 9001
排查证书问题:https://cert-manager.io/docs/troubleshooting/acme/
kubectl get certificate -A
kubectl describe cert objectstorage-yuhan-tech-tls
k delete cert objectstorage-yuhan-tech-tls
kubectl get certificaterequest (k get cr)
k describe order objectstorage-yuhan-tech-tls-cm84m-1673293443
k describe challenge objectstorage-yuhan-tech-tls-cm84m-1673293443-876957053


说明 CNAME 还没生效,必须等!我们去 cloudflare 查看:

确实如此,剩下的交给时间,你看这就好了!

环境变量配置(必须)
extraEnvVars:  # 必填,否则地址就是 localhost 了 https://github.com/minio/console/issues/1632
  - name: MINIO_SERVER_URL
    value: https://objectstorage.yuhan.tech
  - name: MINIO_BROWSER_REDIRECT_URL
    value: https://objectstorage.yuhan.tech
Ingress 代理:最大上传 Size 配置(必须)
Annotations - NGINX Ingress Controller
ingress.kubernetes.io/proxy-body-size: 10000m  # 老 k8s 版本用
nginx.ingress.kubernetes.io/proxy-body-size: 10000m  # 最新版本使用
同时也要注意 harbor 的相关 size 配置!minio 也得配置!
最终才完美:

外部客户端连接
关于外部连接,minio 与 AWS S3 完全兼容:
AWS CLI with MinIO Server — MinIO Object Storage for Linux
AWS CLI is a unified tool to manage AWS services. It is frequently the tool used to transfer data in and out of AWS S3. It works with any S3 compatible cloud storage service.
先登录网页:
用户名:echo $(kubectl get secret --namespace default my-minio -o jsonpath="{.data.root-user}" | base64 -d)
密码:echo $(kubectl get secret --namespace default my-minio -o jsonpath="{.data.root-password}" | base64 -d)
然后创建 AccessToken:
H3vCj0L3LIBHWvbh
LevG9vCPLvNguatIMJfQdGZhKRUgNl0h
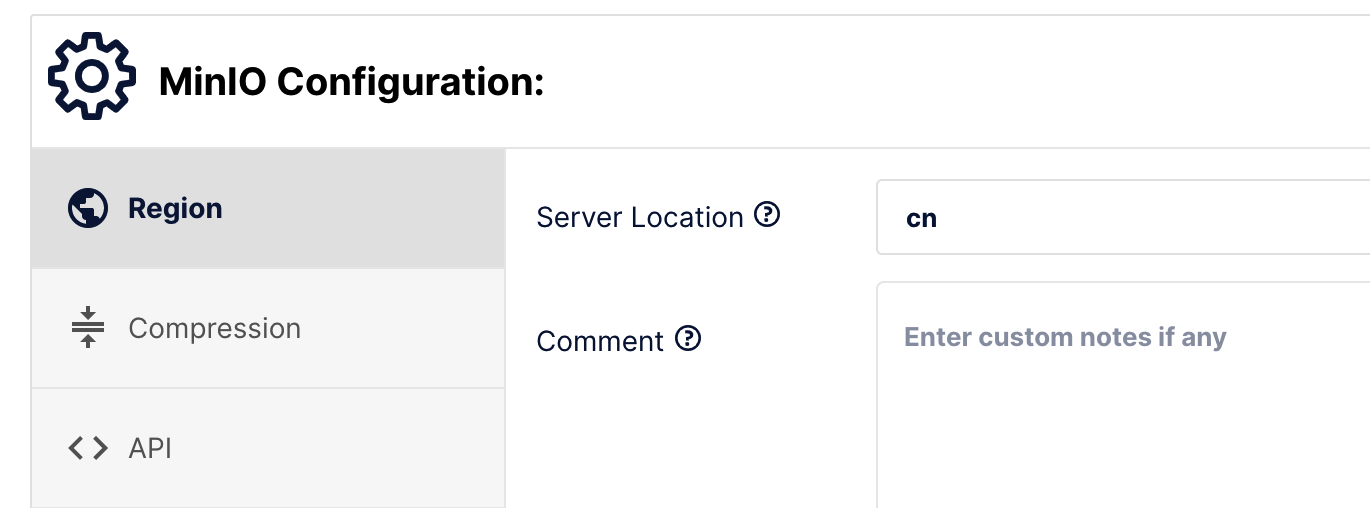
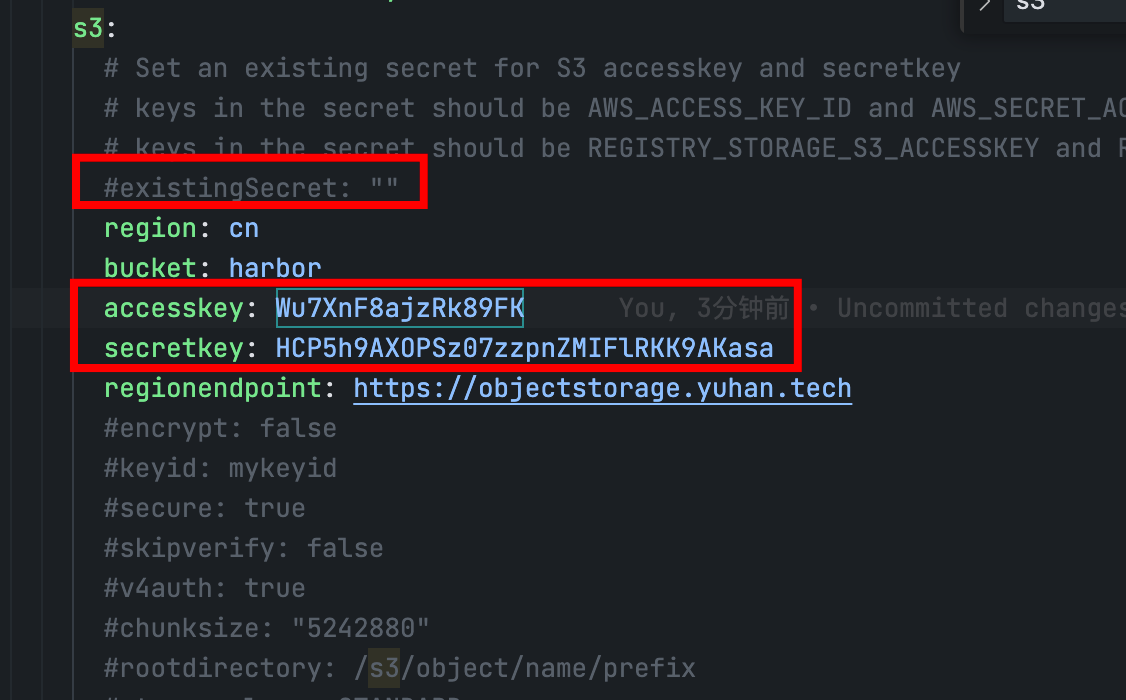
之后还可以设置服务的 region 是 cn:
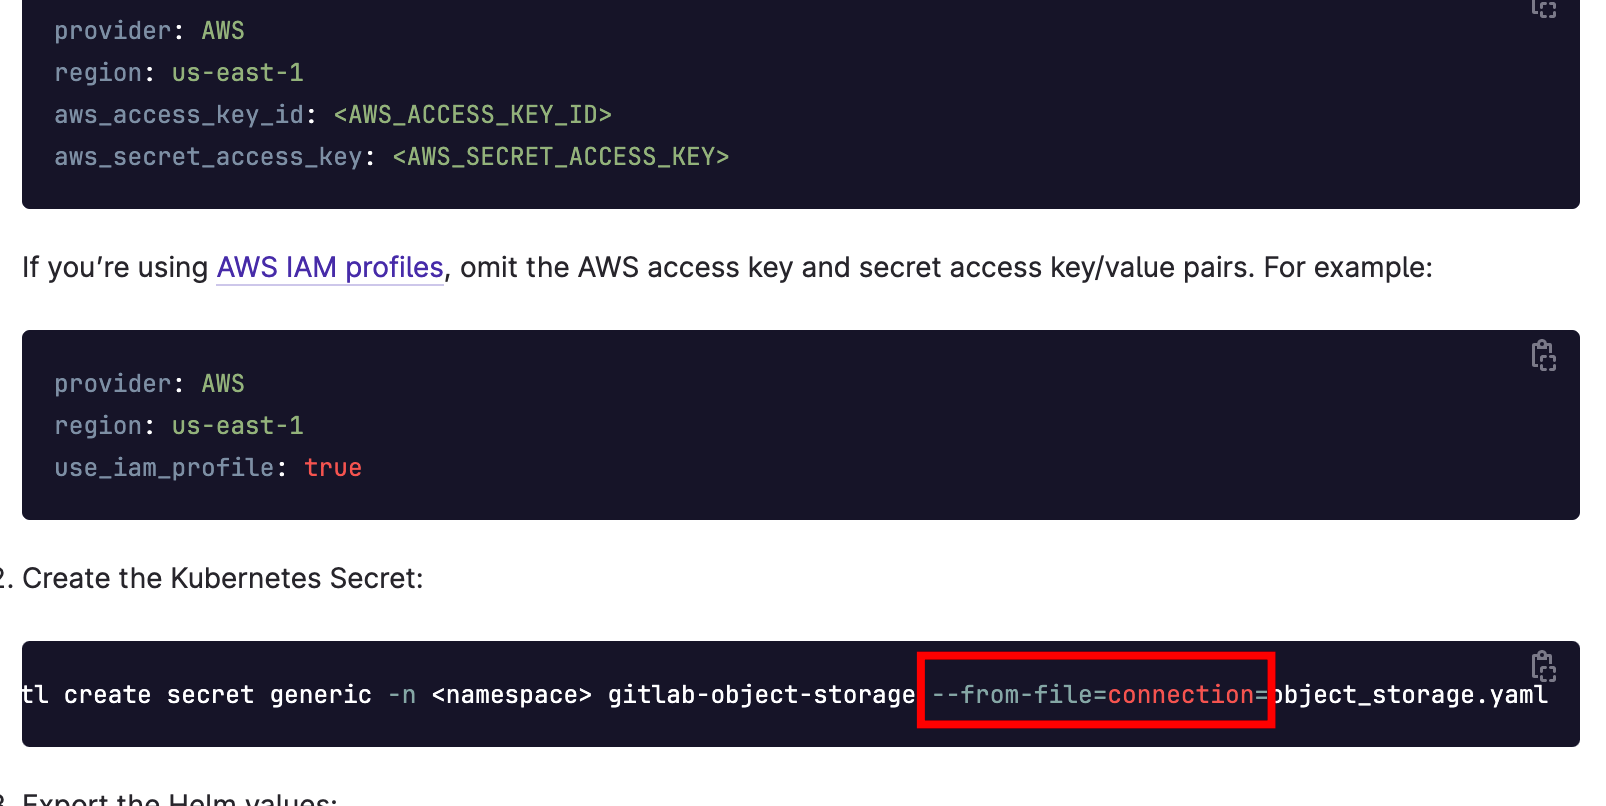
然后 GitLab 的 S3 存储可以有了,所以 Secret 参考 S3 进行配置, Secret 的 key 对应一个 yaml 文件, 文件参考为:
provider: AWS
# Specify the region
region: cn
# Specify access/secret keys
aws_access_key_id: H3vCj0L3LIBHWvbh
aws_secret_access_key: LevG9vCPLvNguatIMJfQdGZhKRUgNl0h
# The below settings are for S3 compatible endpoints
#   See https://docs.gitlab.com/ee/administration/job_artifacts.html#s3-compatible-connection-settings
aws_signature_version: 4
host: objectstorage.yuhan.tech
endpoint: "https://objectstorage.yuhan.tech"
path_style: true
## https://docs.gitlab.com/charts/charts/globals#lfs-artifacts-uploads-packages-external-mr-diffs-and-dependency-proxy
object_store:
  enabled: true
  proxy_download: true
  storage_options: {}
    # server_side_encryption:
    # server_side_encryption_kms_key_id
  connection:
    secret: **minio-storage-secret**
    key: **connection

# 记得创建对应的桶 git-lfs gitlab-artifacts gitlab-uploads gitlab-packages gitlab-backups

# When consolidated object storage is enabled, for each item `bucket` must be specified and the `connection` must be empty. Check the following object storage configuration(s): artifacts,lfs,uploads,packages**
kubectl create secret generic **minio-storage-secret** --from-file=**connection**=./minio-storage-secret.ym
已经不建议用命令式,建议声明式!
尝试用 mac 的 client 连接:
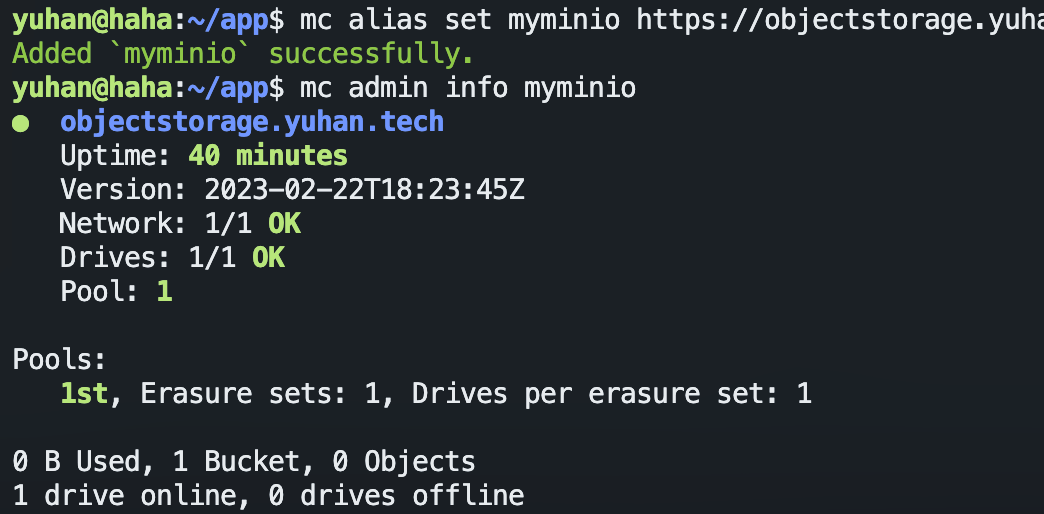
成功!
Argo CD
argo-cd 5.23.1 · argoproj/argo
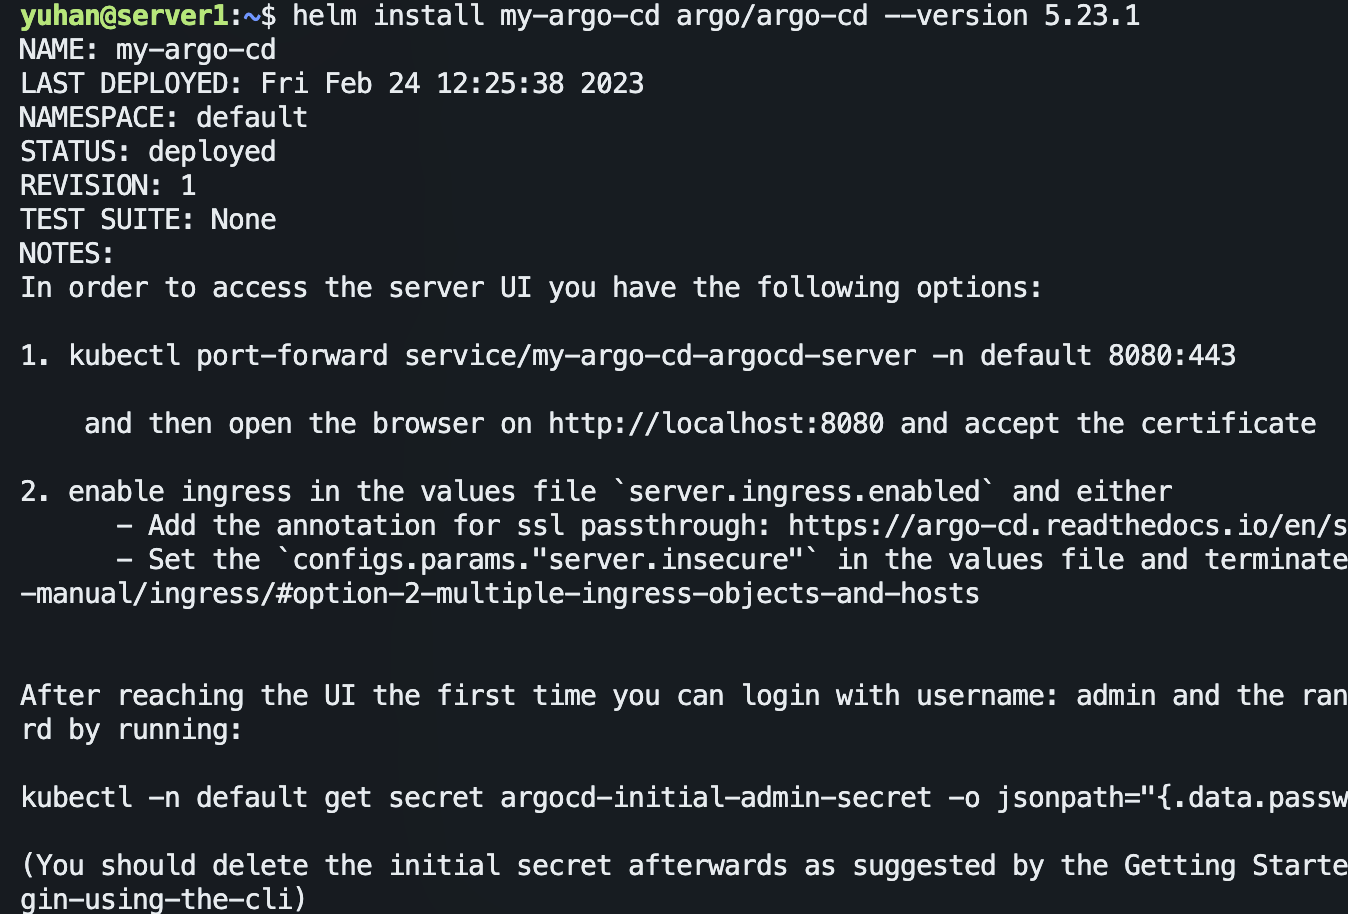
按照上面的 INSTALL 提示:
helm repo add argo https://argoproj.github.io/argo-helm

helm install my-argo-cd argo/argo-cd --version 5.23.1

# 可选自行设置,包括 ingress 的配置等
helm show values argo/argo-cd > argo.yml
helm install my-argo-cd argo/argo-cd -f argo.yml
我自行设置主要修改了:
ingress 配置:Enable an ingress resource for the Argo CD server使得使用泛域名证书(之后 都自建 ingress )使得使用 argo.yuhan.tech/cd 路径访问,这需要参考下面这个注释:
externalRedis 配置:External Redis parameters,注意禁用自带的
NOTES:
In order to access the server UI you have the following options:

1. kubectl port-forward service/my-argo-cd-argocd-server -n default 8080:443

    and then open the browser on http://localhost:8080 and accept the certificate

2. enable ingress in the values file `server.ingress.enabled` and either
      - Add the annotation for ssl passthrough: https://argo-cd.readthedocs.io/en/stable/operator-manual/ingress/#option-1-ssl-passthrough
      - Set the `configs.params."server.insecure"` in the values file and terminate SSL at your ingress: https://argo-cd.readthedocs.io/en/stable/operator-manual/ingress/#option-2-multiple-ingress-objects-and-hosts

After reaching the UI the first time you can login with username: admin and the random password generated during the installation. You can find the password by running:

kubectl -n default get secret argocd-initial-admin-secret -o jsonpath="{.data.password}" | base64 -d

(You should delete the initial secret afterwards as suggested by the Getting Started Guide: https://argo-cd.readthedocs.io/en/stable/getting_started/#4-login-using-the-cli)
在这里 add 应该 pon 一下,即开个 export 代理。
# 代理设置
url=socks5://127.0.0.1:7890
# 如果代理失效的话直接运行 poff 即可断开 proxy
alias poff='unset http_proxy;unset https_proxy'
# 快捷方式打开
alias pon='export http_proxy=$url; export https_proxy=$url'
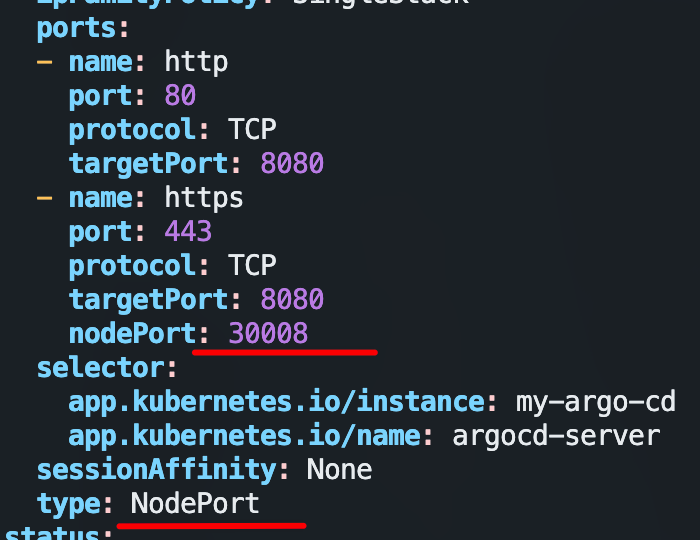
上面有命令做端口转发,但我偏要修改 yml 文件,用 NodePort 而不是 ClusterIP:
kubectl edit svc my-argo-cd-argocd-server
或者自建 Ingress (一定要是 443,因为• 80 - HTTP (redirects to HTTPS)):
Ingress Configuration - Argo CD - Declarative GitOps CD for Kubernetes
apiVersion: networking.k8s.io/v1
kind: Ingress
metadata:
  name: default-tls-ingress
  namespace: default
  annotations:
    # use the shared ingress-nginx
    kubernetes.io/ingress.class: public
    nginx.ingress.kubernetes.io/backend-protocol: "HTTPS"
    # cert-manager.io/cluster-issuer: letsencrypt
spec:
  # https://kubernetes.io/docs/concepts/services-networking/ingress/
  # https://kubernetes.github.io/ingress-nginx/user-guide/tls/
  tls:
  - hosts:
    - argo.yuhan.tech
    secretName: all-yuhan-tech-tls
  rules:
  - host: argo.yuhan.tech
    http:
      paths:
      - path: "/"
        pathType: Prefix
        backend:
          service:
            name: my-argo-cd-argocd-server
            port:
              number: 443
访问 https 网页:
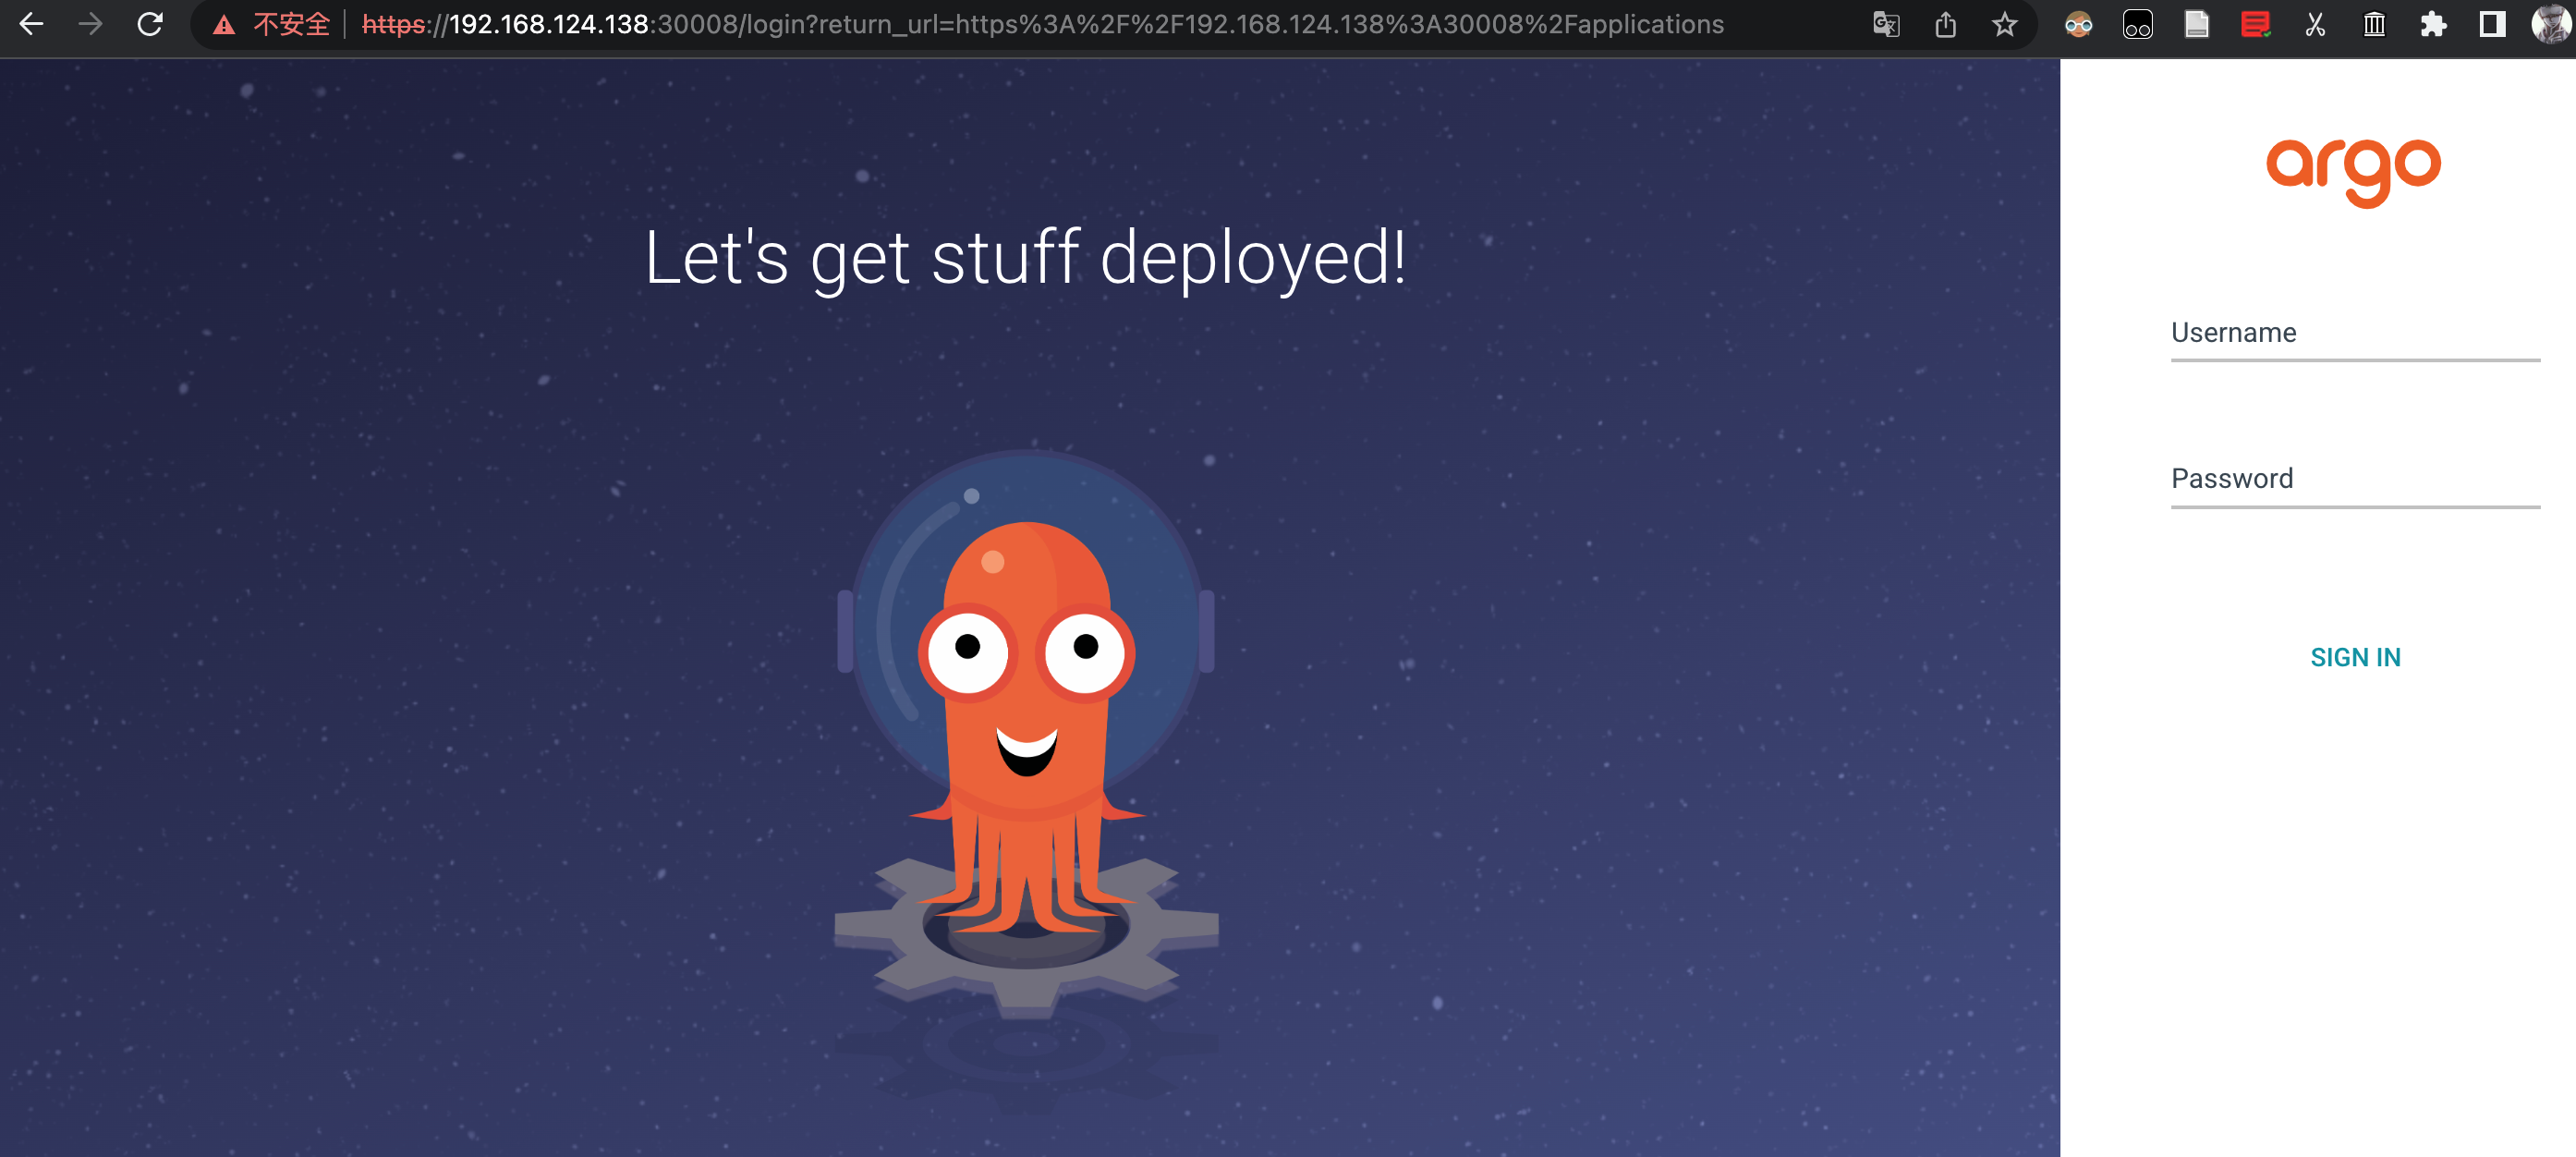
用户名:admin
登录密码:kubectl -n default get secret argocd-initial-admin-secret -o jsonpath="{.data.password}" | base64 -d
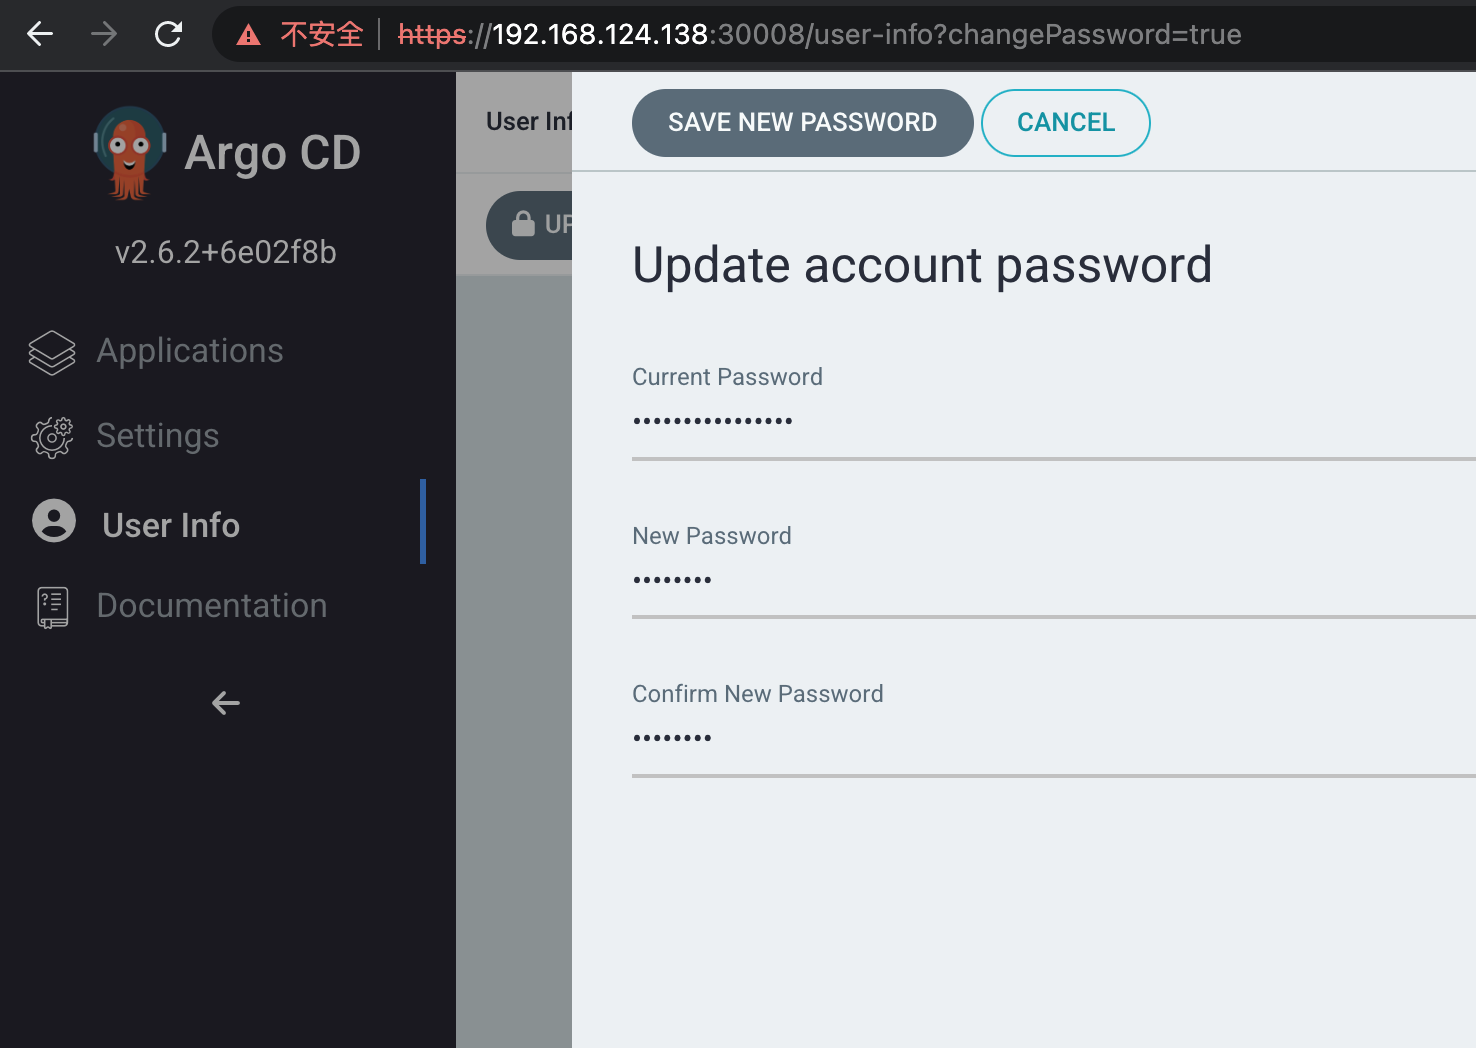
第一件事改密码:
Argo Workflows
argo-workflows 0.22.12 · argoproj/argo
按照上面的 INSTALL 指示来安装:
helm repo add argo https://argoproj.github.io/argo-helm

~~helm install my-argo-workflows argo/argo-workflows --version 0.22.12~~

helm show values argo/argo-workflows > argo-workflows.yml

helm install my-argo-workflows argo/argo-workflows -f argo-workflows.yml
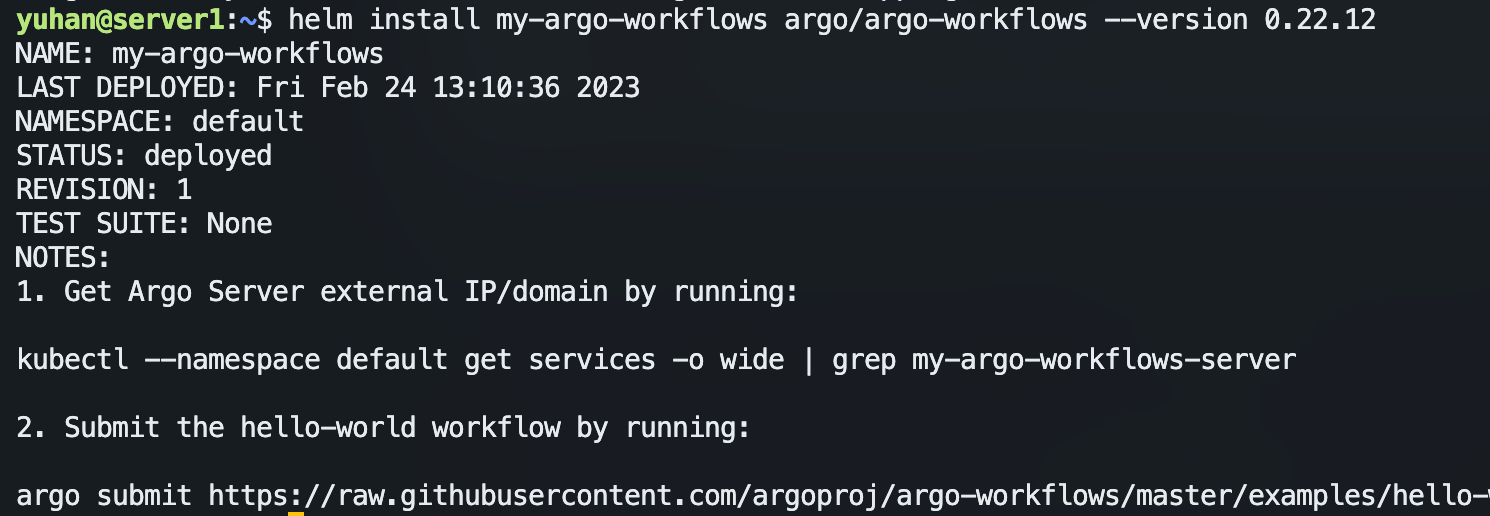
上面虽然有命令 kubectl --namespace default get services -o wide | grep my-argo-workflows-server,但是无法外部访问。
同 Argo CD ,我们配置下 NodePort。
kubectl edit svc my-argo-workflows-server
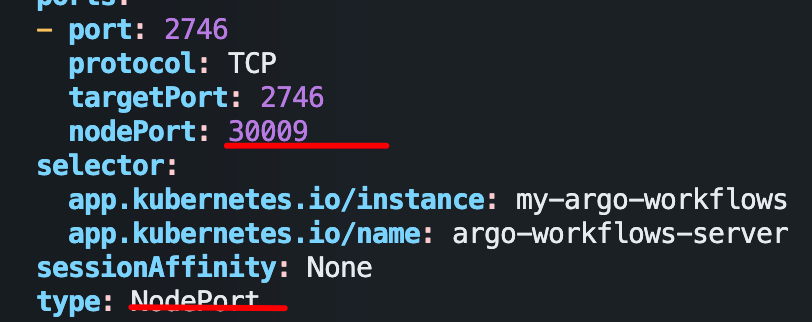
注意此时配置的是 HTTP 端口,用 http 访问。
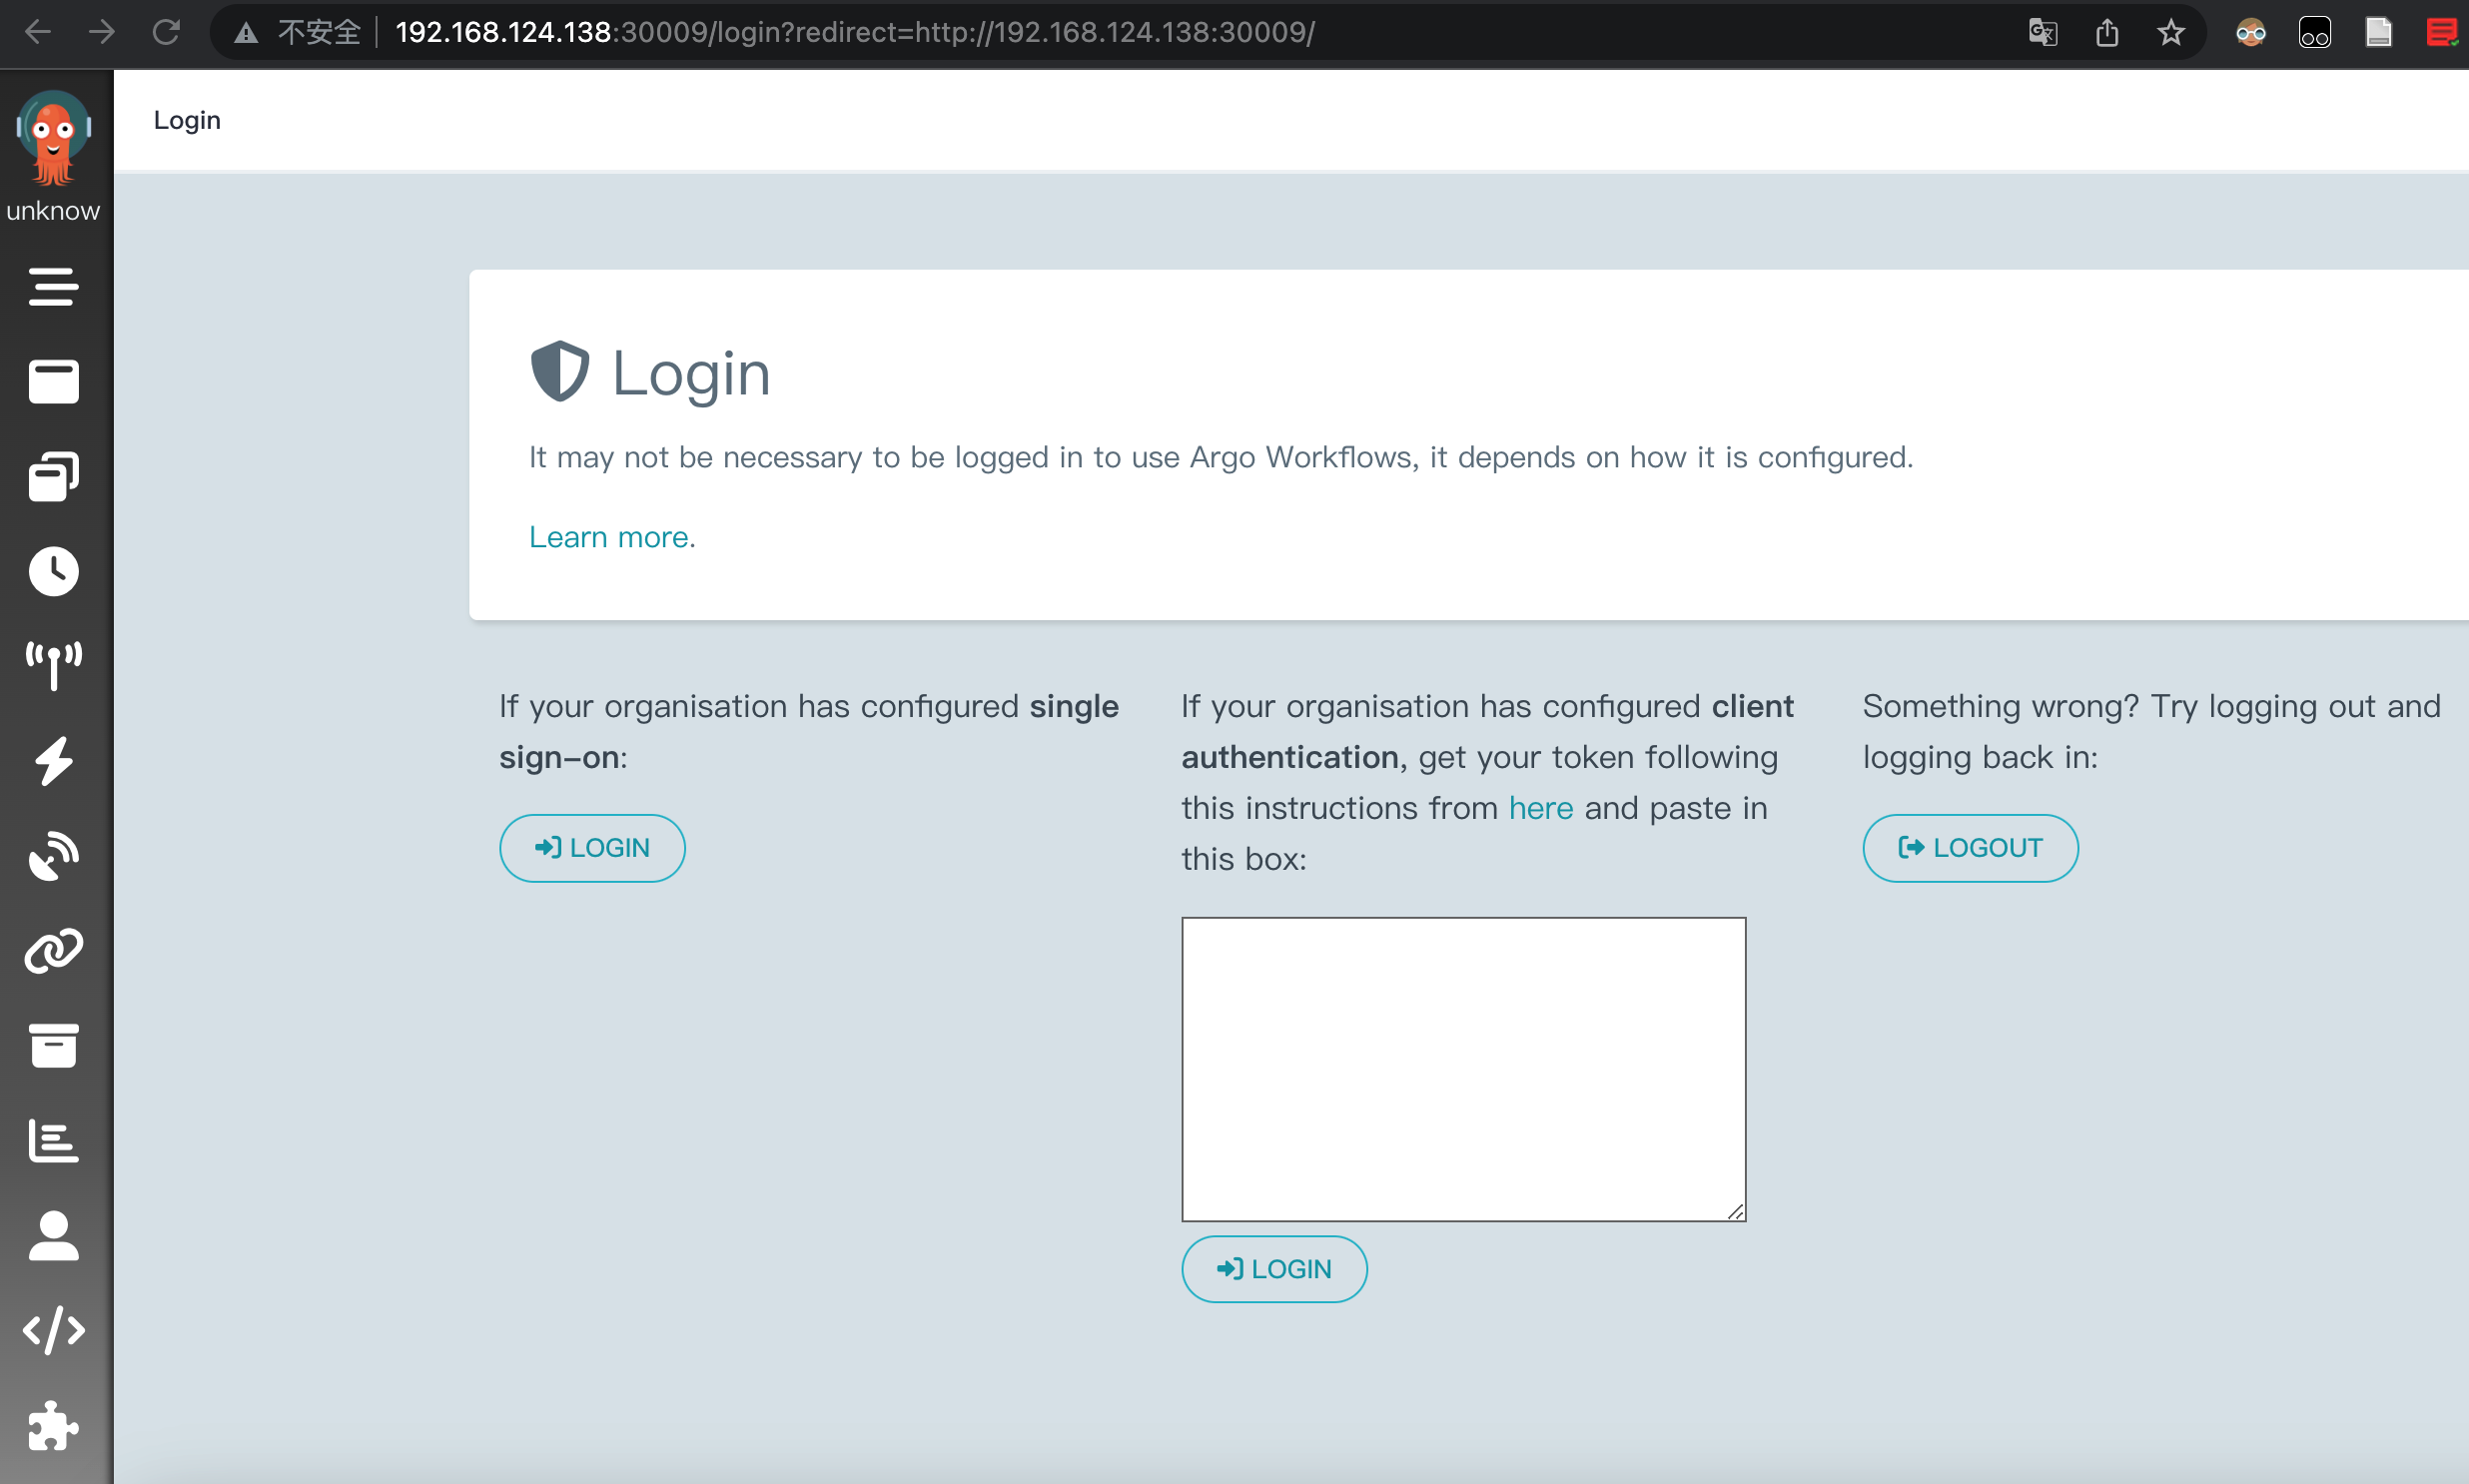
登录有三种方式 SSO 我肯定不会配置,那么就 client 模式,需要 token:
https://argoproj.github.io/argo-workflows/access-token/#token-creation
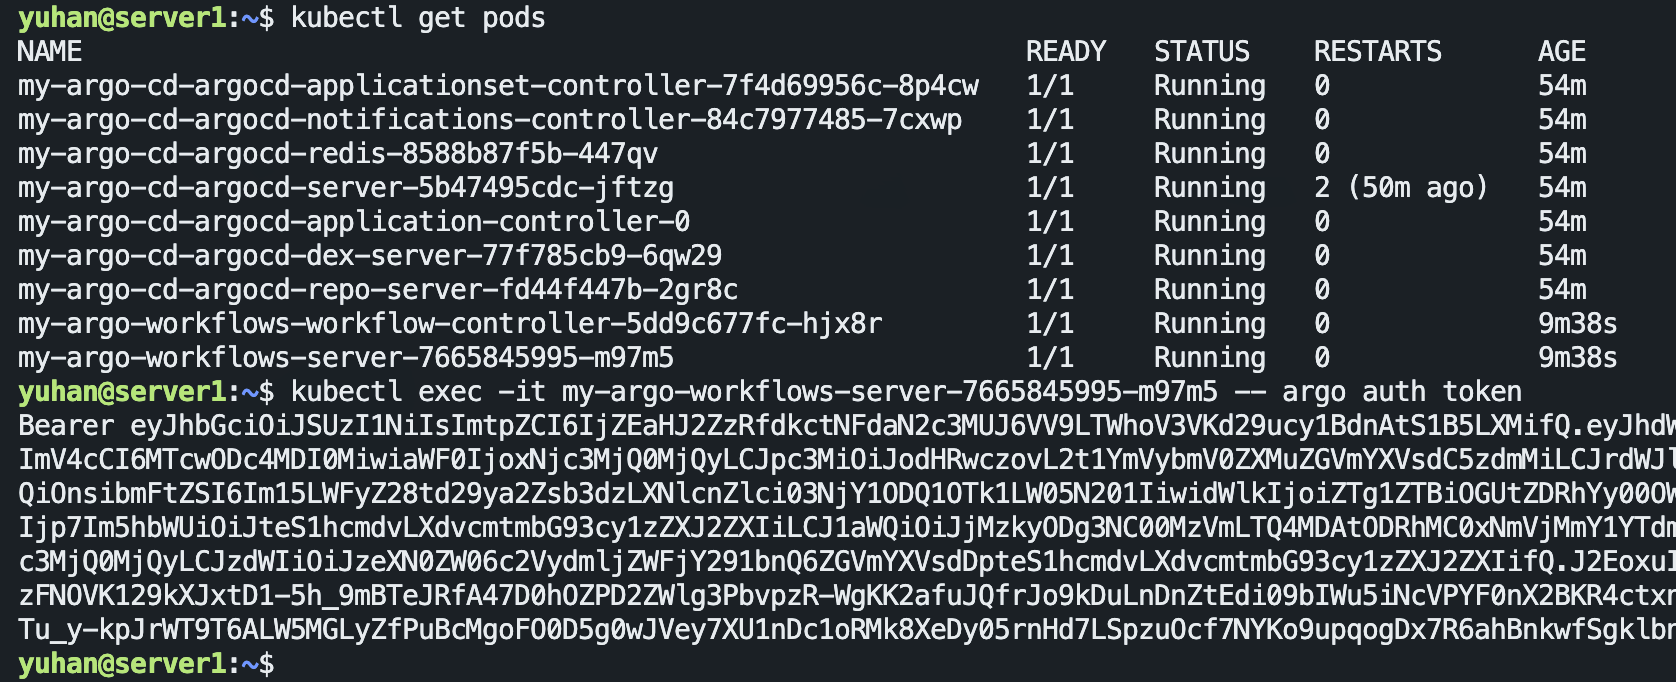
方法一,进入容器运行 argo auth token 命令:
方法二,添加用户啥的就如链接所说,好麻烦
直接粘贴 Bearer eyJhbGciOiJSUzI1NiIsImtpZCI6IjZEaHJ2ZzRfdkctNFdaN2c3MUJ6VV9LTWhoV3VKd29ucy1BdnAtS1B5LXMifQ.eyJhdWQiOlsiaHR0cHM6Ly9rdWJlcm5ldGVzLmRlZmF1bHQuc3ZjIl0sImV4cCI6MTcwODc4MDI0MiwiaWF0IjoxNjc3MjQ0MjQyLCJpc3MiOiJodHRwczovL2t1YmVybmV0ZXMuZGVmYXVsdC5zdmMiLCJrdWJlcm5ldGVzLmlvIjp7Im5hbWVzcGFjZSI6ImRlZmF1bHQiLCJwb2QiOnsibmFtZSI6Im15LWFyZ28td29ya2Zsb3dzLXNlcnZlci03NjY1ODQ1OTk1LW05N201IiwidWlkIjoiZTg1ZTBiOGUtZDRhYy00OWI3LTk1ZTEtNDFjYjZjOGFiNjk4In0sInNlcnZpY2VhY2NvdW50Ijp7Im5hbWUiOiJteS1hcmdvLXdvcmtmbG93cy1zZXJ2ZXIiLCJ1aWQiOiJjMzkyODg3NC00MzVmLTQ4MDAtODRhMC0xNmVjMmY1YTdmZjgifSwid2FybmFmdGVyIjoxNjc3MjQ3ODQ5fSwibmJmIjoxNjc3MjQ0MjQyLCJzdWIiOiJzeXN0ZW06c2VydmljZWFjY291bnQ6ZGVmYXVsdDpteS1hcmdvLXdvcmtmbG93cy1zZXJ2ZXIifQ.J2EoxuIvWj6F-bCKnpDoWiBgaezNm4-pSkVlC9kIIJUbkzk6GgjcL7toxzFNOVK129kXJxtD1-5h_9mBTeJRfA47D0hOZPD2ZWlg3PbvpzR-WgKK2afuJQfrJo9kDuLnDnZtEdi09bIWu5iNcVPYF0nX2BKR4ctxn1QSpMD8zLtKhpIAnEWMXyux5dUuXmWy0s5a5Wgug8MpmudNpqvTu_y-kpJrWT9T6ALW5MGLyZfPuBcMgoFO0D5g0wJVey7XU1nDc1oRMk8XeDy05rnHd7LSpzuOcf7NYKo9upqogDx7R6ahBnkwfSgklbn7_jlqhnlJ7Gz7o4nVVojIcg9_ng
这一串就能登录:
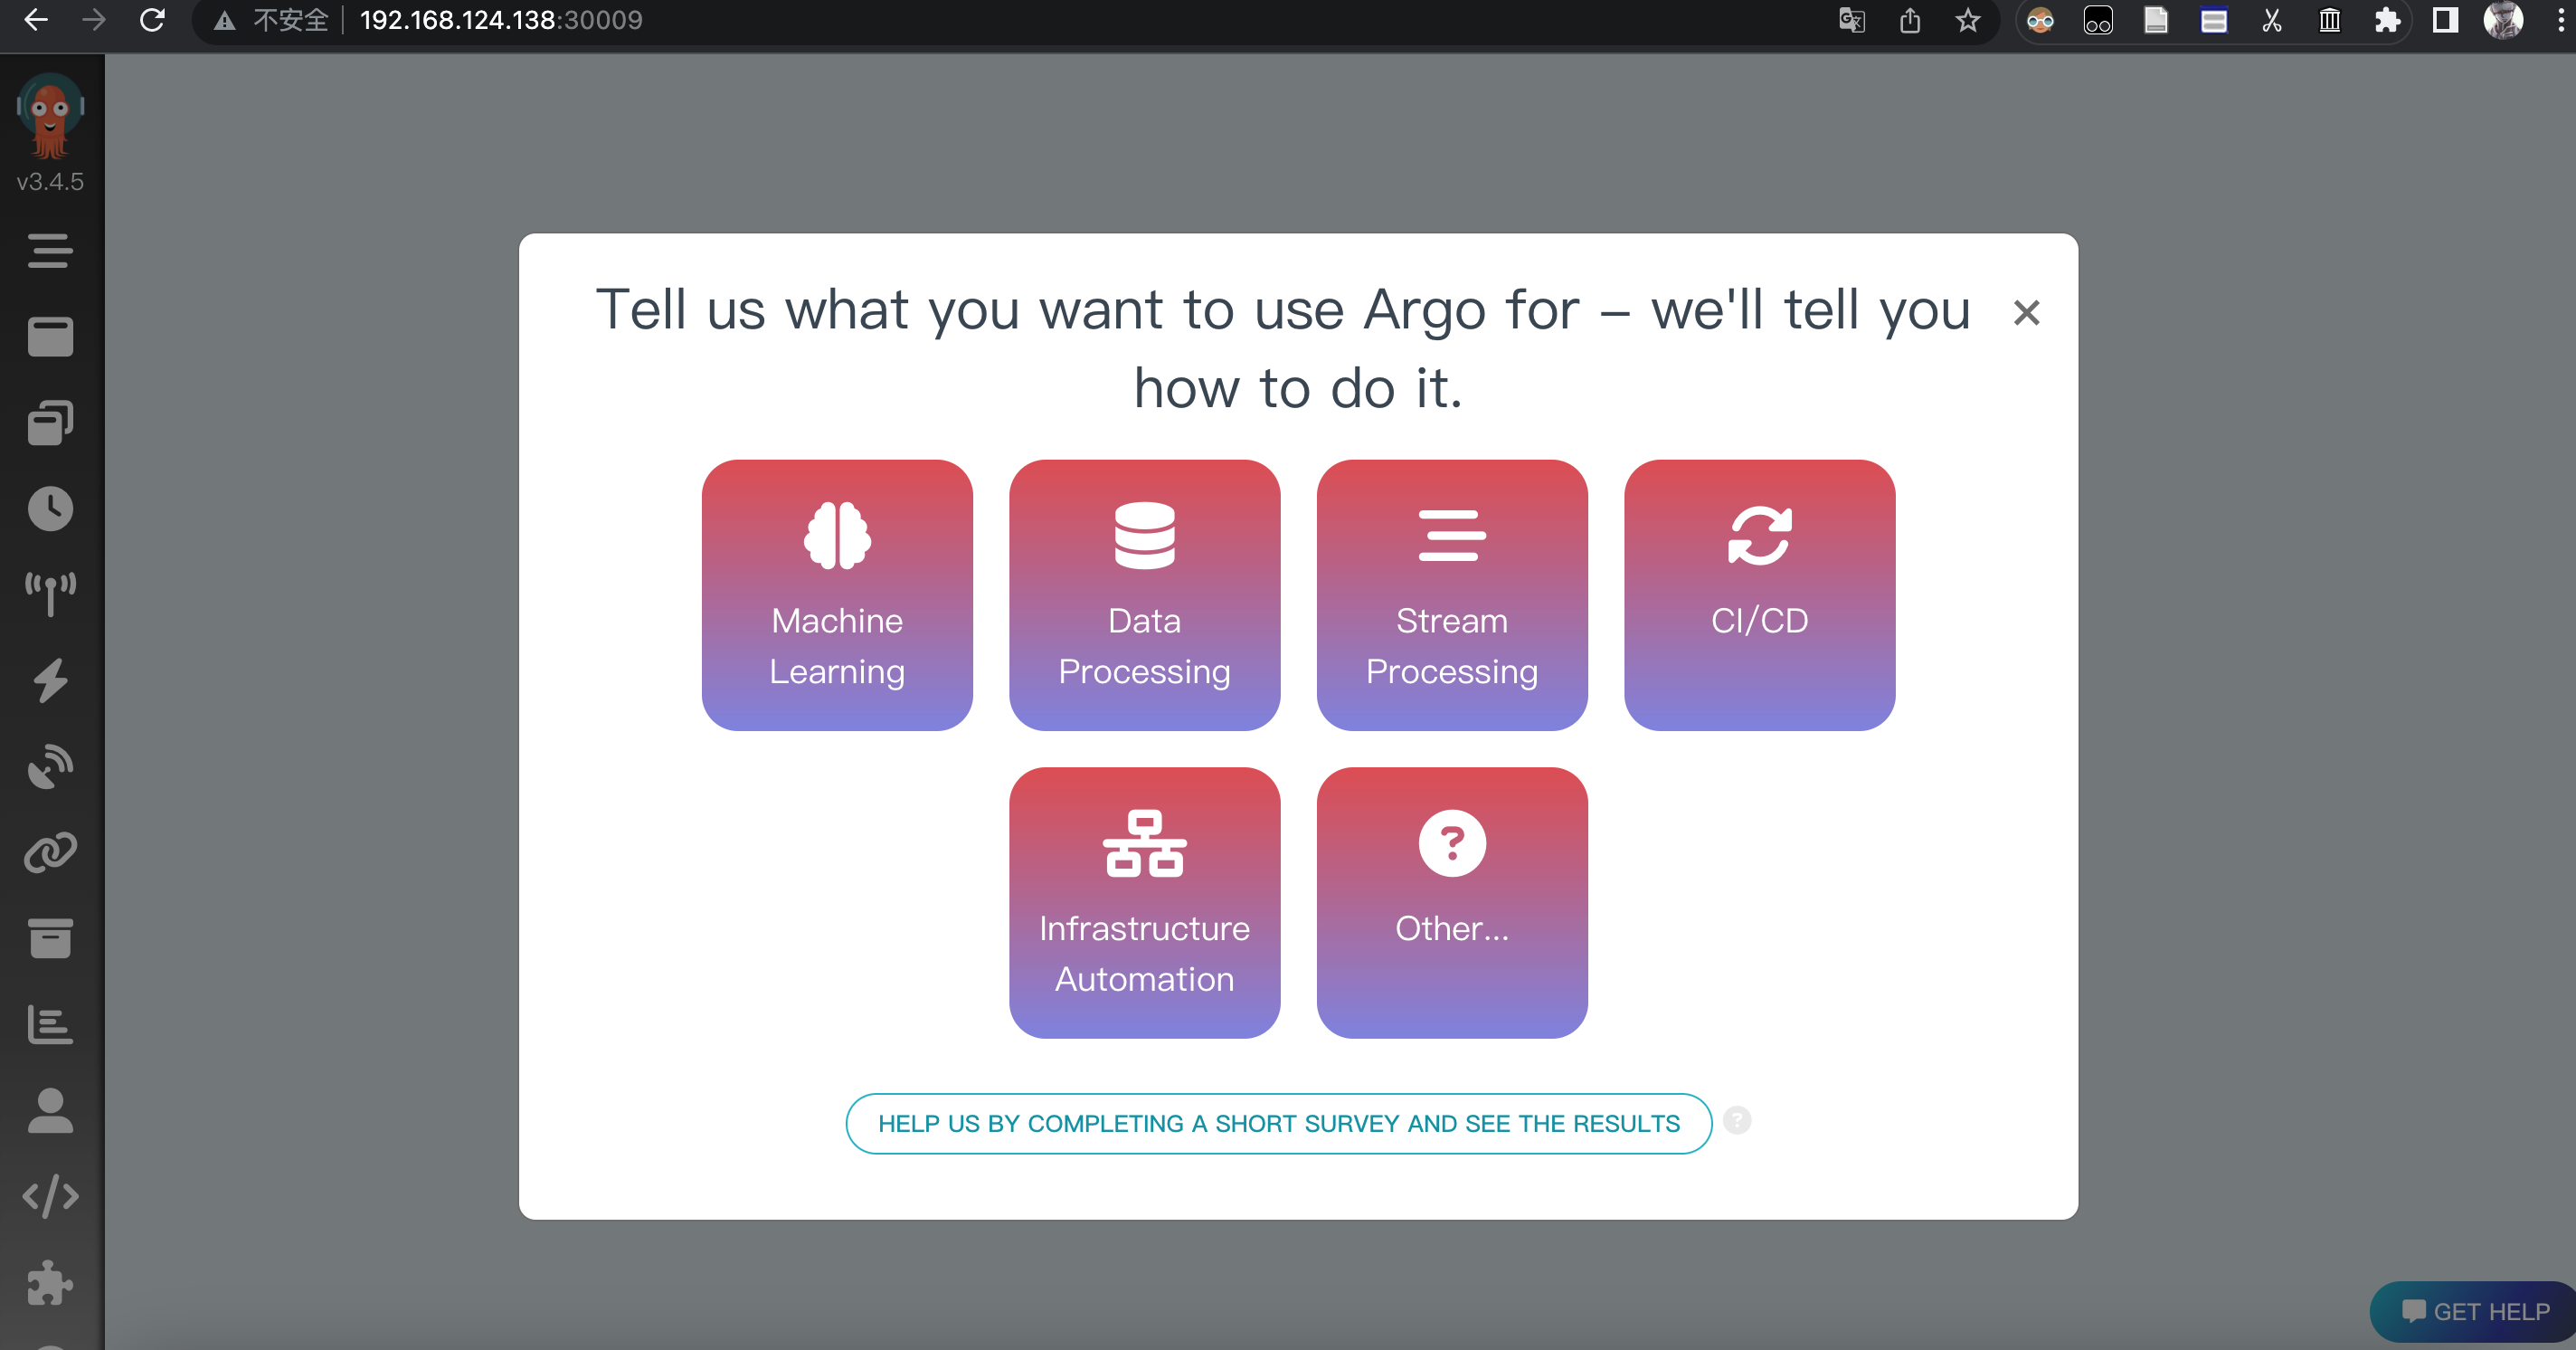
Quick Start - Argo Workflows - The workflow engine for Kubernetes
选择 CI/CD 进入指导页面,提示下载 Argo Workflows CLI ,release 页面有介绍怎么弄,不赘述了,详见 https://github.com/argoproj/argo-workflows/releases。
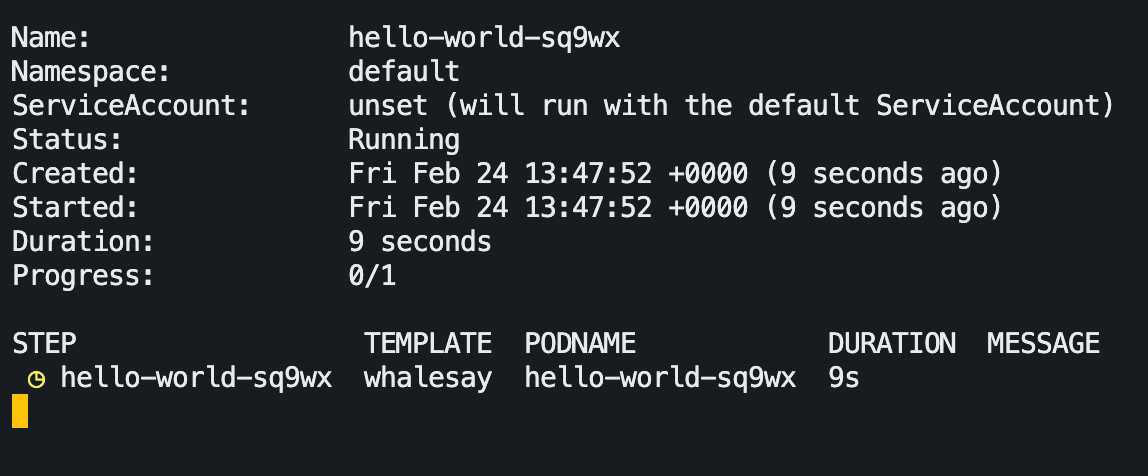
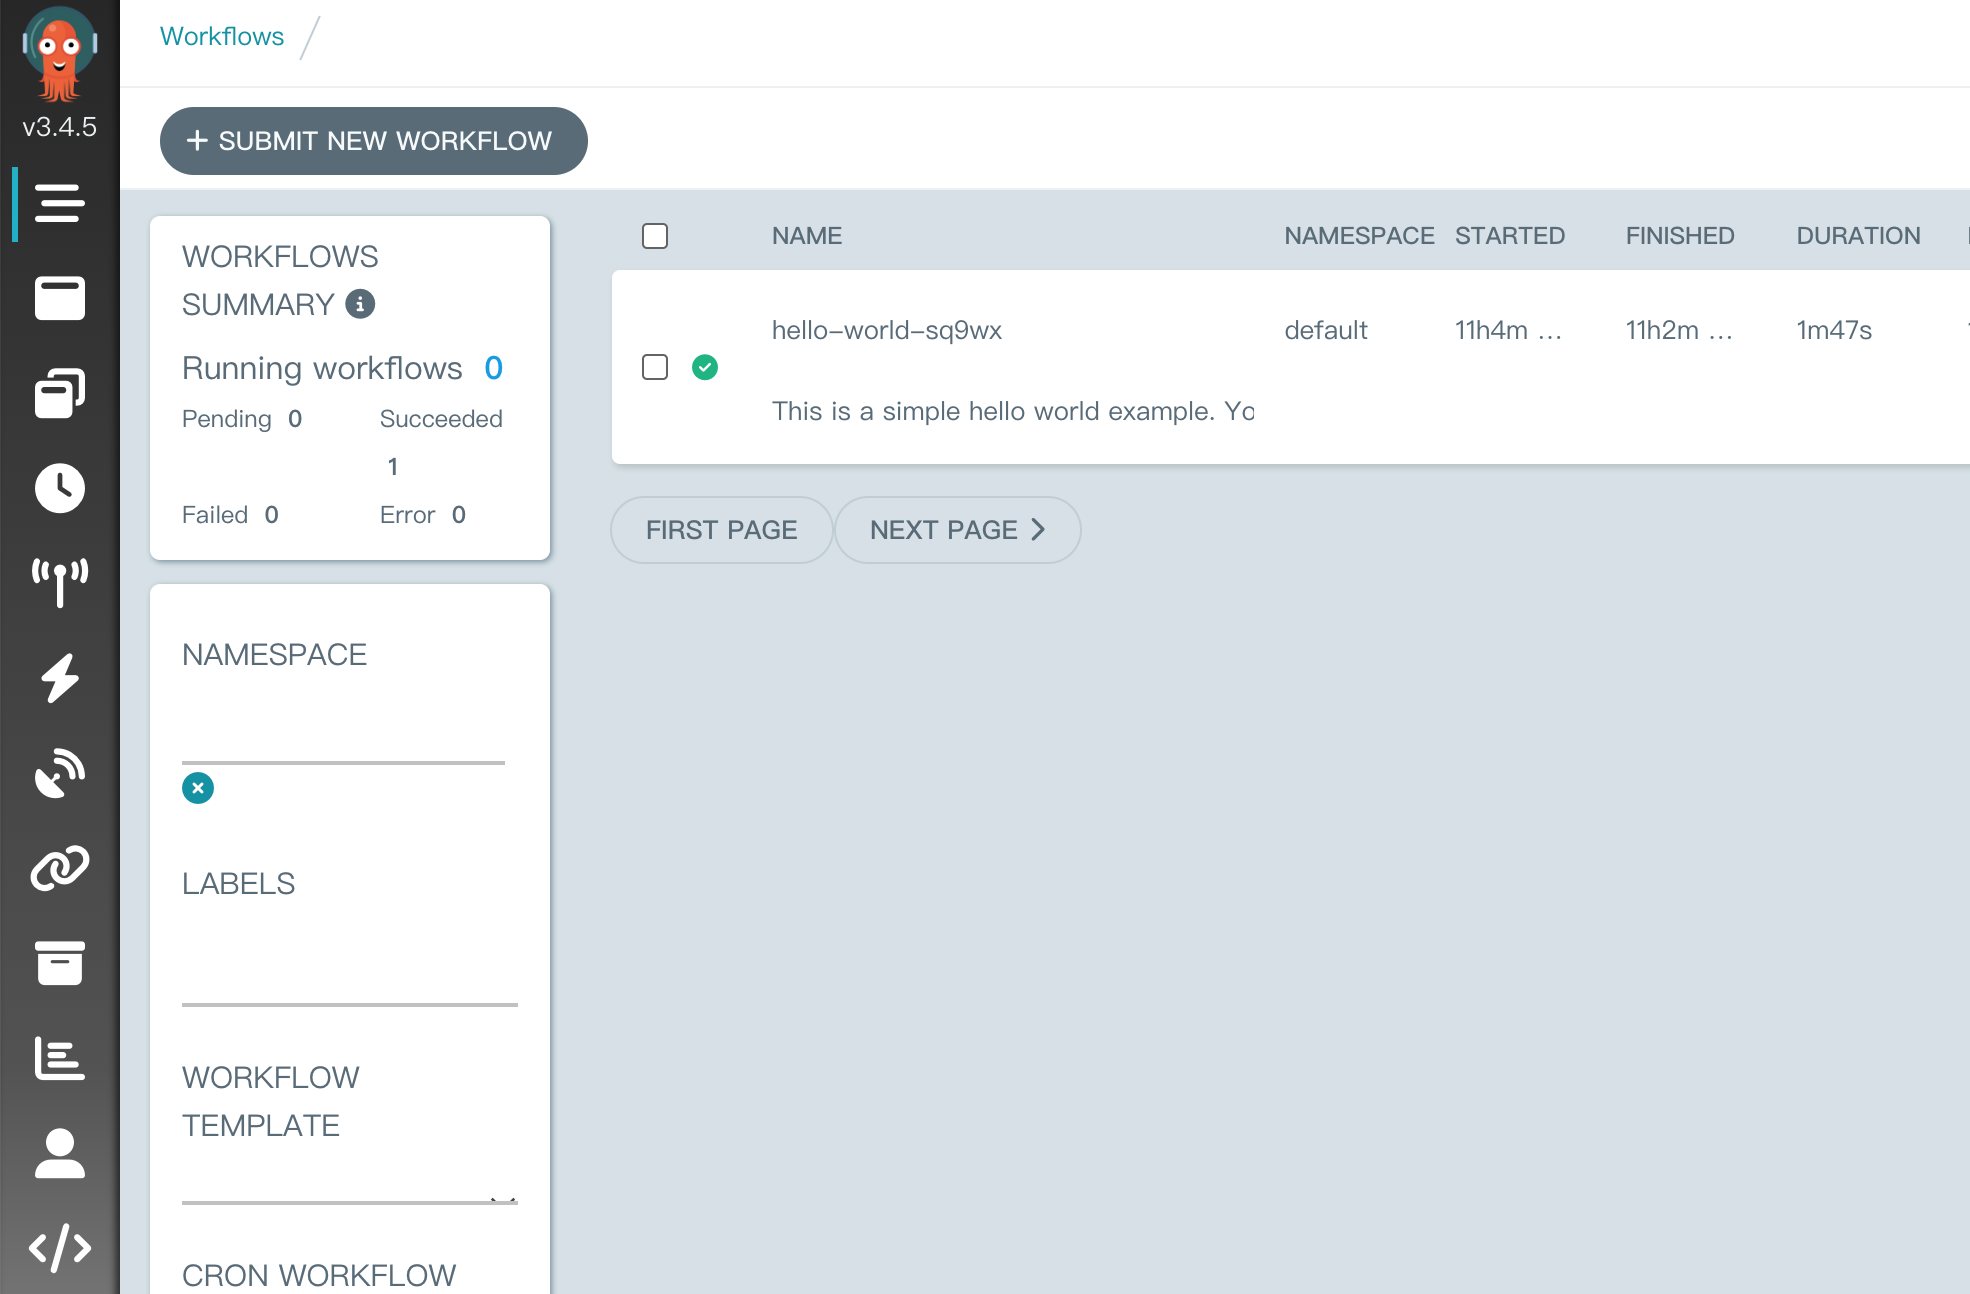
提交一个实例 workflow:
argo submit --watch https://raw.githubusercontent.com/argoproj/argo-workflows/master/examples/hello-world.yaml
但报错:invalid configuration: no configuration has been provided, try setting KUBERNETES_MASTER environment variable
解决:https://github.com/canonical/microk8s/issues/2022 sudo microk8s.kubectl config view --raw > $HOME/.kube/config
argo list
argo auth token 现在也能直接用了:
Bearer bUNlSTM1REZJaEpOSWVEeWJyS1pqV25oWEI4T1M4SDB6MEwzaXFsUUdqYz0K
清空 namespace 的 undefined 就可以看到之前部署的 workflow 了:
后期
show values 配置,主要修改:
- ingress
- artifactRepository 的 minio s3 配置
Configuring Your Artifact Repository - Argo Workflows - The workflow engine for Kubernetes
GitLab
前提:Redis、PostgreSQL
GitLab chart prerequisites | GitLab
Deploy the GitLab Helm chart | GitLab
根据上面的 INSTALL 提示进行安装:
helm repo add gitlab http://charts.gitlab.io/  # 还是得 pon 开代理哦

~~helm install my-gitlab gitlab/gitlab --version 6.9.1  # 但是失败了,得看文档了

helm repo update
helm upgrade --install gitlab gitlab/gitlab \
  --timeout 600s \
  --set global.hosts.domain=gitlab.yuhan.tech \
  --set global.hosts.externalIP=10.130.158.191 \
  --set certmanager-issuer.email=[email protected] \
  --set postgresql.image.tag=15.2.0~~
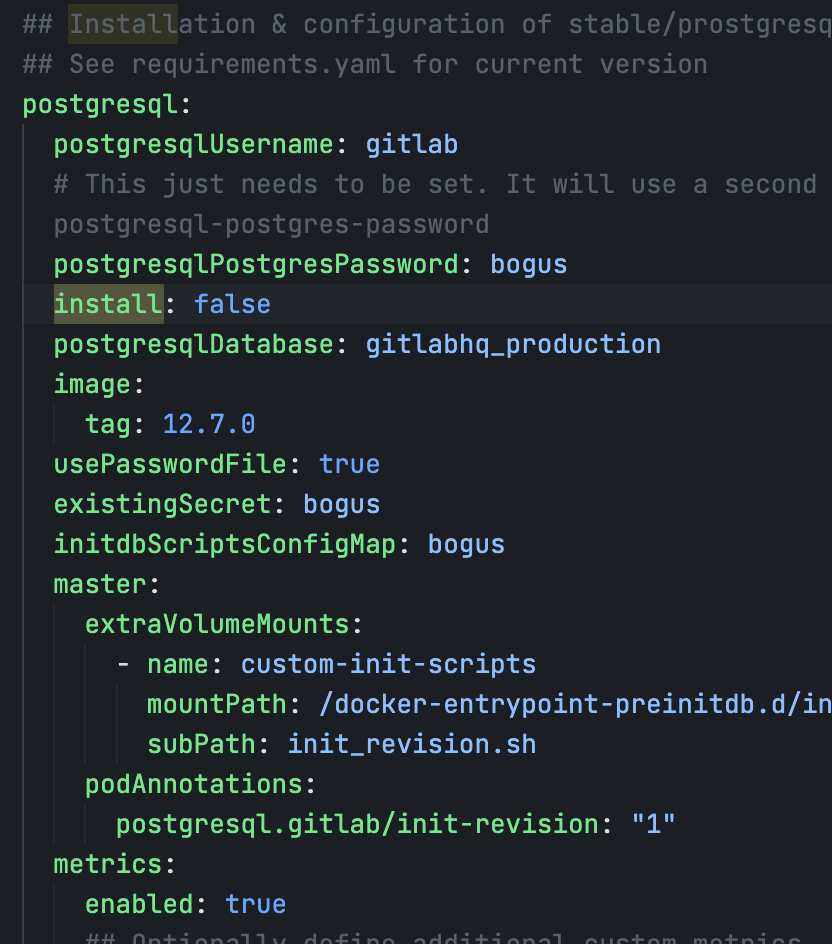
GitLab Helm chart deployment options | GitLab
使用 Helm 安装 Gitlab 时, 默认的配置会安装所有的依赖, 但是对于已有数据库等功能的场景来说, 这样做并不是很合适, 所以需要调整 values.yaml 文件让 Gitlab 使用已有的外部依赖.
# 导出默认配置到文件
helm show values gitlab/gitlab > gitlab.yml

# 修改这个配置
# 过程中注意设置数据库用户、对象存储等等
# 再安装

helm install my-gitlab gitlab/gitlab --version 6.9.1 -f gitlab.yml
关闭这下依赖的安装:install: false
certmanager
Ingress
Redis Configure charts using globals | GitLab
Postgresql
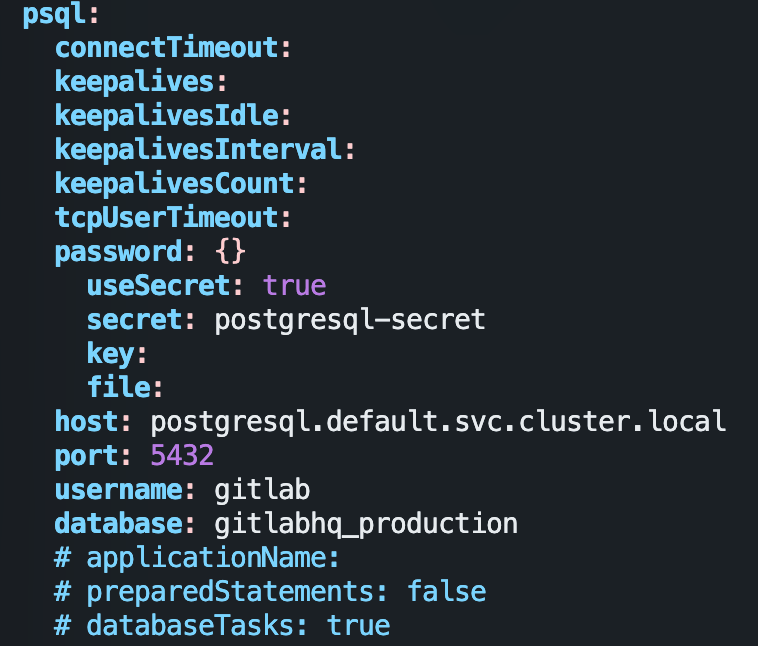
配置文件主要做了以下修改
global.hosts.domain: gitlab.yuhan.tech
global.psql.password.useSecret: true
global.psql.password.secret: postgresql-gitlab-secret # 之前创建数据库生成过
global.psql.password.key: postgres-password
global.psql.host: my-postgresql.default.svc.cluster.local
global.psql.port: 5432
global.psql.username: gitlab # 之前的
global.psql.database: gitlabhq_production # 之前的
global.redis.password.secret: my-redis
global.redis.password.key: redis-password
global.redis.host: my-redis-master.default.svc.cluster.local
global.time_zone: Asia/Shanghai
certmanager-issuer.email: [email protected]
certmanager.installCRDs: false
certmanager.install: false
nginx-ingress.enabled: false
redis.install: false
redis.existingSecret: my-redis
redis.existingSecretKey: redis-password
postgresql.install: false
global.minio.enabled: false
global.appConfig.object_store.enabled: true
global.appConfig.object_store.connection.secret: minio-storage-secret
global.appConfig.object_store.connection.key: connection
global.ingress.configureCertmanager: false
ingress 全部禁用,后期我们自己搞(自己配不太行啊,配不准,只配一个不行)# 就用它自带的 ingress: apiVersion: "" configureCertmanager: false class: public provider: nginx # class: annotations: {} enabled: true tls: enabled: true secretName: all-yuhan-tech-tls path: / pathType: Prefixgitlab-runner. install: false
global.edition: ce # md 默认居然是企业版……我要社区版
对象存储配置
GitLab 依靠对象存储来存储 Kubernetes 中的高可用持久数据。默认情况下,名为 minio
的 S3 兼容存储解决方案与 chart 一起部署,但对于生产环境质量的部署,我们建议使用托管对象存储解决方案,如 Google Cloud Storage 或 AWS S3。
在安装 minio(它是 S3 兼容的) 时有提到:
大功告成
=== NOTICE
The minimum required version of PostgreSQL is now 12. See https://gitlab.com/gitlab-org/charts/gitlab/-/blob/master/doc/installation/upgrade.md for more details.

=== NOTICE
You've installed GitLab Runner without the ability to use 'docker in docker'.
The GitLab Runner chart (gitlab/gitlab-runner) is deployed without the `privileged` flag by default for security purposes. This can be changed by setting `gitlab-runner.runners.privileged` to `true`. Before doing so, please read the GitLab Runner chart's documentation on why we
chose not to enable this by default. See https://docs.gitlab.com/runner/install/kubernetes.html#running-docker-in-docker-containers-with-gitlab-runners
Help us improve the installation experience, let us know how we did with a 1 minute survey:https://gitlab.fra1.qualtrics.com/jfe/form/SV_6kVqZANThUQ1bZb?installation=helm&release=15-9

=== NOTICE
kas:
    The configuration of `gitlab.kas.privateApi.tls.enabled` has moved. Please use `global.kas.tls.enabled` instead.
    Other components of the GitLab chart other than KAS also need to be configured to talk to KAS via TLS.
    With a global value the chart can take care of these configurations without the need for other specific values.
排错
- 第一一定手动 Ingress
- 第二不安装 runner,我貌似在官方文档看过 helm 部署的 runner 有问题来着,但是我已经找不到链接了
再提示 0/2 nodes are available: pod has unbound immediate PersistentVolumeClaims.
说明 pvc 没有绑定,这边建议手动建立,跟他们同名的:
apiVersion: v1
kind: PersistentVolumeClaim
metadata:
  name: my-gitlab-prometheus-server
spec:
  accessModes:
  - ReadWriteOnce
  storageClassName: nfs-client
  resources:
    requests:
      storage: 50Gi

---
apiVersion: v1
kind: PersistentVolumeClaim
metadata:
  name: repo-data-my-gitlab-gitaly-0
spec:
  accessModes:
  - ReadWriteOnce
  storageClassName: nfs-client
  resources:
    requests:
      storage: 50Gi
PVC 它不会自动删除,还留下来了!这就是 statefulset 卷绑定可知!
登录
账号:root
密码:echo $(kubectl get secret --namespace default my-gitlab-gitlab-initial-root-password -o jsonpath="{.data.password}" | base64 -d)
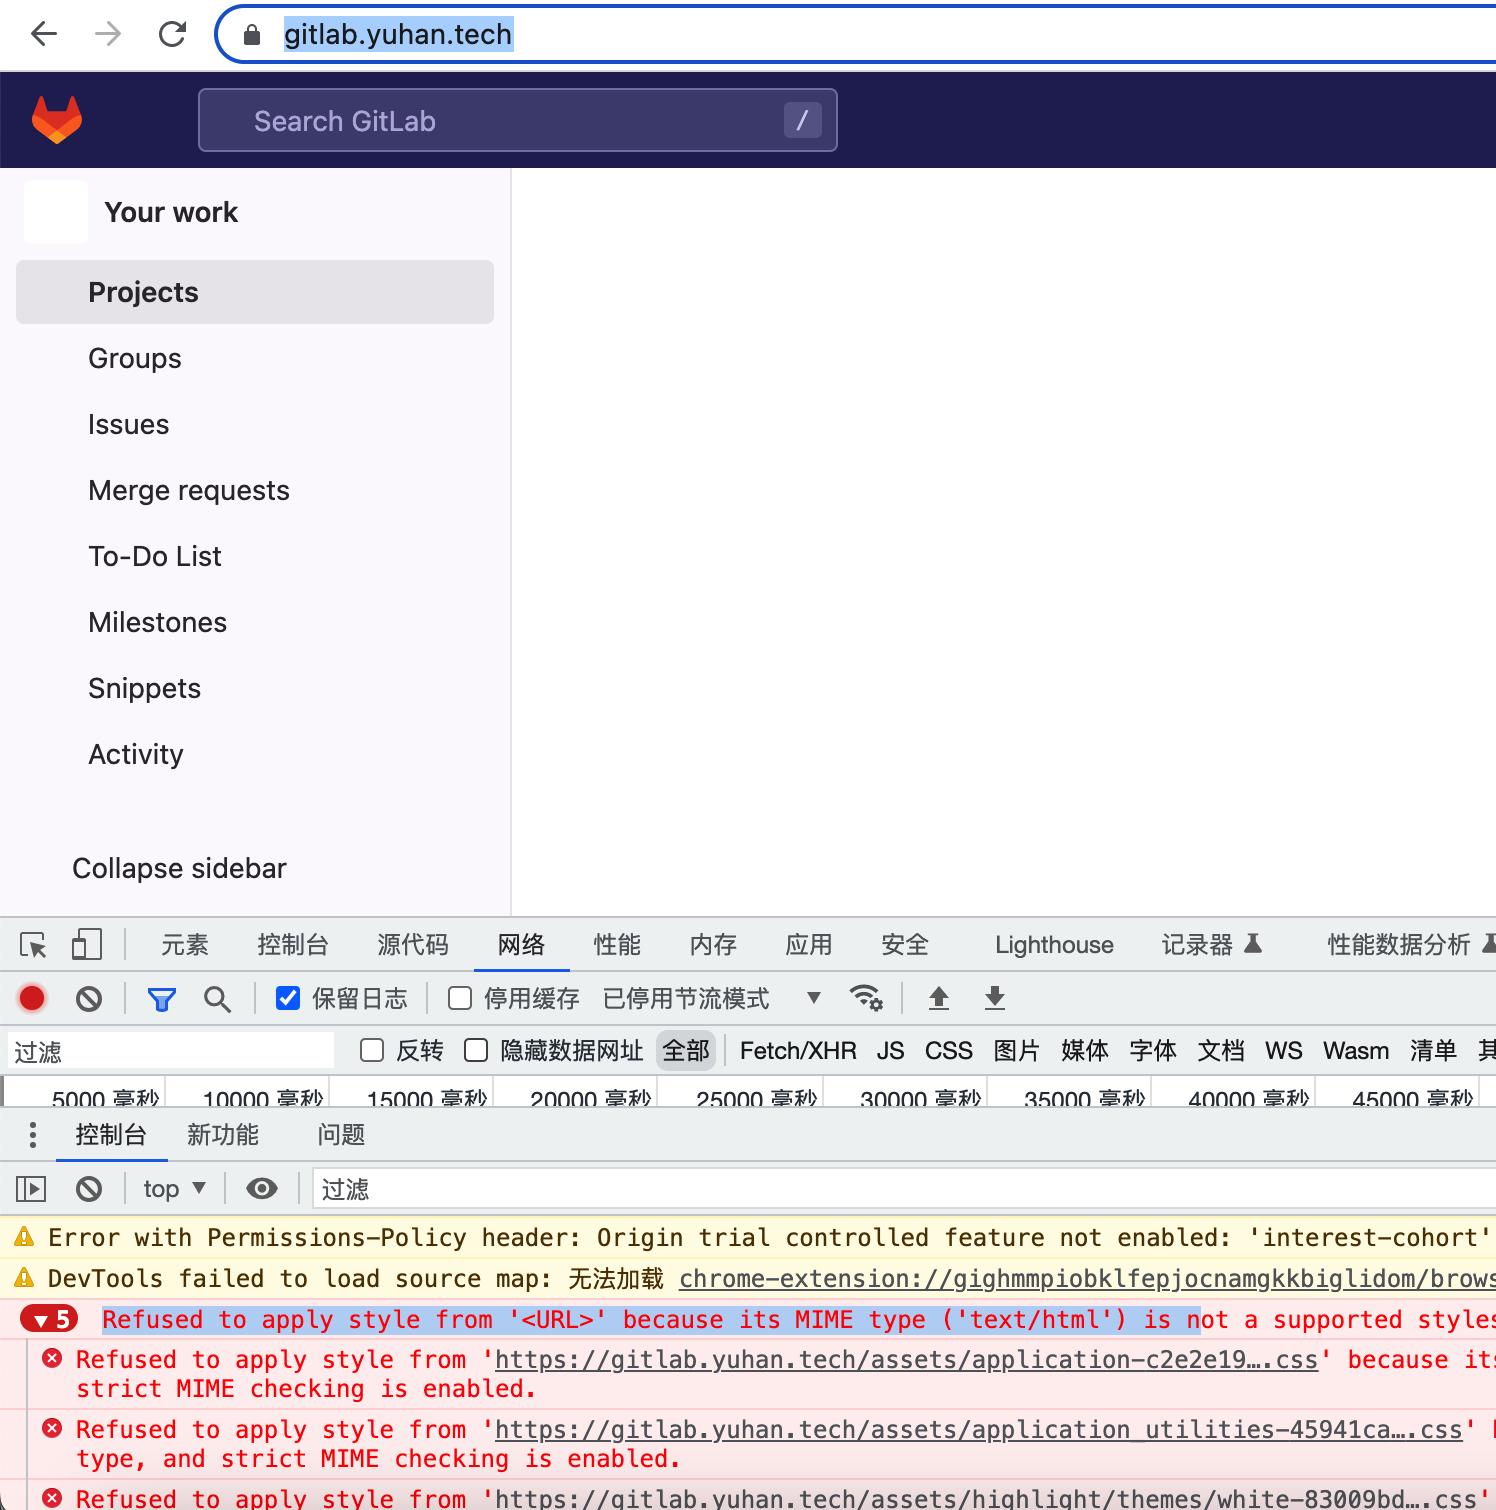
页面错误
说明你还有两个 ingress 没配!
rules:
  - host: kas.yuhan.tech
    http:
      paths:
      - backend:
          service:
            name: my-gitlab-kas
            port:
              number: 8154
        path: /k8s-proxy/
        pathType: Prefix
      - backend:
          service:
            name: my-gitlab-kas
            port:
              number: 8150
        path: /
        pathType: Prefix

- host: registry.yuhan.tech
    http:
      paths:
      - backend:
          service:
            name: my-gitlab-registry
            port:
              number: 5000
        path: /
        pathType: Prefix
  tls:
  - hosts:
    - registry.yuhan.tech
    secretName: all-yuhan-tech-tls

- host: gitlab.yuhan.tech
    http:
      paths:
      - backend:
          service:
            name: my-gitlab-webservice-default
            port:
              number: 8181
        path: /
        pathType: Prefix

后期
我还尝试用过中文版 极狐:
helm install my-gitlab gitlab-jh/gitlab -f gitlab-jh.yml
后期我还开启了 runner ,然后更新配置,丝滑得很:
helm **upgrade** my-gitlab gitlab-jh/gitlab -f gitlab-jh.yml
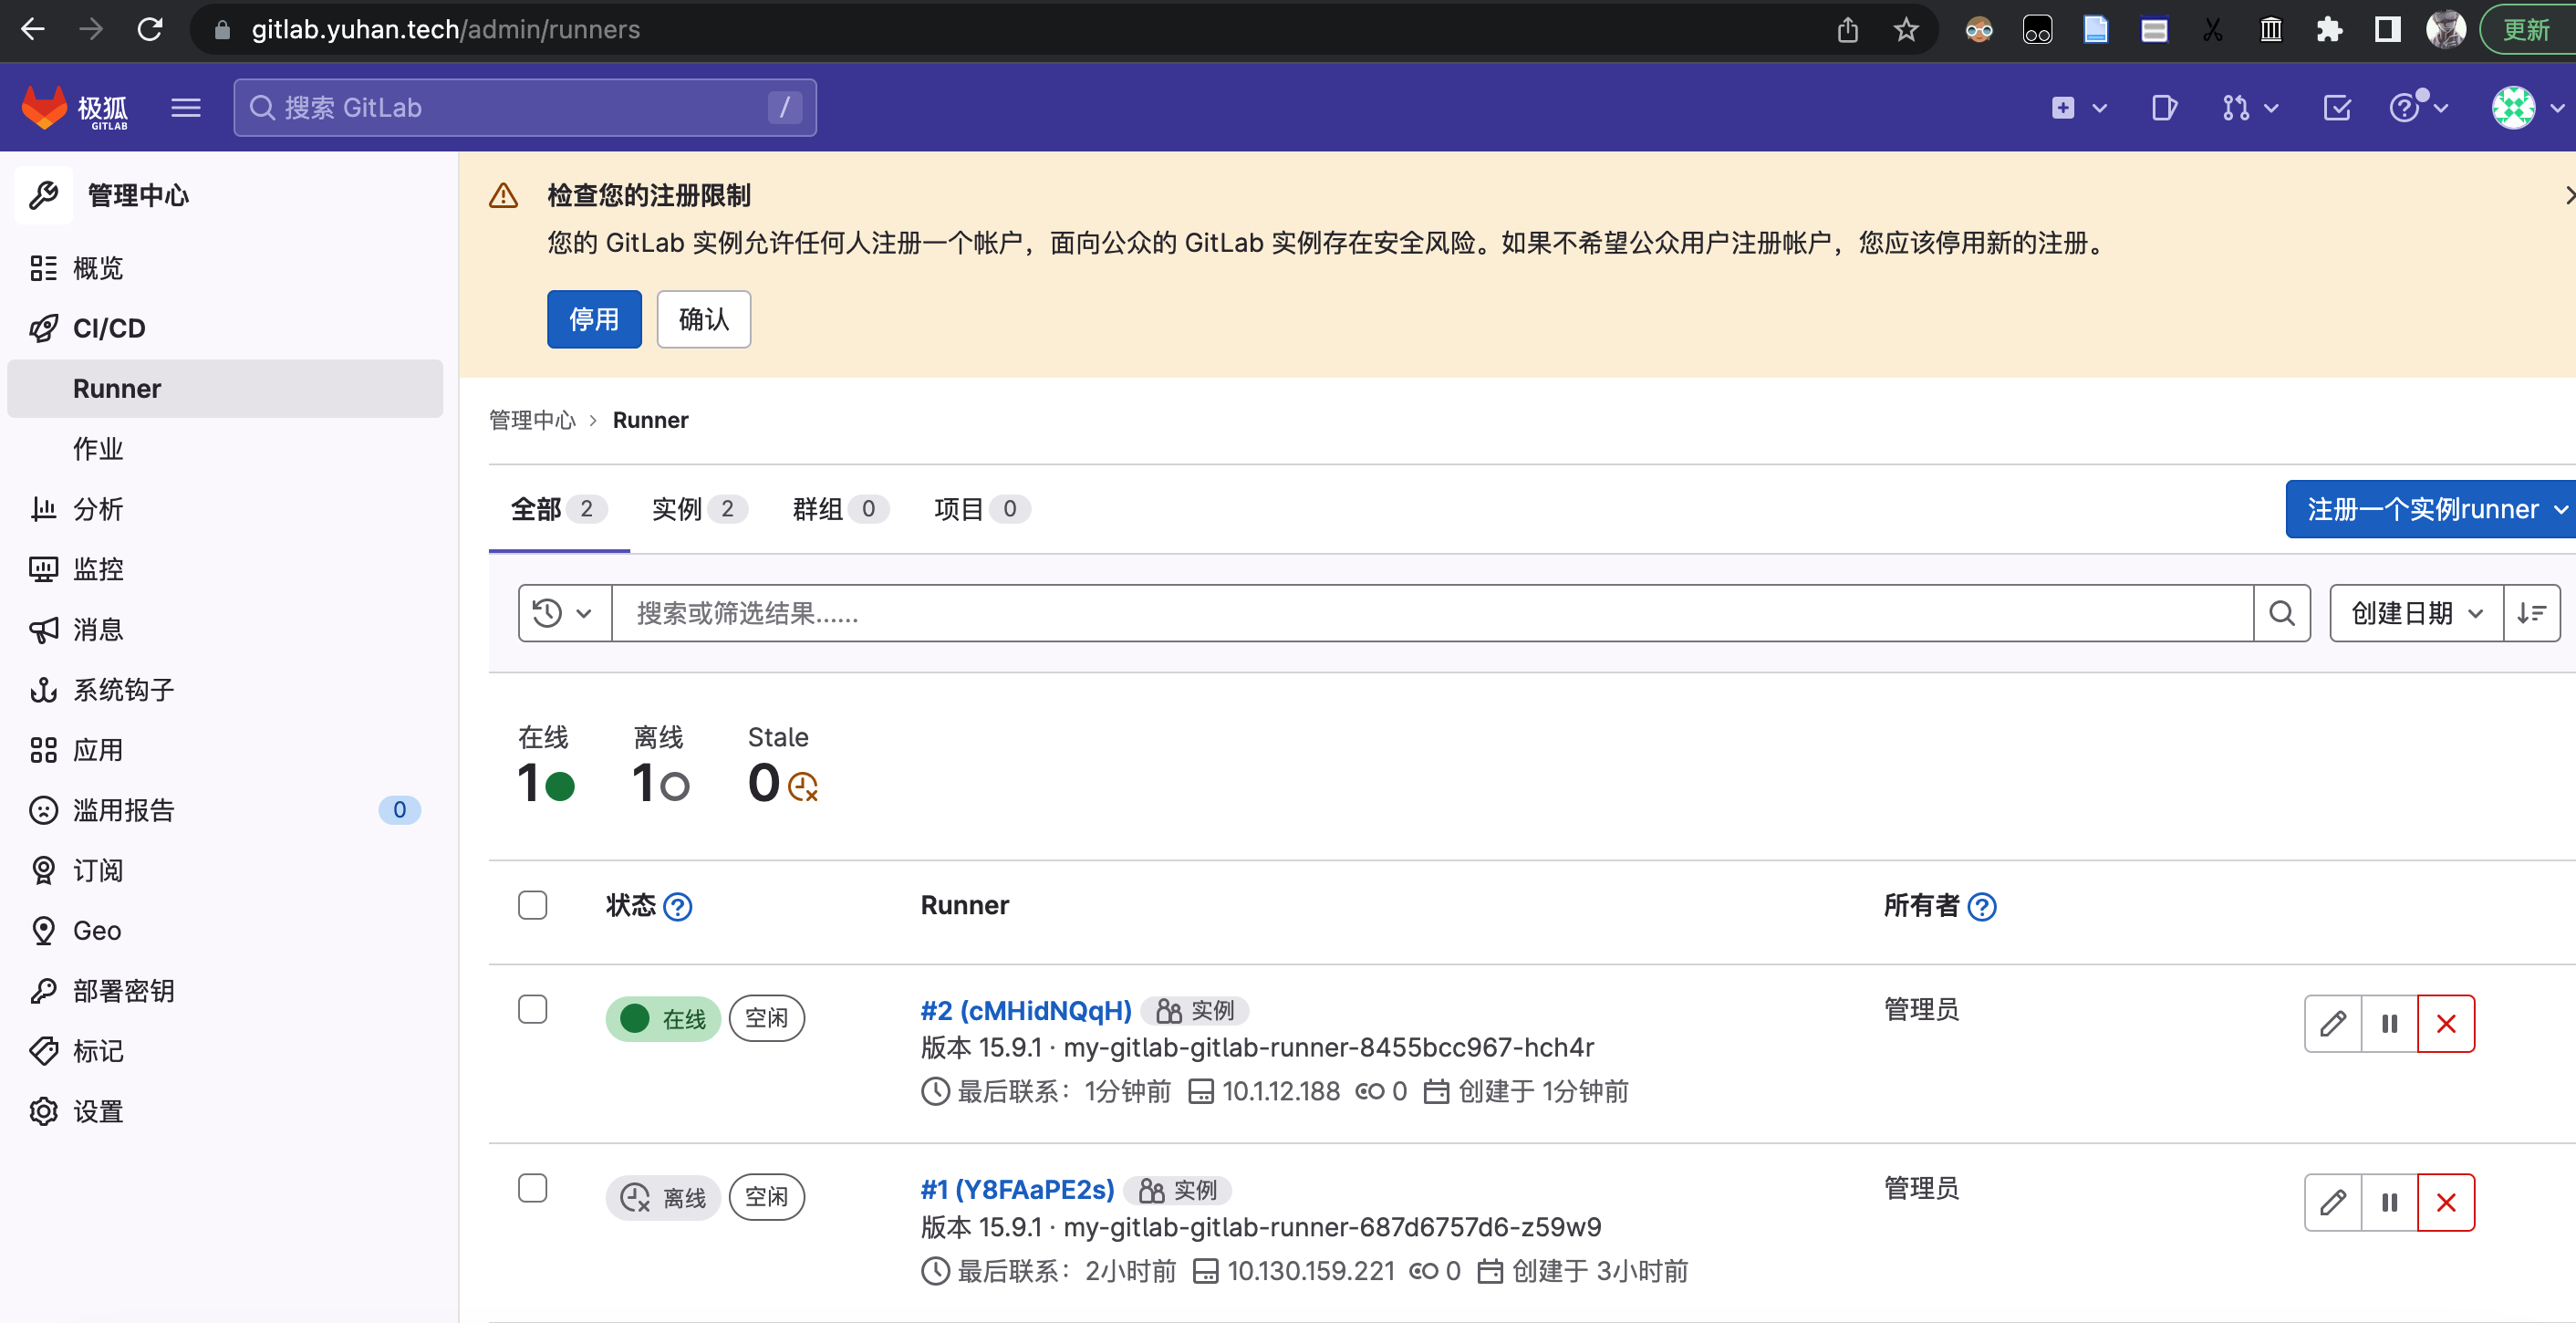
取消使用 gitlab 的 runner 、registry、prometheus,因为没用……
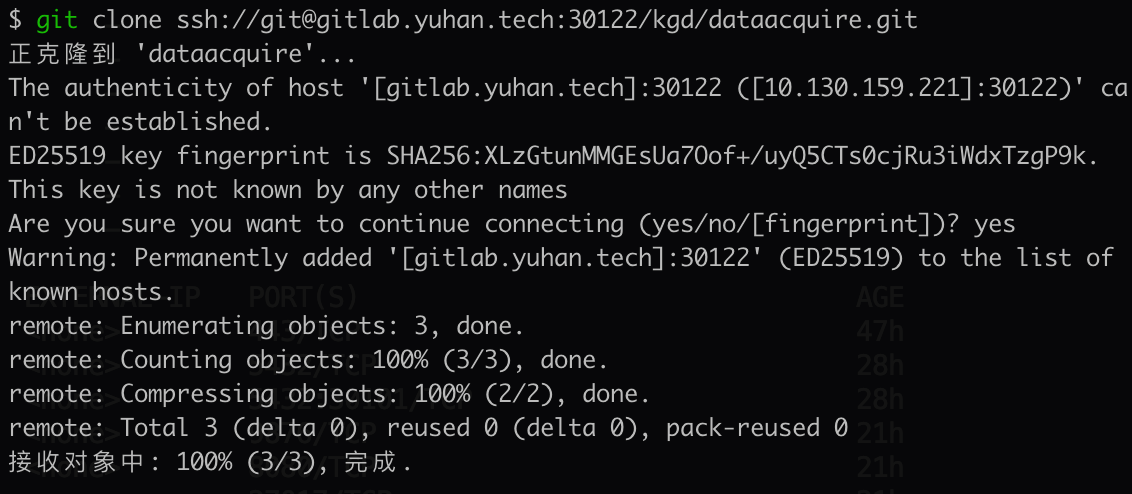
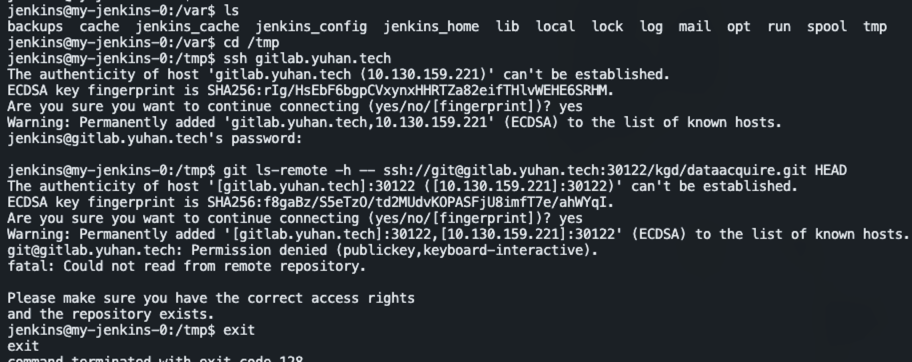
开启 SSH 克隆
由于默认 my-gitlab-gitlab-shell 也是用的 22 端口,不能直接映射到主机的 22 端口。
所以,我们映射到 30122 端口。
然后再 clone 的时候,填完整地址:
- ssh:// 开头
gitlab.yuhan.tech**:30122**表明端口- /kgd/ 是群组名
git clone **ssh://**[email protected]**:30122/kgd**/dataacquire.git
在 ssh key 的配置上:
Host gitlab
  User git
  Hostname gitlab.yuhan.tech:30122
  PreferredAuthentications publickey
  IdentityFile ~/.ssh/id_ed25519_gitlab_dfface
ssh -T 你仍然会失败:

但仓库已经可 clone:
git remote get origin

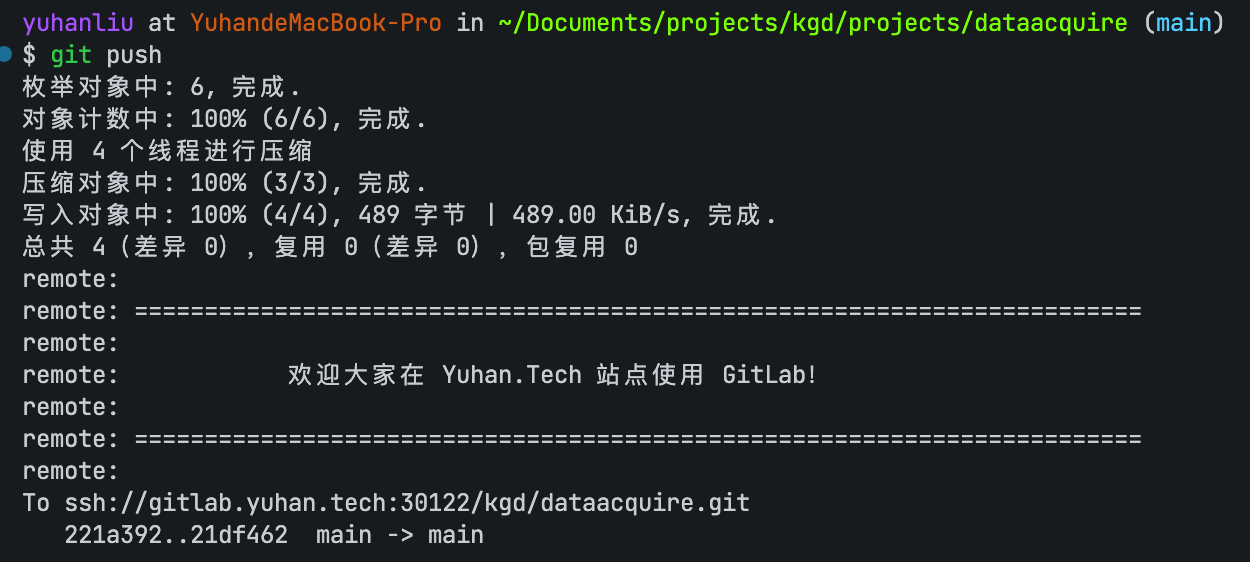
添加仓库,也要这样写,不能是它提示的那种:
git remote add origin ssh://[email protected]:30122/kgd/umlfigure.git
如果 ssh 方式实在连不上,请改用 http 方式
https://gitlab.yuhan.tech/kgd/dataacquire.git
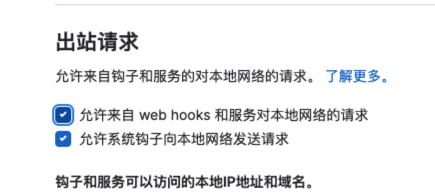
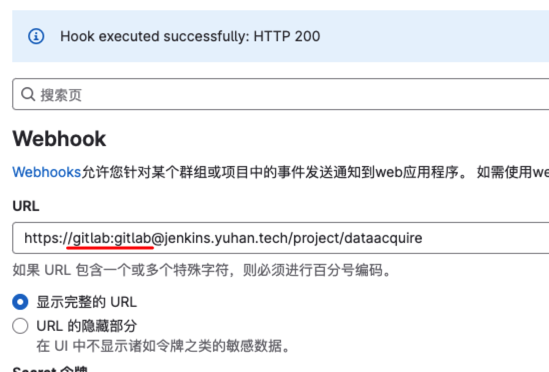
Jenkins Webhook
显示不允许访问本地的
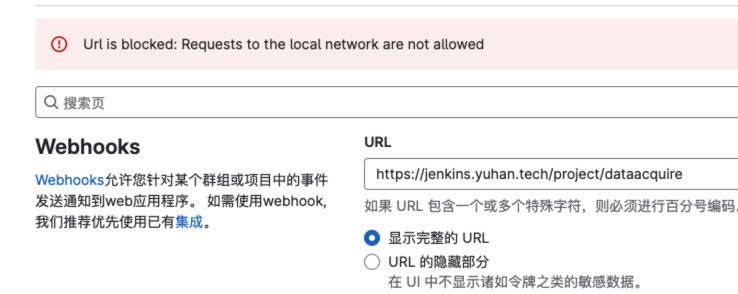
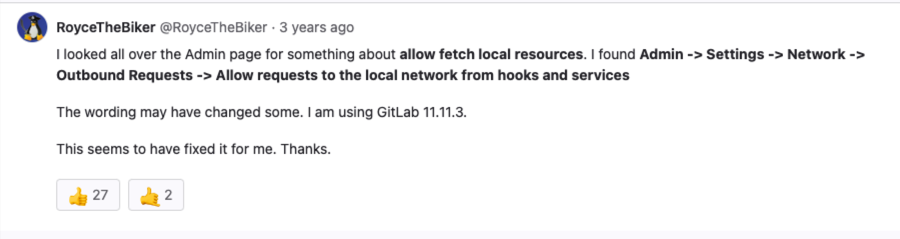
https://gitlab.com/gitlab-org/gitlab/-/issues/26845
But returned 403

Gitlab Jenkins Webhook executed successfully but returned HTTP 403 (Authentication required)
注意,配置 Jenkins 任务的时候,要选择高级,然后生成 Secret Token:
But I already fixed it: I simply added the authentication parameters in the url like this: https://USERNAME:[email protected]/github-webhook
我新建了 gitlab 用户。
SonarQube
暂不上
Hashicorp Vault
暂不上
Istio
暂不上
FAQ
DNS 解析异常
如果是 Ubuntu Desktop 默认会用 NetworkManager 来管理网络。
使用 nmcli 来设置 DNS:
sudo nmcli con

sudo nmcli con mod "有线连接 1" ipv4.dns "114.114.114.114 8.8.8.8”
service NetworkManager restart
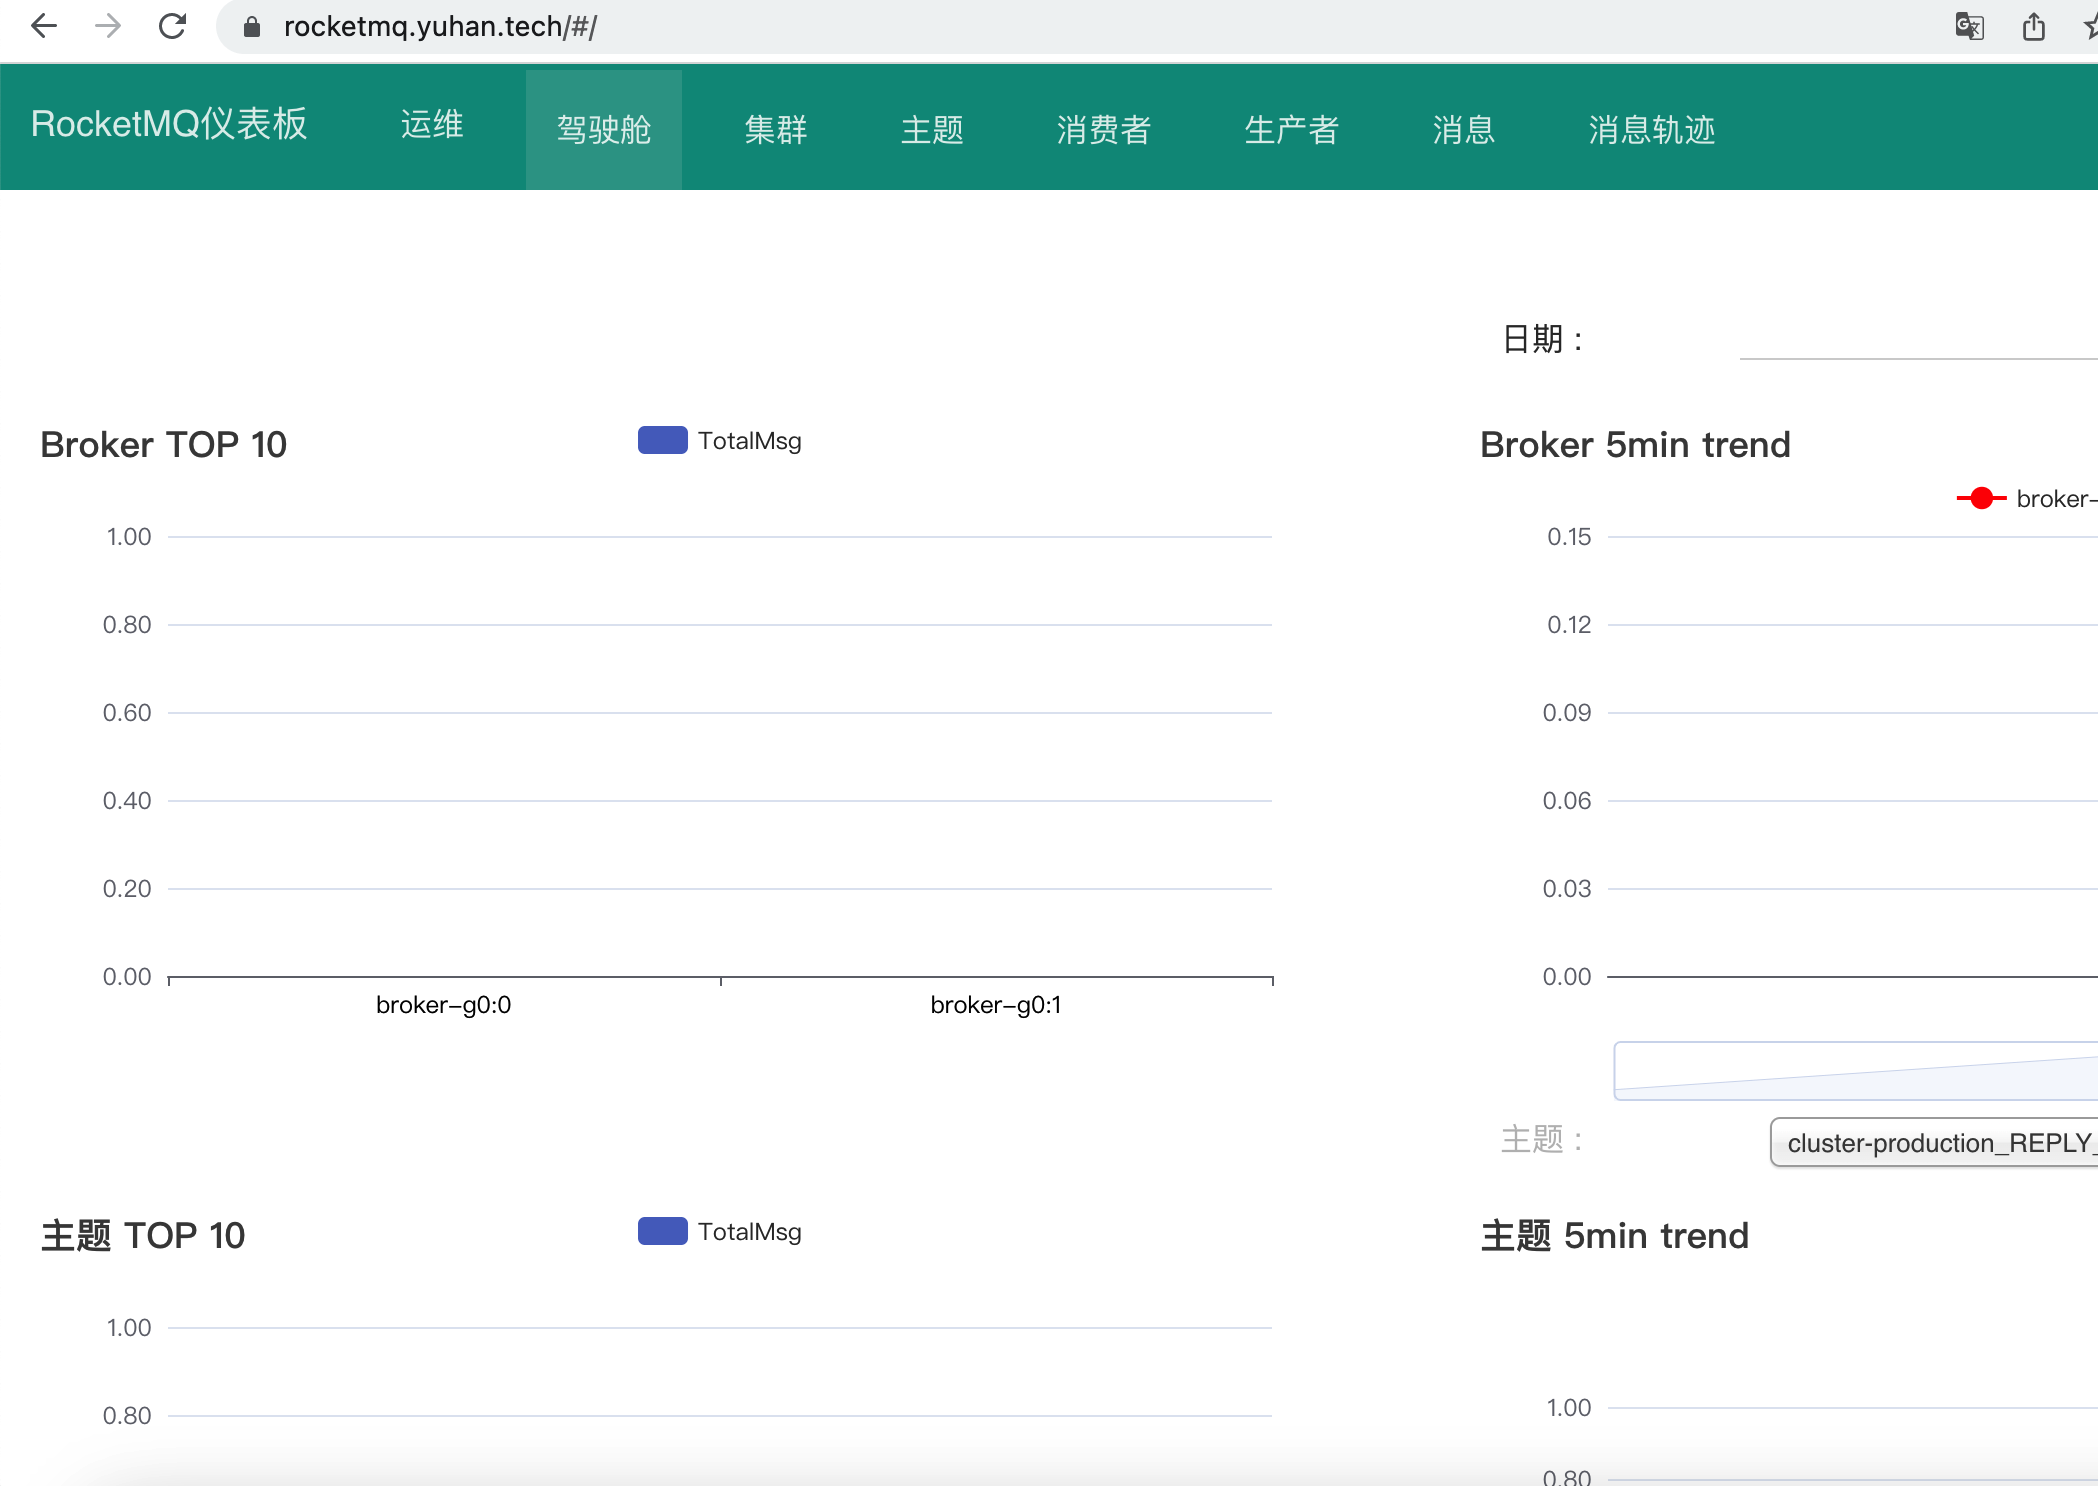
RocketMQ
https://github.com/itboon/rocketmq-helm
# 集群名
clusterName: "cluster-production"

image:
  repository: "apache/rocketmq"
  tag: "4.9.4"

broker:
  # 3 个 master 节点,每个 master 具有1个副节点,共6个 broker 节点
  size:
    master: 1
    replica: 1

  persistence:
    enabled: true
    size: 8Gi
    storageClass: nfs-client

  # 主节点资源分配
  master:
    brokerRole: ASYNC_MASTER
    jvmMemory: " -Xms4g -Xmx4g -Xmn1g "
    resources:
      limits:
        cpu: 4
        memory: 12Gi
      requests:
        cpu: 200m
        memory: 6Gi

  # 副节点资源分配
  replica:
    jvmMemory: " -Xms1g -Xmx1g -Xmn256m "
    resources:
      limits:
        cpu: 4
        memory: 8Gi
      requests:
        cpu: 50m
        memory: 2Gi

nameserver:
  replicaCount: 3

  # 修改 nameserver 容器镜像地址和版本
  #image:
  #  repository: "apacherocketmq/rocketmq-nameserver"
  #  tag: "4.5.0-alpine-operator-0.3.0"

  resources:
    limits:
      cpu: 4
      memory: 8Gi
    requests:
      cpu: 50m
      memory: 1Gi

  persistence:
    enabled: true
    size: 8Gi
    #storageClass: gp2

dashboard:
  enabled: true
  replicaCount: 1

  ingress:
    enabled: false
    className: "nginx"
    hosts:
      - host: rocketmq.yuhan.tech
        paths:
          - path: /
            pathType: ImplementationSpecific
    #tls:
    #  - secretName: example-com-tls
    #    hosts:
    #      - rocketmq.example.com
- host: rocketmq.yuhan.tech
    http:
      paths:
      - backend:
          service:
            name: my-rocketmq-dashboard
            port:
              number: 8080
        path: /
        pathType: ImplementationSpecific
helm install my-rocketmq -f examples/production.yaml ./charts/rocketmq****
兼容官方镜像:https://hub.docker.com/r/apache/rocketmq
你得等等才能访问网页:
MongoDB
helm show values bitnami/mongodb > mongodb-helm-values.yml
- 主要是 persistence
apiVersion: v1
kind: PersistentVolumeClaim
metadata:
  name: mongodb-pvc
spec:
  accessModes:
  - ReadWriteOnce
  storageClassName: nfs-client
  resources:
    requests:
      storage: 20Gi
** Please be patient while the chart is being deployed **

MongoDB® can be accessed on the following DNS name(s) and ports from within your cluster:

    my-mongodb.default.svc.cluster.local

To get the root password run:

    export MONGODB_ROOT_PASSWORD=$(kubectl get secret --namespace default my-mongodb -o jsonpath="{.data.mongodb-root-password}" | base64 -d)

To connect to your database, create a MongoDB® client container:

    kubectl run --namespace default my-mongodb-client --rm --tty -i --restart='Never' --env="MONGODB_ROOT_PASSWORD=$MONGODB_ROOT_PASSWORD" --image docker.io/bitnami/mongodb:6.0.4-debian-11-r10 --command -- bash

Then, run the following command:
    mongosh admin --host "my-mongodb" --authenticationDatabase admin -u root -p $MONGODB_ROOT_PASSWORD

To connect to your database from outside the cluster execute the following commands:

    kubectl port-forward --namespace default svc/my-mongodb 27017:27017 &
    mongosh --host 127.0.0.1 --authenticationDatabase admin -p $MONGODB_ROOT_PASSWORD
后期去重,new bing 可太好用了:

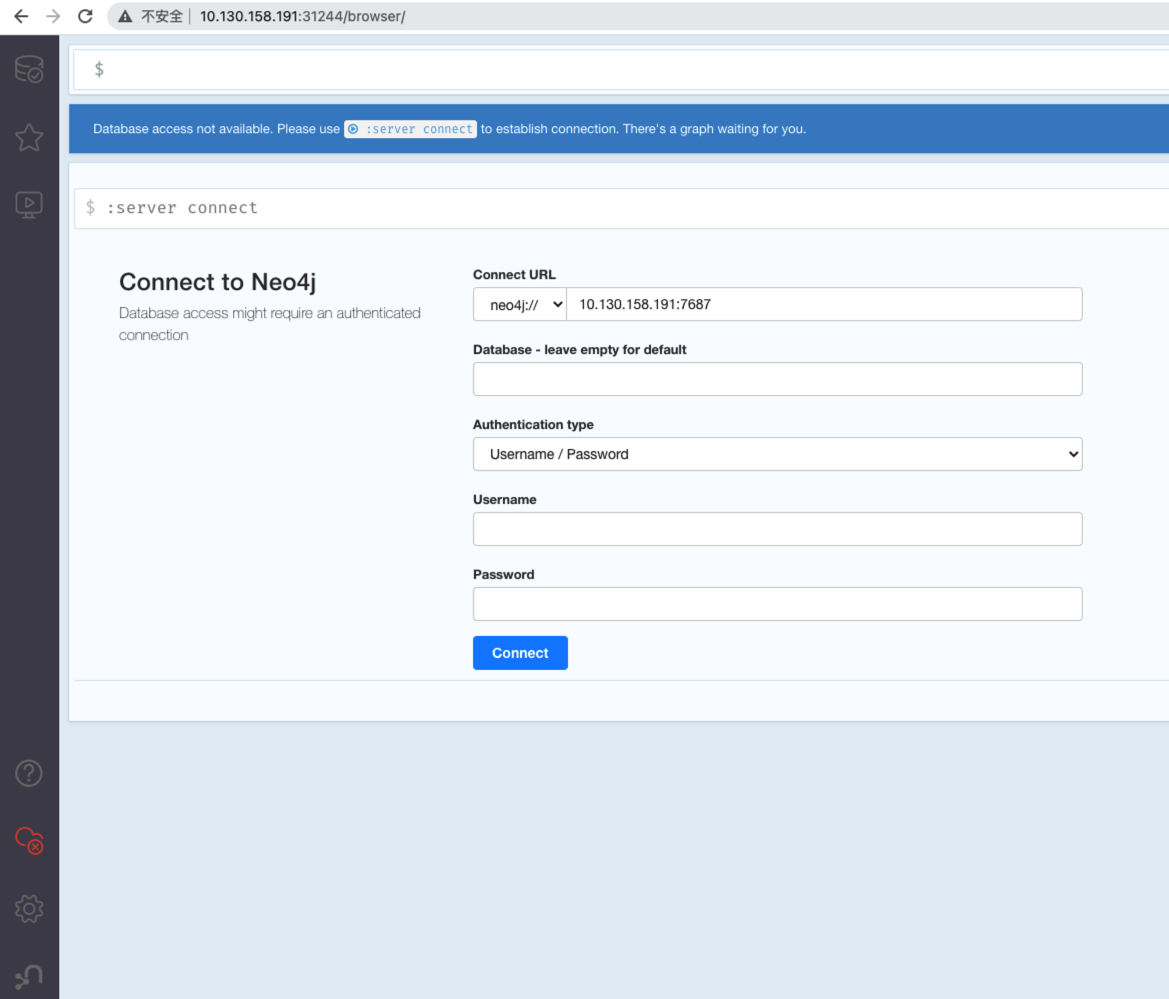
Neo4j
helm repo add neo4j-helm-charts https://neo4j.github.io/helm-charts/
helm show values neo4j-helm-charts/neo4j > neo4j-helm-values.yml
- 主要是 volume 的持久化
helm install my-neo4j neo4j-helm-charts/neo4j -f neo4j-helm-values.yml
helm upgrade my-neo4j neo4j-helm-charts/neo4j -f neo4j-helm-values.yml
Thank you for installing neo4j.

Your release "my-neo4j" has been installed
 .

The neo4j user's password has been set to "YmkGAFYzieUlA8".To view the progress of the rollout try:

  $ kubectl rollout status --watch --timeout=600s statefulset/my-neo4j

Once rollout is complete you can log in to Neo4j at "neo4j://my-neo4j.default.svc.cluster.local:7687". Try:

  $ kubectl run --rm -it --image "neo4j:5.5.0" cypher-shell \
     -- cypher-shell -a "neo4j://my-neo4j.default.svc.cluster.local:7687" -u neo4j -p "or6saMeRDcZyL1"

Graphs are everywhere!

WARNING: Passwords set using 'neo4j.password' will be stored in plain text in the Helm release ConfigMap.
Please consider using 'neo4j.passwordFromSecret' for improved security.
修改 svc 为 NodePort:

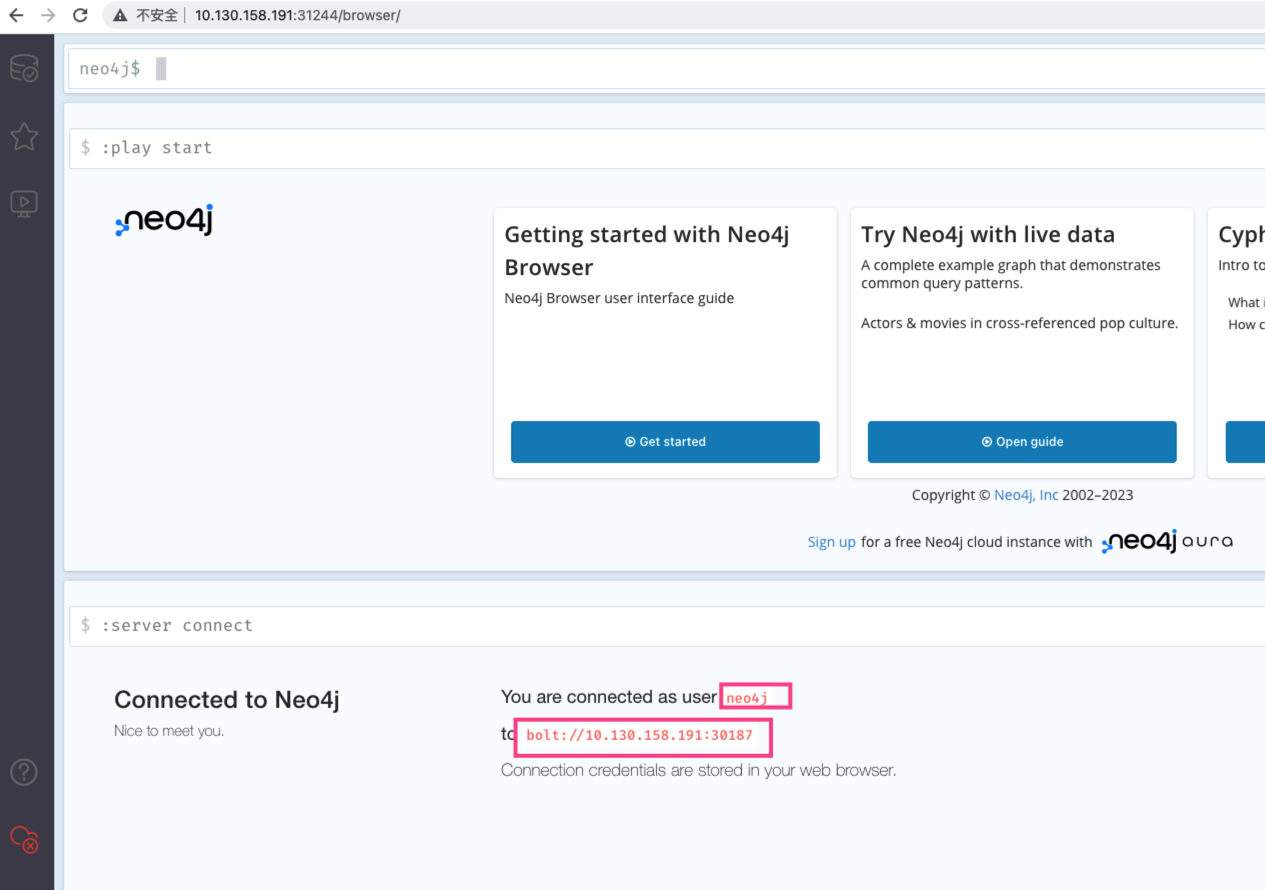
密码这样看:
k get secret my-neo4j-auth -o jsonpath={.data.NEO4J_AUTH} | base64 --decode
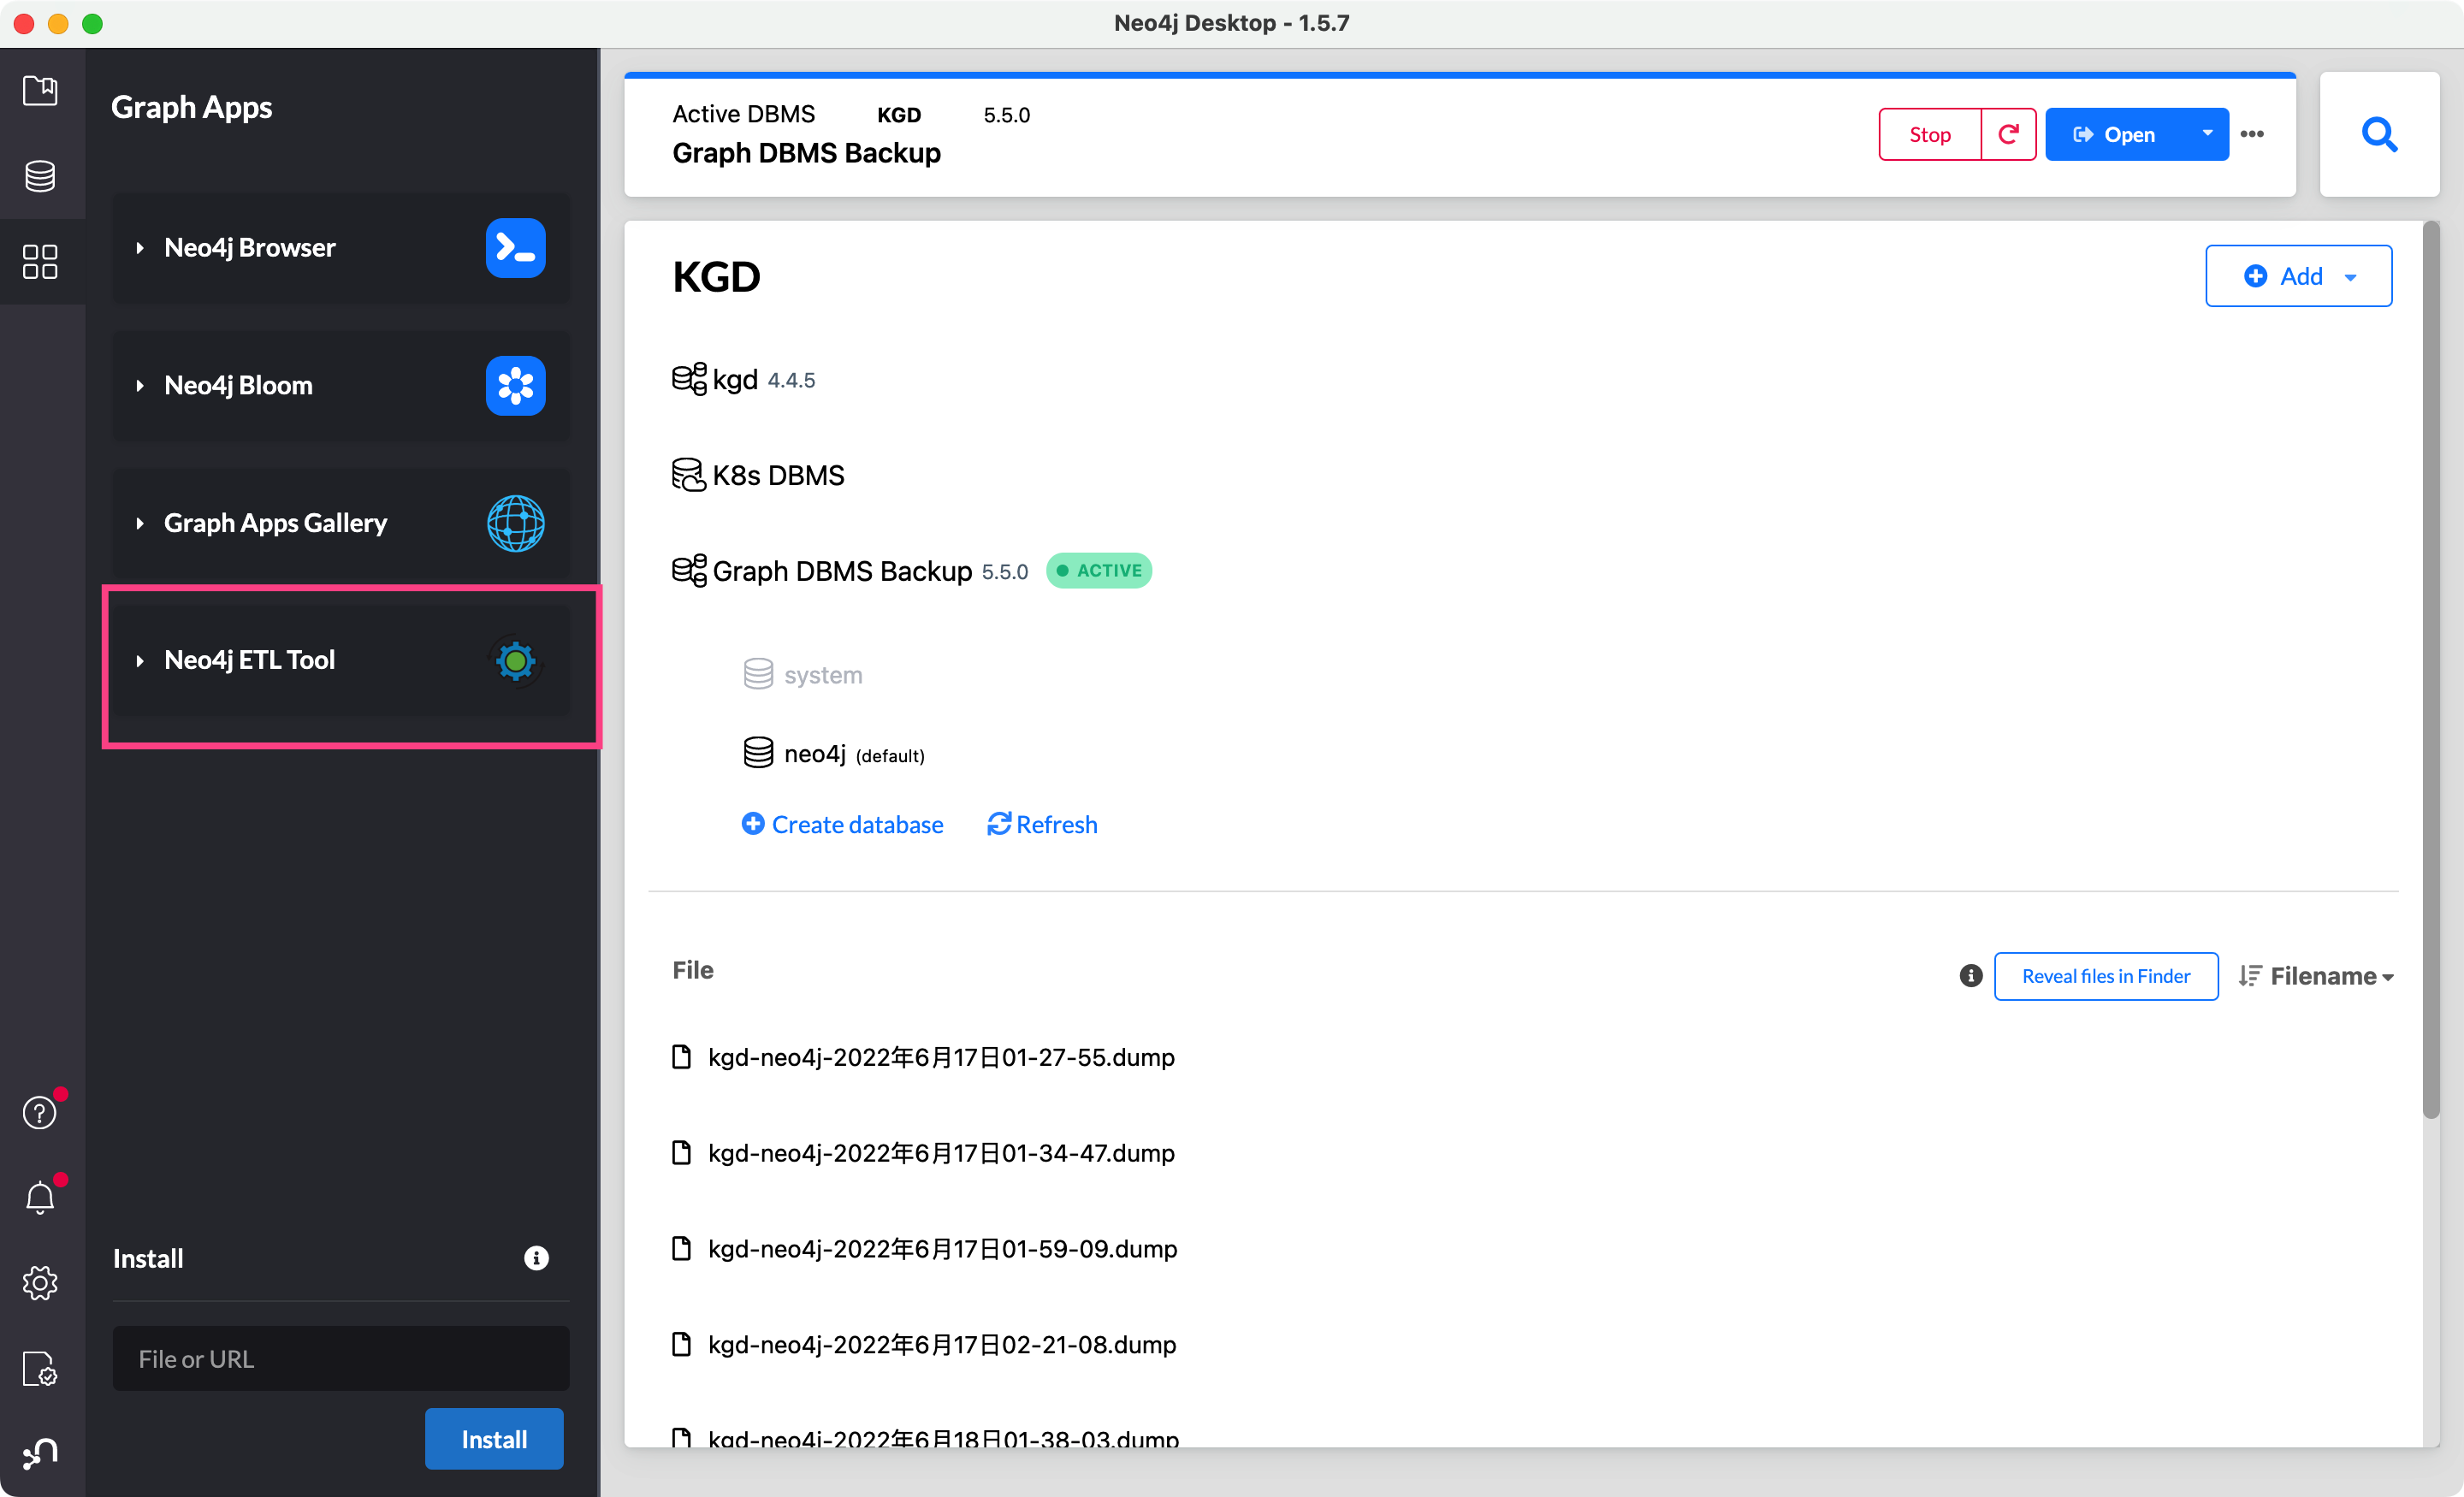
ETL 工具备份
在 mac 上有:
brew install cypher-shell
我看文档还有 neo4j-admin 工具呢
如何在 k8s 中备份数据库:
https://community.neo4j.com/t/how-to-backup-a-db-running-in-kubernetes/16724/5
kubectl run -it --rm neo4j-utils
--image=neo4j:4.0.3 --restart=Never --namespace neo4j --command -- bash

./bin/neo4j-admin
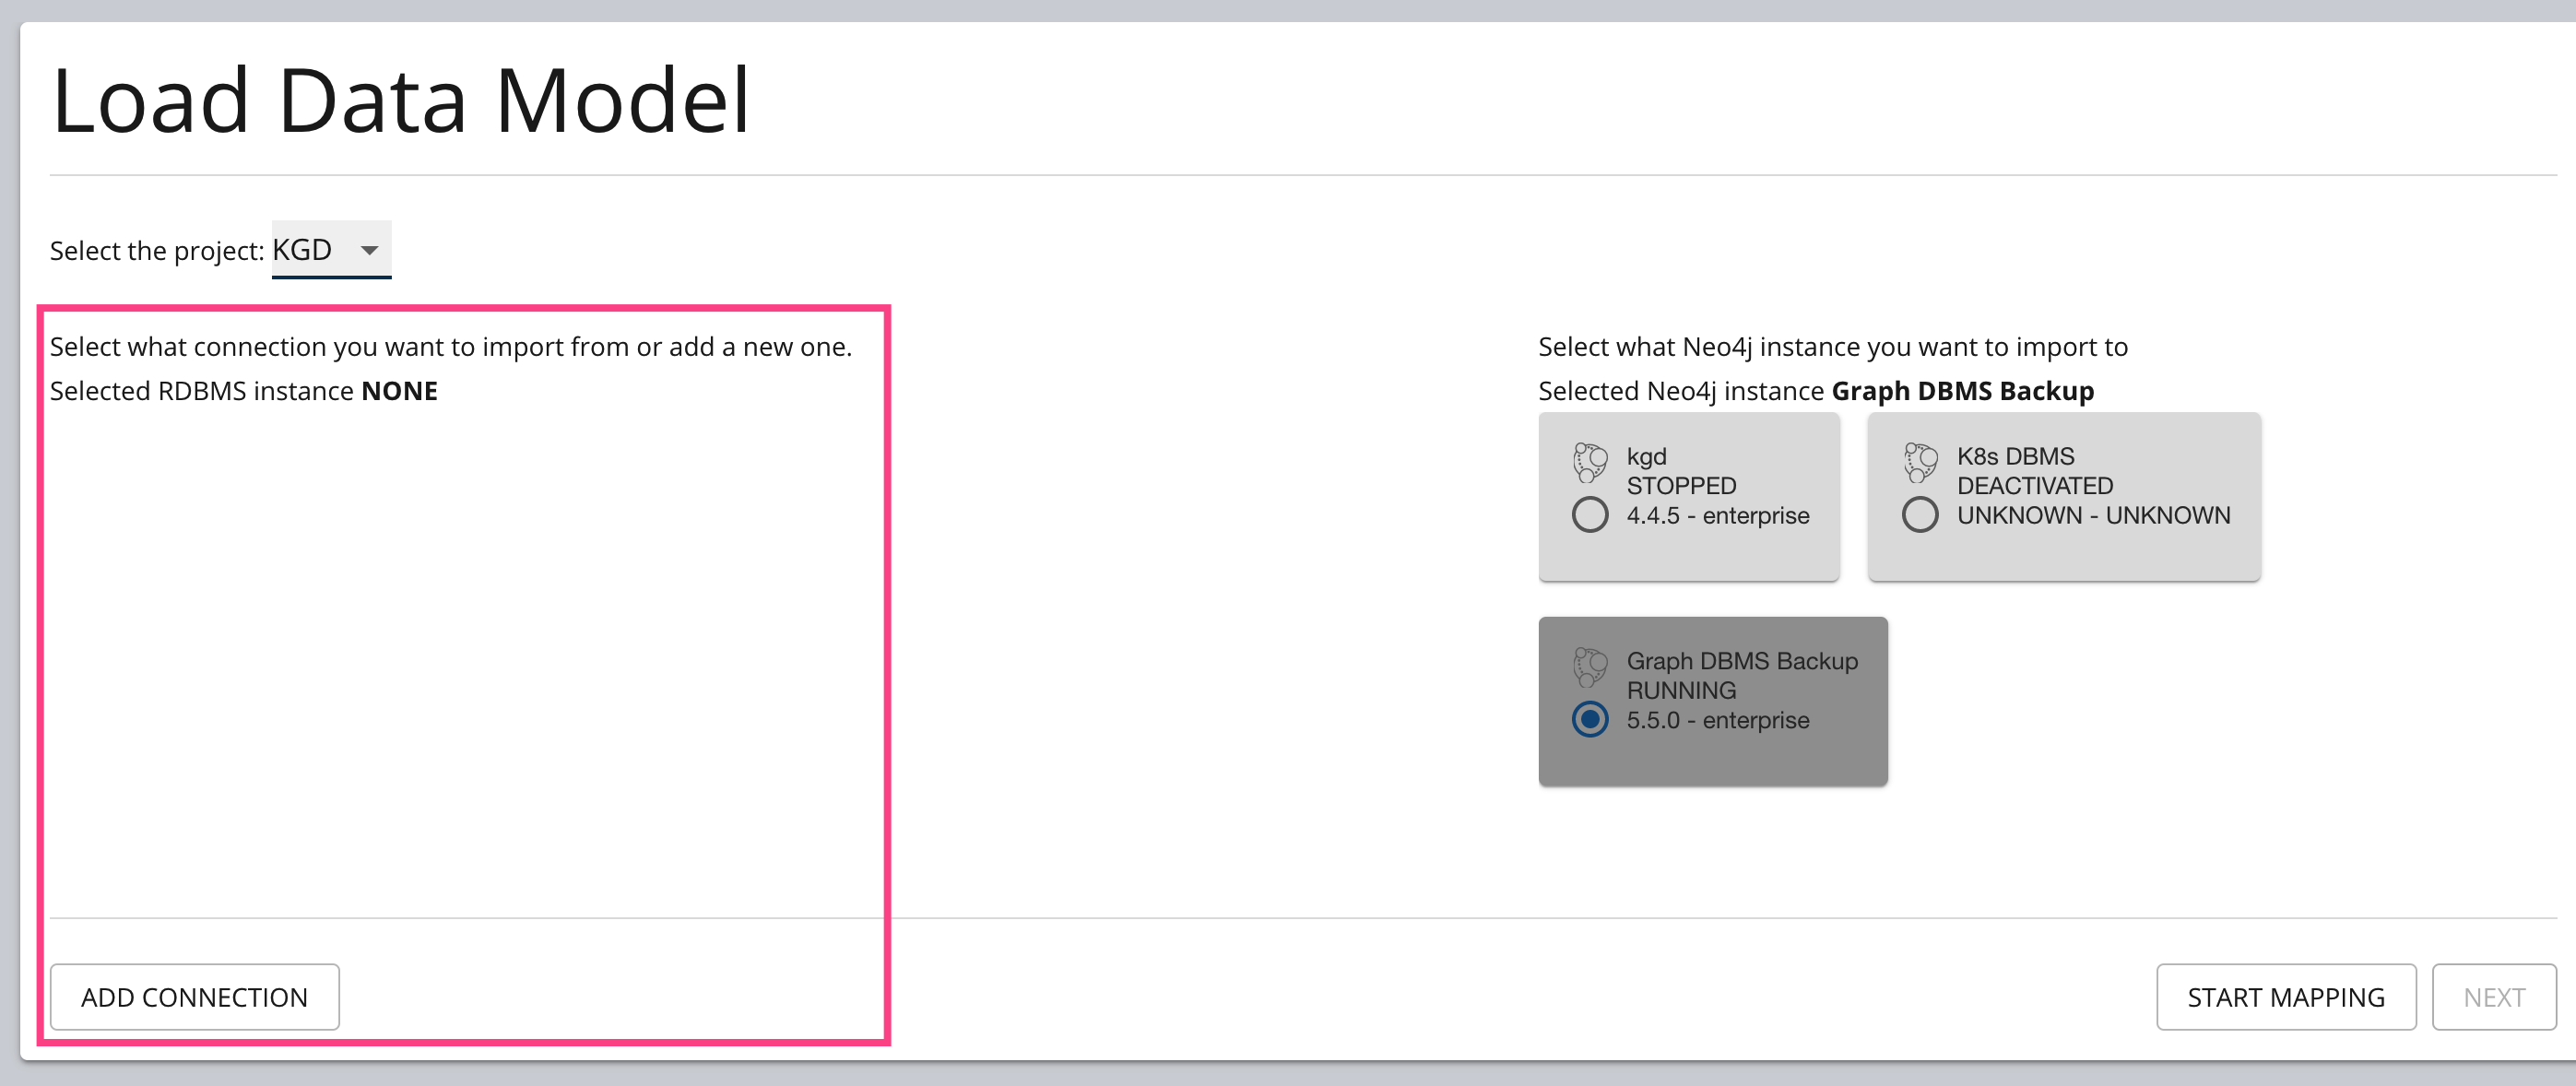
用 Desktop 的 ETL 工具好像很不错:
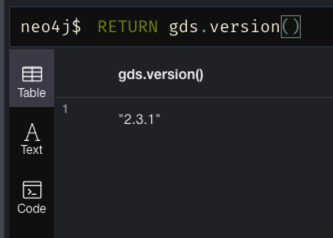
安装 data science 库
本来这个库是需要手动下载放到 plugins 文件夹下的,但是 Docker 的话可配置环境变量,自动下载。
Neo4j Docker - Neo4j Graph Data Science
docker run -it --restart always \
  --publish=7474:7474 --publish=7687:7687 \
  --user="$(id -u):$(id -g)" \
  -e NEO4J_AUTH=none \
  --env NEO4JLABS_PLUGINS='["graph-data-science"]' \
  neo4j:4.4
用 helm 的话(我手动 neo4j stop 之后它再自动重启就有了!可能需要时间下载!):

helm upgrade my-neo4j neo4j-helm-charts/neo4j -f neo4j-helm-values.yml
Harbor
容器存储服务。
~~helm repo add bitnami https://charts.bitnami.com/bitnami

helm show values bitnami/harbor > harbor.yml

helm install my-harbor bitnami/harbor -f harbor.yml

helm upgrade my-harbor bitnami/harbor -f harbor.yml~~

helm repo add harbor https://helm.goharbor.io
helm show values harbor/harbor > harbor.yml
helm install my-harbor  harbor/harbor -f harbor.yml
主要修改了:
s3 的存储、persistence
External PostgreSQL: 创建用户 harbor 密码
echo $(openssl rand -base64 18)、创建系列数据库; 举例 CREATE DATABASE "harbor_notary_signer" WITH OWNER = "harbor"External Redis: 得新建一个账户 redis:
ACL SETUSER redis on >5fd1203ac95a0424 ~* +@all,密码就是5fd1203ac95a0424@lebseu @darklight147 are you using the default user or a custom ACL user?If you’re using the default user, make sure the set the username to “default” or just leave it empty.
ingress
** Please be patient while the chart is being deployed **

1. Get the Harbor URL:

  NOTE: It may take a few minutes for the LoadBalancer IP to be available.
        Watch the status with: 'kubectl get svc --namespace default -w my-harbor'
    export SERVICE_IP=$(kubectl get svc --namespace default my-harbor --template "{{ range (index .status.loadBalancer.ingress 0) }}{{ . }}{{ end }}")
    echo "Harbor URL: http://$SERVICE_IP/"

2. Login with the following credentials to see your Harbor application

  echo Username: "admin"
  echo Password: $(kubectl get secret --namespace default my-harbor-core-envvars -o jsonpath="{.data.HARBOR_ADMIN_PASSWORD}" | base64 -d)

# 账户 admin 密码 Harbor12345
Please wait for several minutes for Harbor deployment to complete.
Then you should be able to visit the Harbor portal at https://harbor.yuhan.tech
For more details, please visit https://github.com/goharbor/harbor
bitnami 排查问题
我居然在创建数据库的时候名字写错了!!!harbor_notary_erver 掉了 s ……
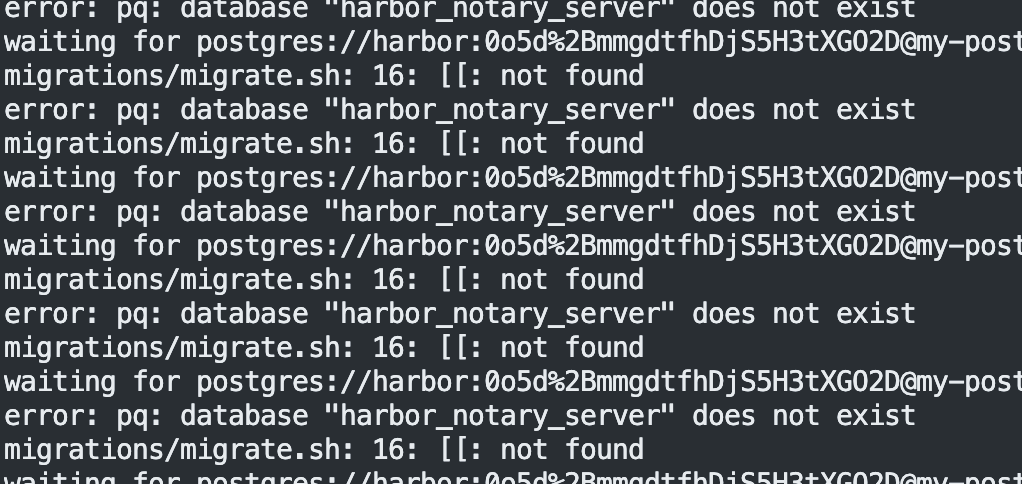
现在又是我的数据库版本太高了……

只好放弃让它自己安装一个 postgresql。

外部 Redis 端口号要指定
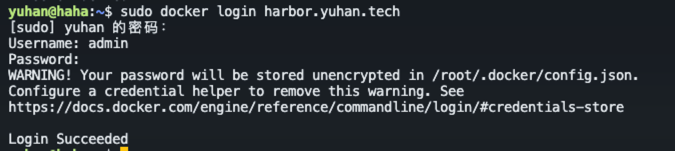
登录成功
注意要用 sudo docker
注意:key 和 secret 都是明文:
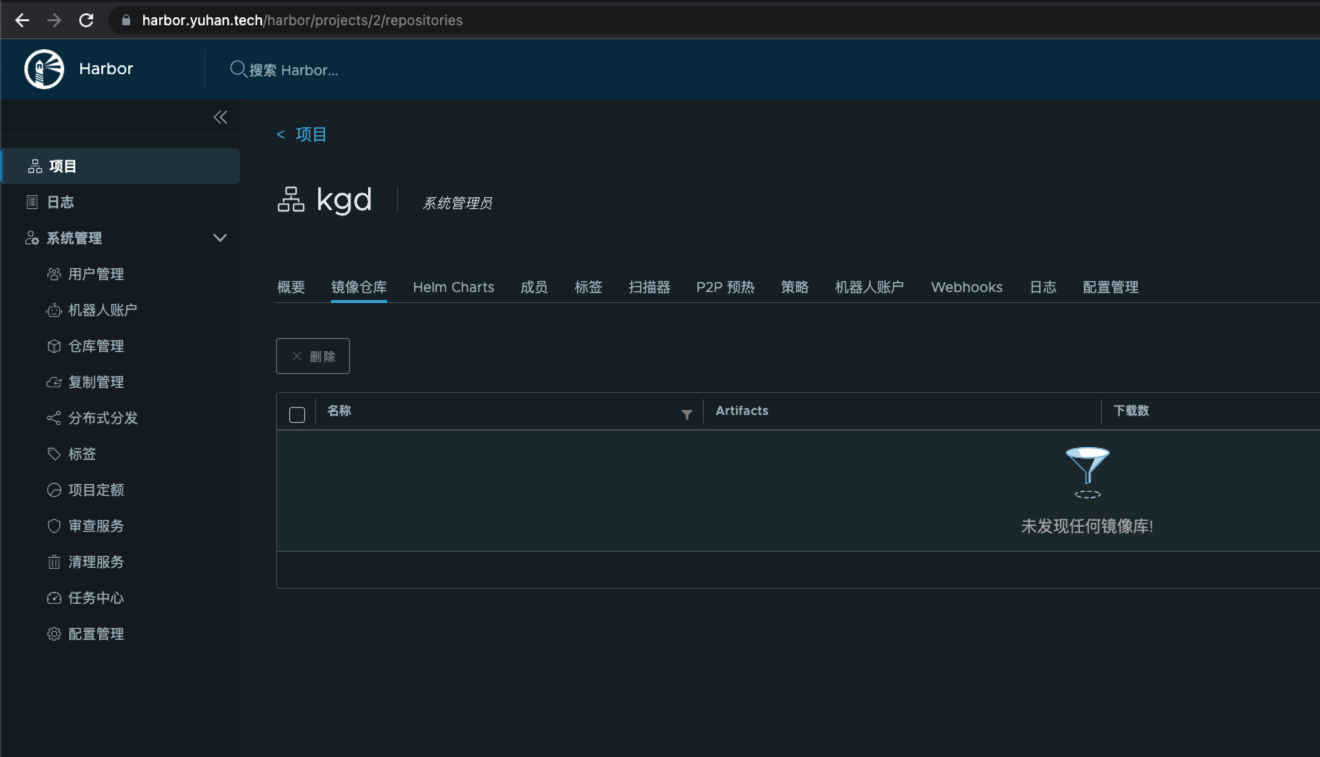
推送镜像:
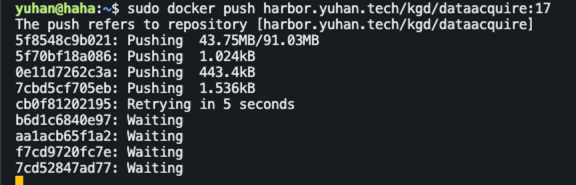
注意上传大小限制:
ingress.kubernetes.io/proxy-body-size: 10000m  # 老 k8s 版本用
nginx.ingress.kubernetes.io/proxy-body-size: 10000m  # 最新版本使用
同时也要注意 harbor 的相关 size 配置!minio 也得配置!
fluentd
helm repo add bitnami https://charts.bitnami.com/bitnami
helm install my-fluentd bitnami/fluentd --version 5.5.15

helm show values bitnami/fluentd > fluentd.yml
helm install my-fluentd bitnami/fluentd -f fluentd.yml
- global.storageClass: “nfs-client”
- persistence true
- ingress:
- 不使用 all-yuhan-teck-tls,因为说Error: INSTALLATION FAILED: rendered manifests contain a resource that already exists. Unable to continue with install: Secret “all-yuhan-tech-tls” in namespace “default” exists and cannot be imported into the current release: invalid ownership metadata; label validation error: missing key “app.kubernetes.io/managed-by”: must be set to “Helm”; annotation validation error: missing key “meta.helm.sh/release-name”: must be set to “my-fluentd”; annotation validation error: missing key “meta.helm.sh/release-namespace”: must be set to “default”
- 直接用 cert-manager
** Please be patient while the chart is being deployed **

  To verify that Fluentd has started, run:

    kubectl get all -l "app.kubernetes.io/name=fluentd,app.kubernetes.io/instance=my-fluentd"

  Logs are captured on each node by the forwarder pods and then sent to the aggregator pods. By default, the aggregator pods send the logs to the standard output.
  You can see all the logs by running this command:

    kubectl logs -l "app.kubernetes.io/component=aggregator"

  You can mount your own configuration files to the aggregators and the forwarders. For example, this is useful if you want to forward the aggregated logs to Elasticsearch or another service.
但这个东西,不太行,没有 web 界面诶。
Jaeger
Jaeger is a distributed tracing system. It is used for monitoring and troubleshooting microservices-based distributed systems.
Jenkins
helm repo add jenkins https://charts.jenkins.io
helm repo update

helm show values jenkins/jenkins > jenkins.yml
helm install my-jenkins jenkins/jenkins -f jenkins.yml

helm upgrade my-jenkins jenkins/jenkins -f jenkins.yml
主要修改:
- ingress
- pvc
NOTES:
1. Get your 'admin' user password by running:
  kubectl exec --namespace default -it svc/my-jenkins -c jenkins -- /bin/cat /run/secrets/additional/chart-admin-password && echo
2. Visit https://jenkins.yuhan.tech

3. Login with the password from step 1 and the username: admin
4. Configure security realm and authorization strategy
5. Use Jenkins Configuration as Code by specifying configScripts in your values.yaml file, see documentation: https://jenkins.yuhan.tech/configuration-as-code and examples: https://github.com/jenkinsci/configuration-as-code-plugin/tree/master/demos

For more information on running Jenkins on Kubernetes, visit:
https://cloud.google.com/solutions/jenkins-on-container-engine

For more information about Jenkins Configuration as Code, visit:
https://jenkins.io/projects/jcasc/

NOTE: Consider using a custom image with pre-installed plugins
安装插件
DockerDocker stepsCloudBees Docker Build and Publish- Docker Pipeline
- Node and Label parameter
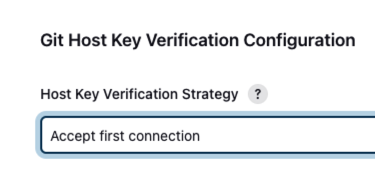
Host key verification failed
需要手动登入容器,保存 host
全局安全配置 → Git Host Key 改成 Accept first connection

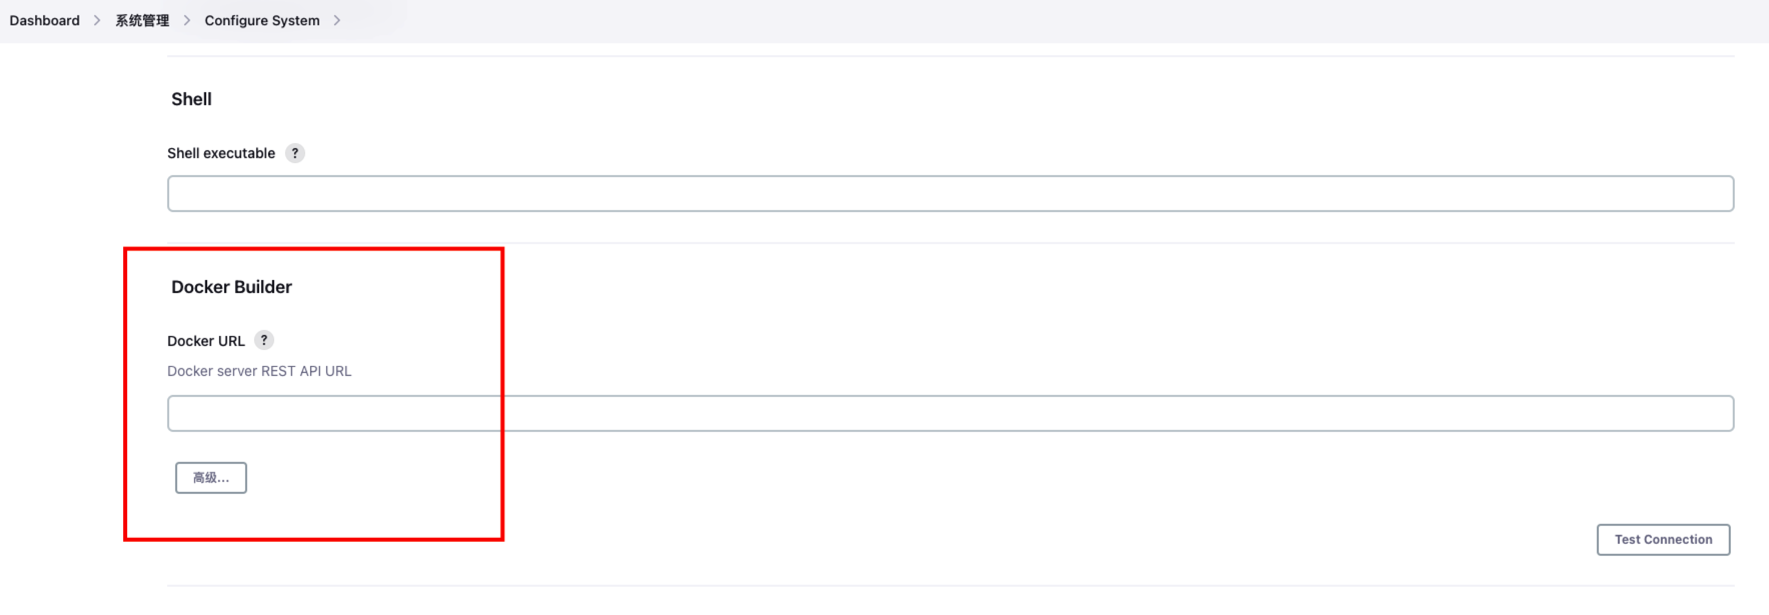
Jenkins Could not find the cloud this project was built on
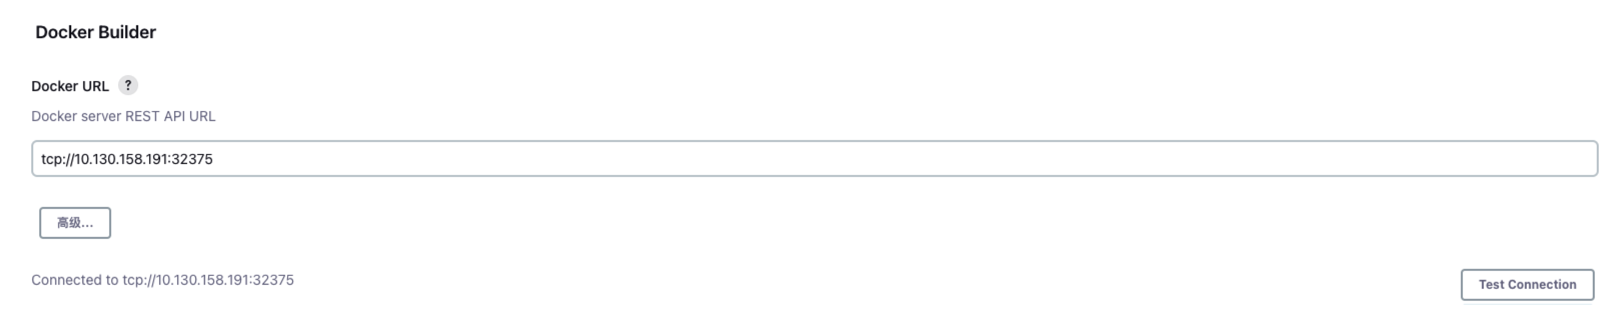
需配置 Docker Builder:
先在 Ubuntu 上安装 Docker:
https://docs.docker.com/engine/install/ubuntu/
如果是 snap install docker 安装的~~,注意:systemctl status snap.docker.dockerd.service 找到位置:/etc/systemd/system[无效,自动生成]~~
Adding this line:
"hosts": ["unix:///var/run/docker.sock", "tcp://0.0.0.0:2376"],to my daemon.json file in
/var/snap/docker/current/configsolved the issue for me but maybe the container option explained on the github would of worked also.
How to enable remote API with Docker that’s been installed with snap?
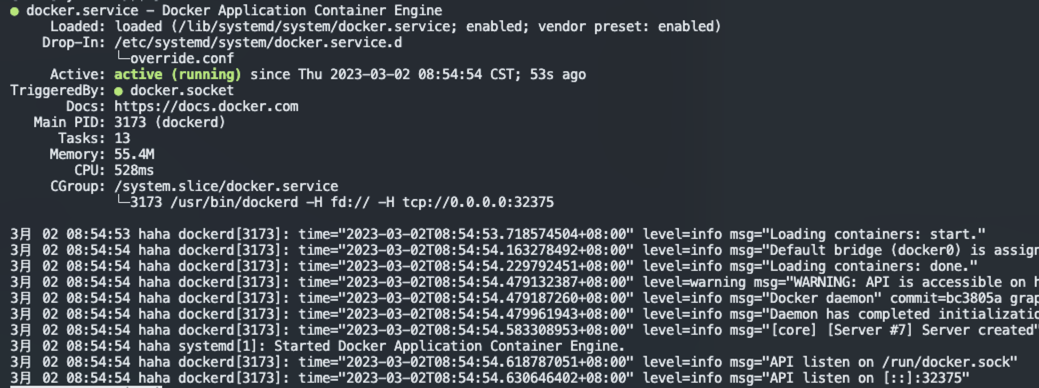
然后开启 Docker URL REST API 访问:
Run Docker in daemon mode:
~~sudo dockerd -H unix:///var/run/docker.sock -H tcp://0.0.0.0:2375 &~~
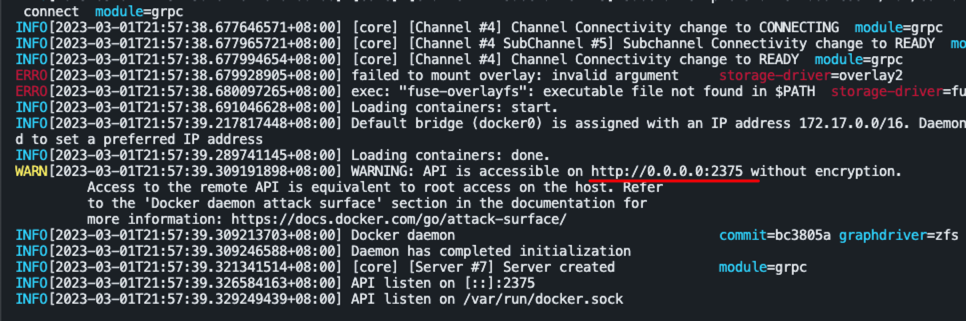
Configure remote access for Docker daemon
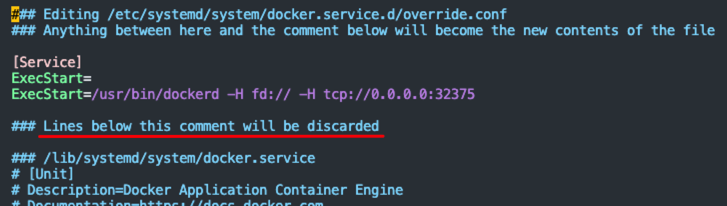
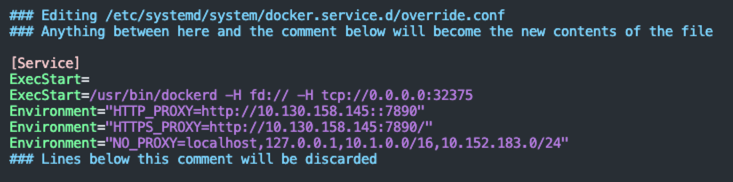
sudo systemctl edit docker.service

# 修改默认 nano 为 vim
sudo update-alternatives --config editor

[Service]
ExecStart=
ExecStart=/usr/bin/dockerd -H fd:// -H tcp://127.0.0.1:2375

sudo systemctl daemon-reload

sudo systemctl restart docker.service
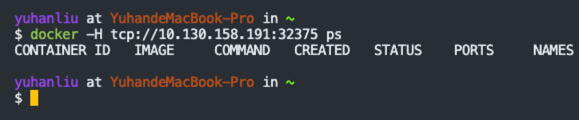
用 mac 上的 Docker 验证下,能不能连上:
jenkins 配上,成功:
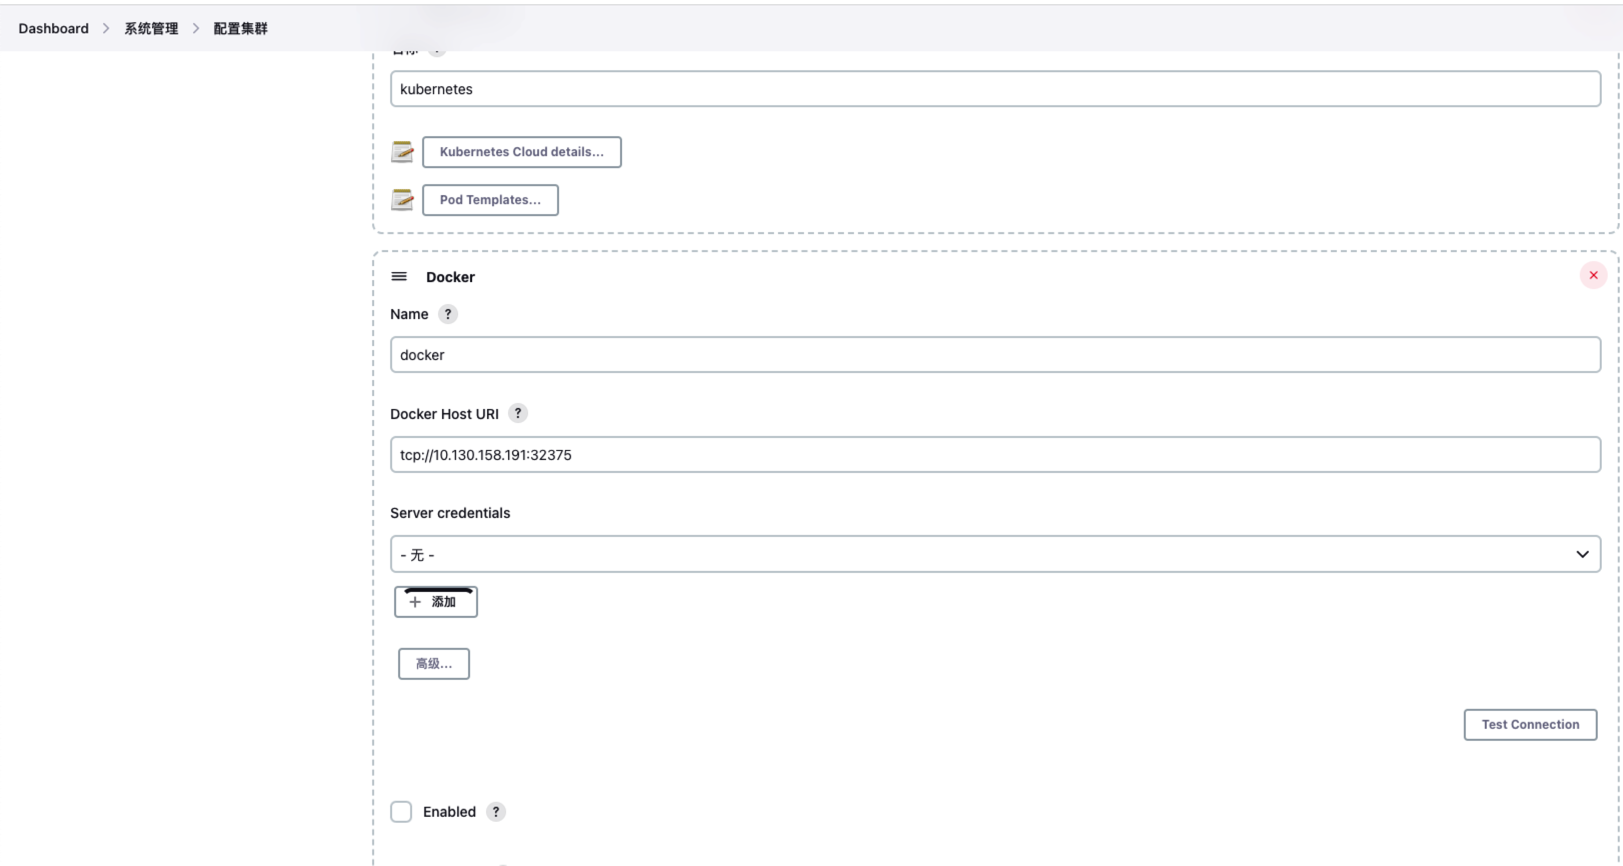
但是这好像不太行,不是那个 build/publish docker 的插件,它好像需要在节点管理中添加 Cloud Server:
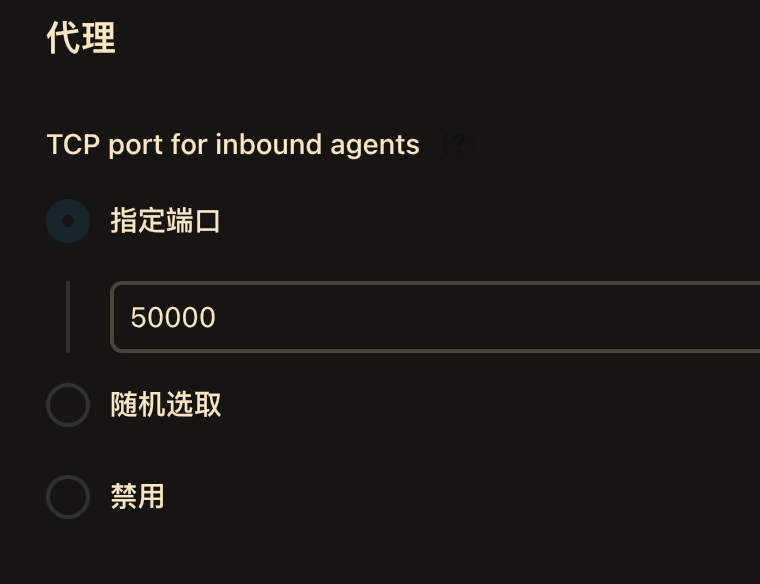
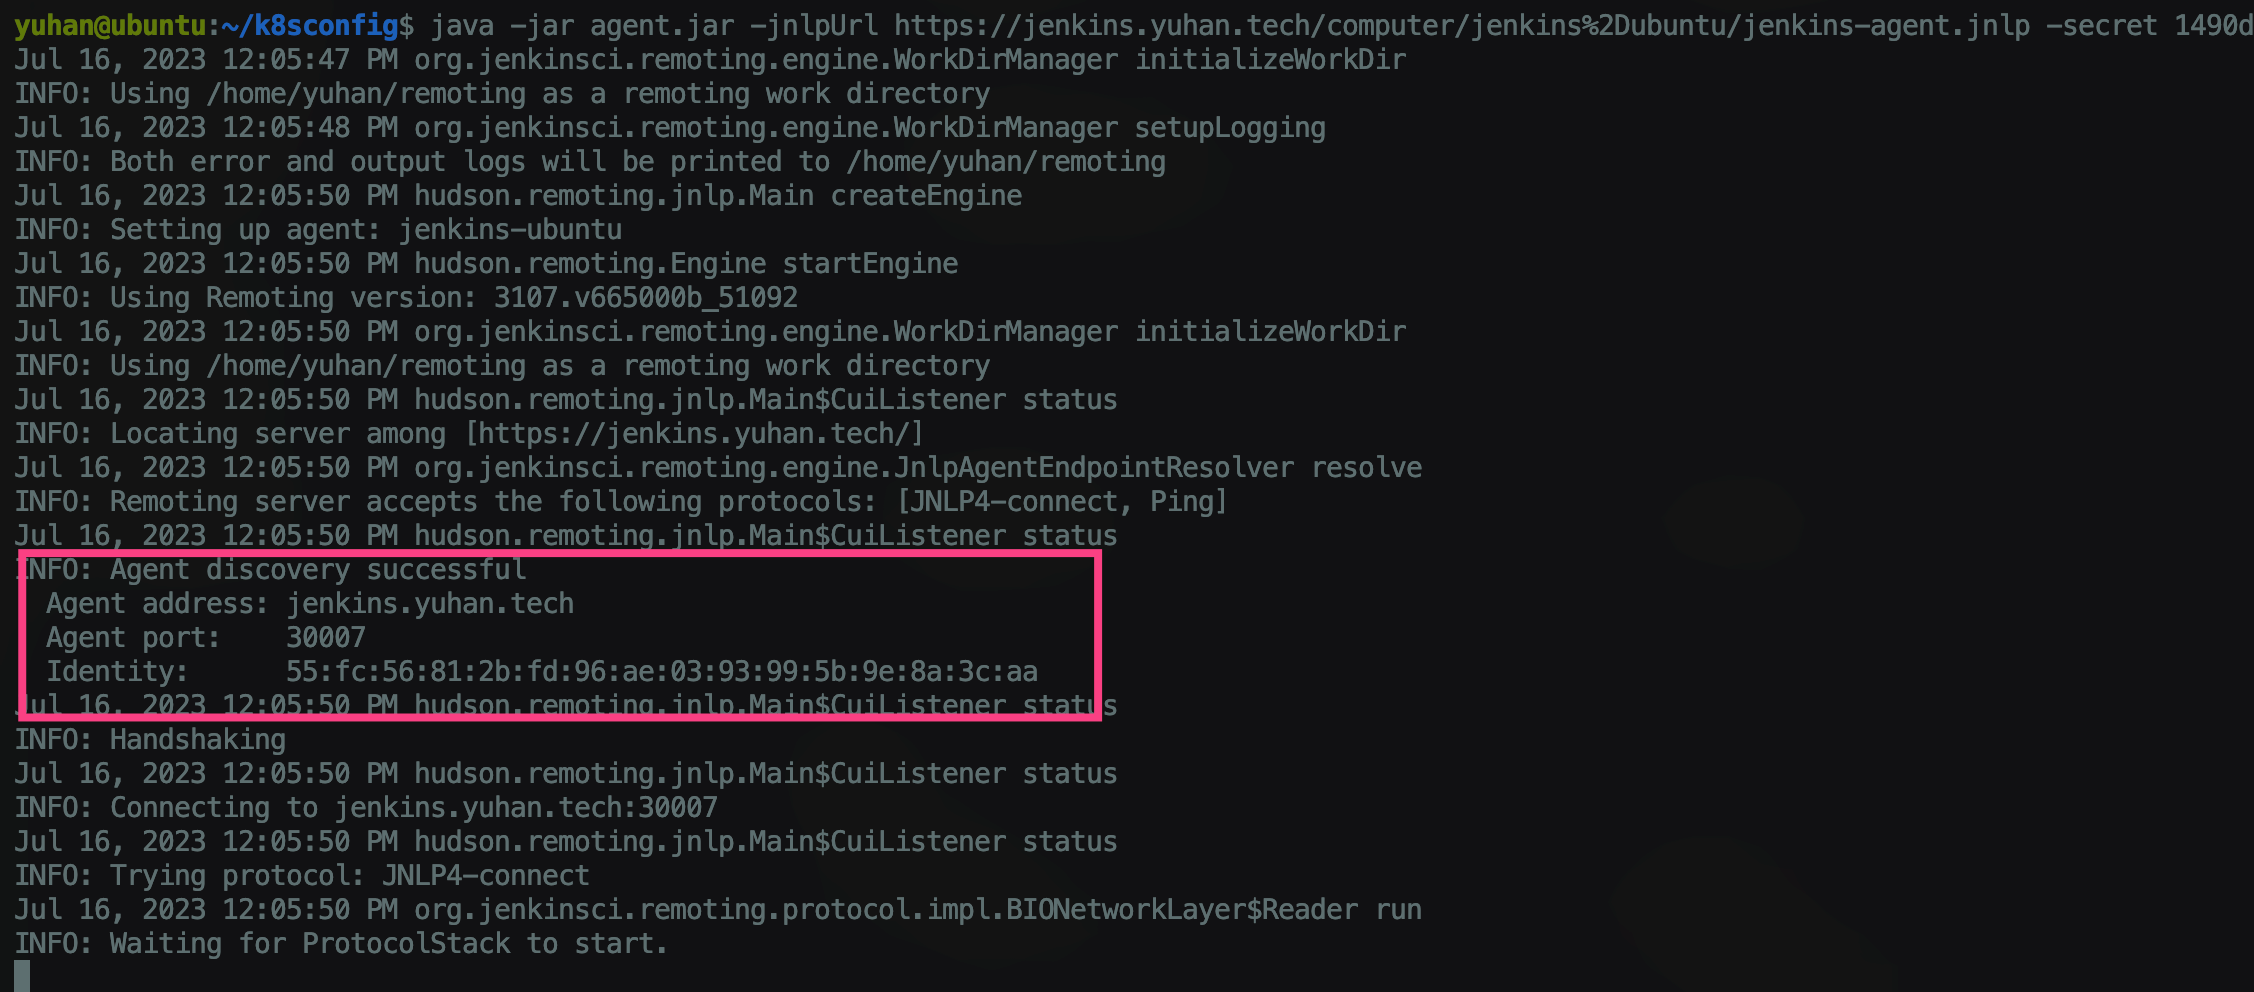
agent 端口暴露与配置
全局安全配置,我指定为 30007,然后让 agent 服务的 NodePort 与之一致。
Gitlab 插件(弃用,连不上)
先注册 jenkins 账户,再登录这个账户,再创建这个账户的访问令牌:
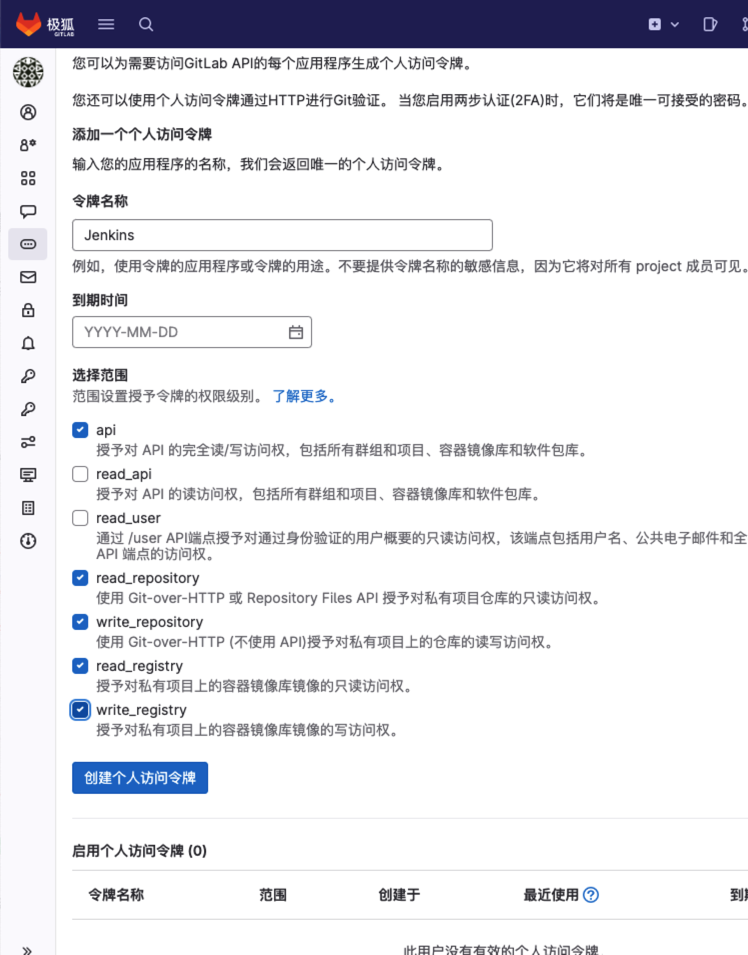
glpat-nFD3qfZfqYEZd5uCnSyX
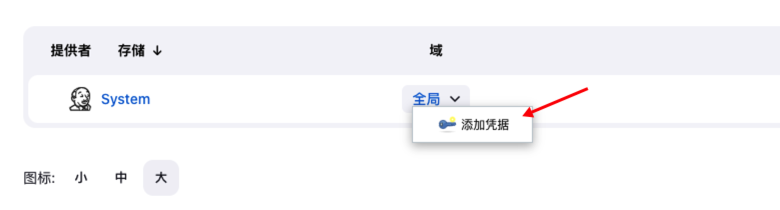
然后在 Jenkins 中创建 Gitlab API token 类型的凭据:
新建节点:连宿主机
注意 root 要在 sshd 中配置 PermitRootLogin yes。
还要 sudo passwd root 为 root 用户配置密码。
然后注意新节点的 Number of executors 别是 0 。

宿主机 docker 配置
如何优雅的给 Docker 配置网络代理 - 腾讯云开发者社区-腾讯云
需要代理上网,否则拉不下来 docker 容器库中的依赖
sudo systemctl edit docker.service

sudo systemctl daemon-reload

sudo systemctl restart docker.service
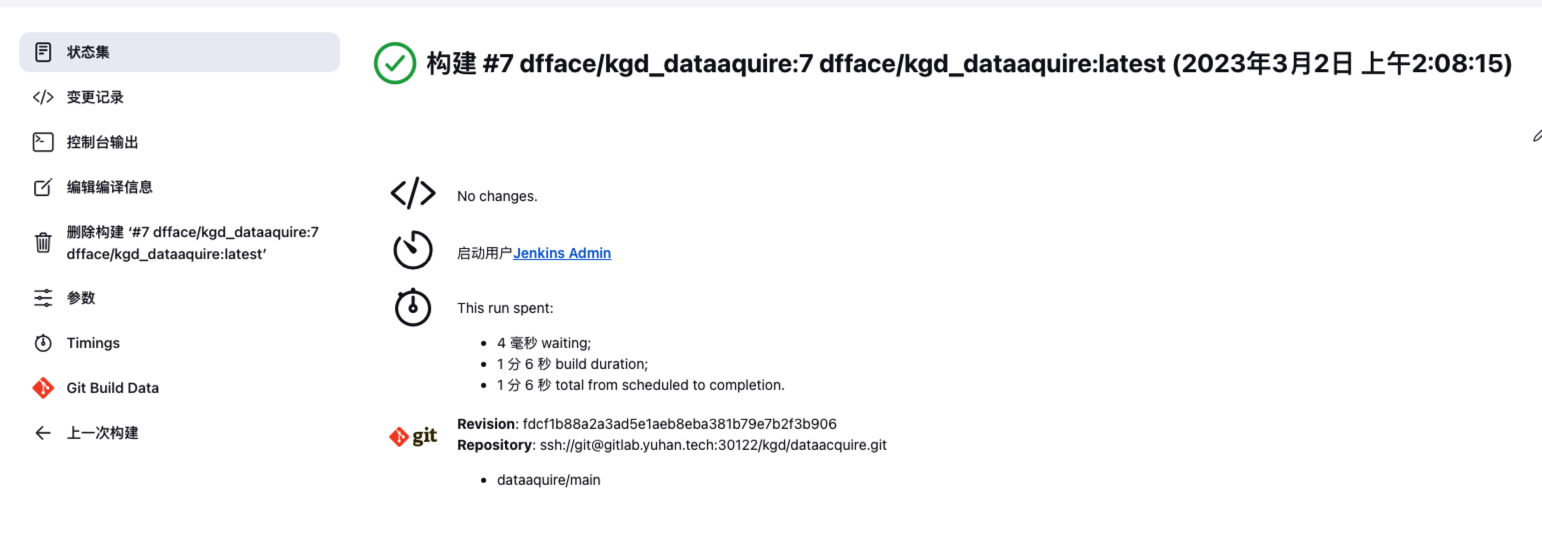
注意,宿主机一定要登录上 dockerhub,不然推送也会失败(看控制台日志)
节点 + Docker 完美构建
安装 Blue Ocean 插件
全新的界面啊

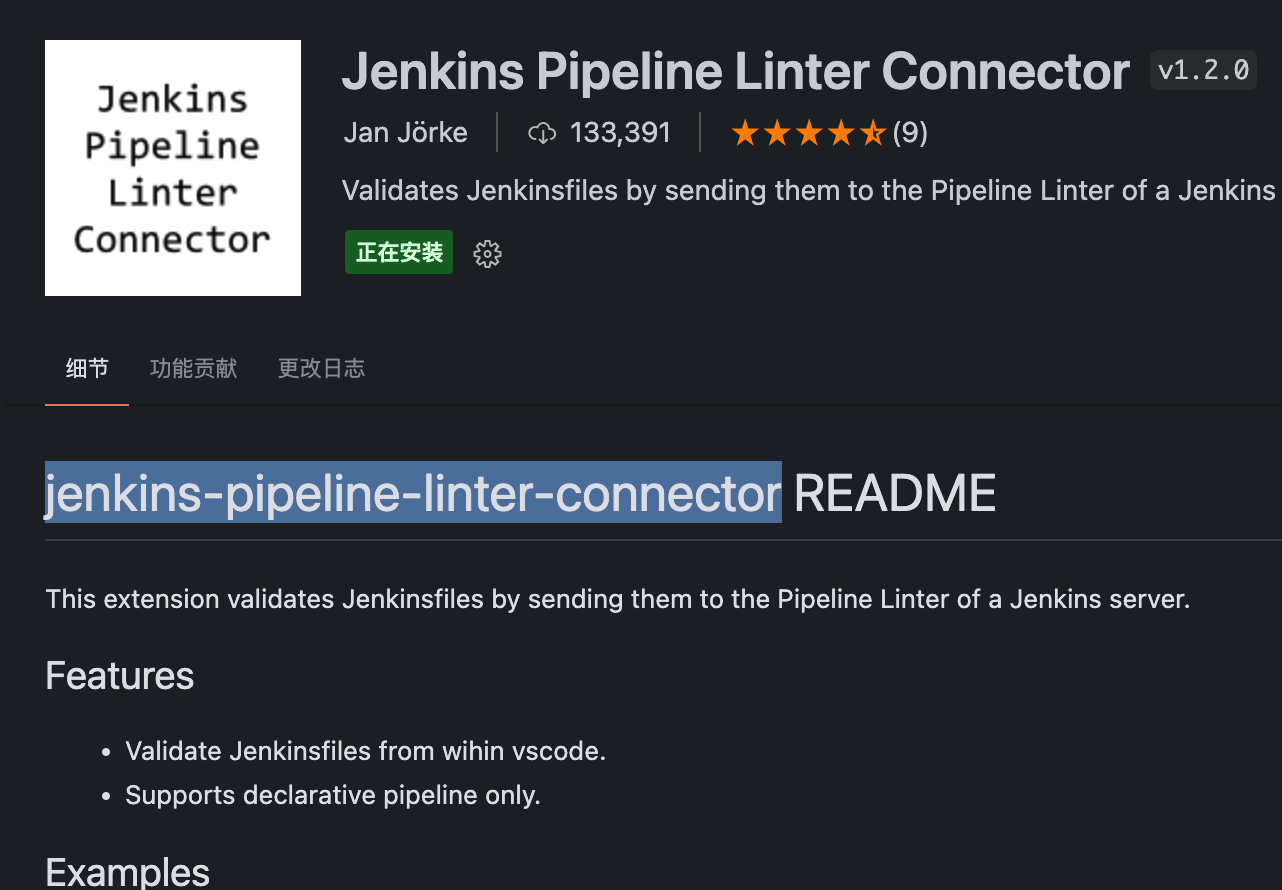
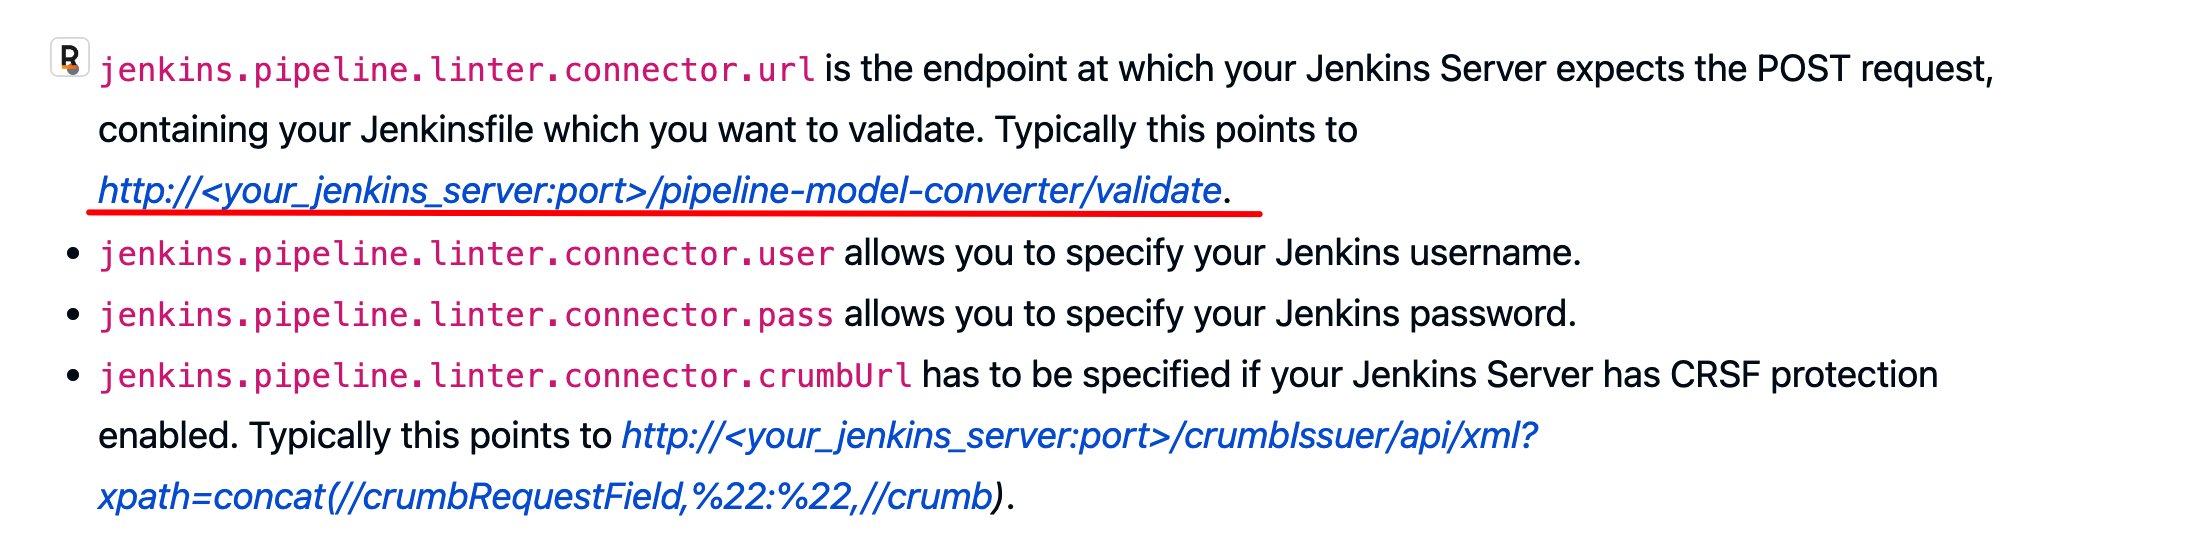
安装 vscode Jenkinsfile 插件
参考文章
k8s argo workflow获取登录token的命令_学亮编程手记的博客-CSDN博客
云原生流水线 Argo Workflows 的安装、使用以及个人体验
How to manage DNS in NetworkManager via console (nmcli)?
后记
- Disk Pressure 的分析,原来宿主机真的存储磁盘满了…… http://www.mydlq.club/article/115/#更改-docker-存储目录
致谢: